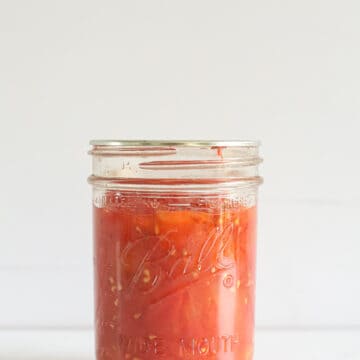
A step by step guide to canning/bottling diced tomatoes, perfect for beginners - they are a pantry staple and the perfect way to preserve an abundance of tomatoes in the garden.
If you are brand new to canning/bottling, these posts might be helpful to read first:
Canning tomatoes is one of the easiest things you can preserve and is probably one of the most useful ingredients to have in your pantry. Add a tin to chilli, cheesy mince pasta or Mexican chicken soup, or use them as a base for homemade tomato soup.
Although the process does take some time, most of the time is spent prepping the tomatoes and then processing them in the water bath, which is hands off! And it's time well spent when you can enjoy the tomatoes from your garden year round!
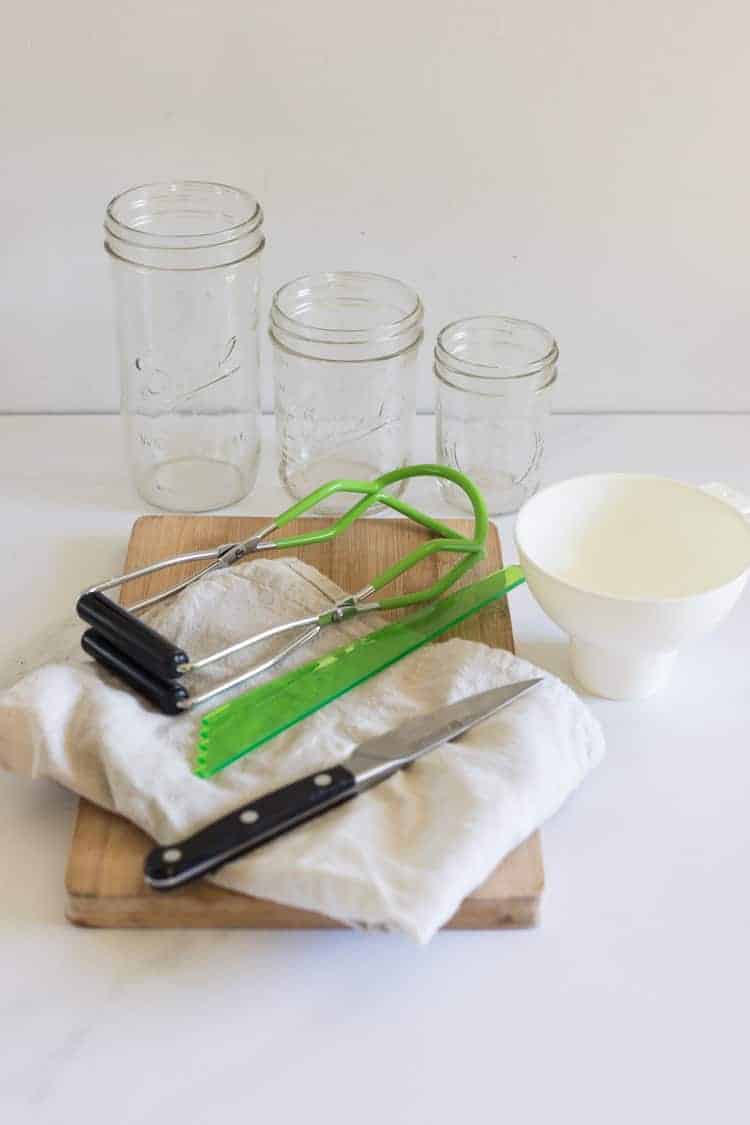
Ingredients and equipment needed:
- Tomatoes - you can use any variety of tomatoes for this recipe but I prefer to use roma style tomatoes such as San Marzano as they have less juice and seeds.
- Citric acid or bottled lemon juice - to safely bottle tomatoes using a water bath, you need to acidify each jar using either citric acid bottled lemon juice. It's important to use bottled lemon juice, not fresh lemon juice as the acidity is controlled in the bottle. Before you add tomatoes, just add ¼ teaspoon citric acid or 1 Tablespoon bottled lemon juice to each 500ml/pint jar or double that for a 1 litre/quart jar.
- Water bath canner or large stockpot with rack/trivet. Tomatoes do need to be processed in a water bath to be stored safely at room temperature, so if you don't have a water bath, just use the biggest pot you have. It needs to be deep enough that the full jars will be covered by at least 1 inch/2.5cm of water during processing. If you don't have a canning rack or trivet, use canning rings at the bottom of the pot so that the jars are not directly sitting on the bottom of the pot.
- Jars, lids and bands - as I talk about in my beginners guide to water bath canning/bottling post, you can reuse jars and bands/rings but you need new lids or seals each time.
- Jar tongs - these make lifting hot jars out of boiling water a breeze and so much safer!
- Chopping board, knife, rubber spatula or chopstick, tea towels and other general kitchen equipment
How to bottle diced tomatoes
Step 1: Get prepared
- Wash jars well in warm soapy water and sterilise your jars. To sterilise the jars you can either run them through the dishwasher on sterilise cycle or place them in the water bath and boil for 10 minutes. Keeping the jars hot prevents them from breaking when filled with hot food. Lids and bands can be at room temperature, just make sure they are clean.
TIP: Always prepare more jars than you think you will need! There is nothing more annoying than running out of jars and having to wash/sterilise extras when you are mid way through the process!
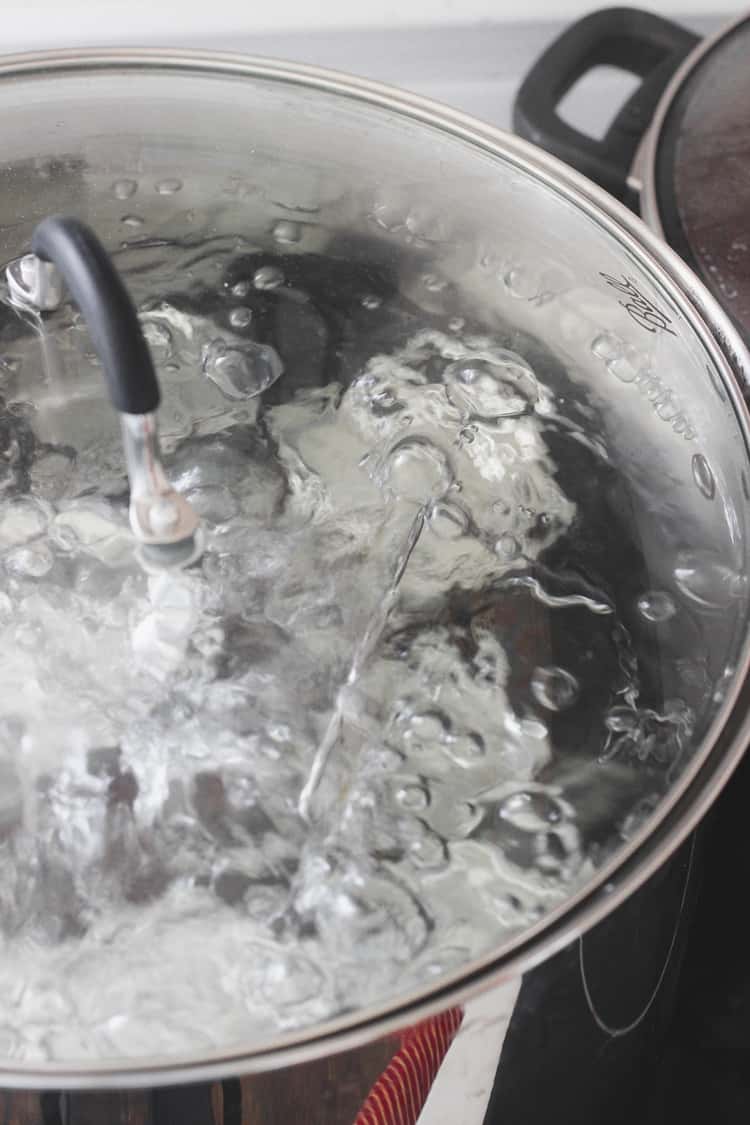
- Fill stockpot or water bath canner at least half-full with water. Cover and get it simmering - you will need enough water in the pot to cover the jars by 1 inch once they are in there.
- Get your kitchen equipment ready - tea towels, knives, chopping boards and anything else you think you might need.
Step 2: Peel your tomatoes
There are 2 options for peeling tomatoes
Blanch and peel - Bring a large pot of water to the boil and fill the clean sink or a large bowl with cold water and ice.
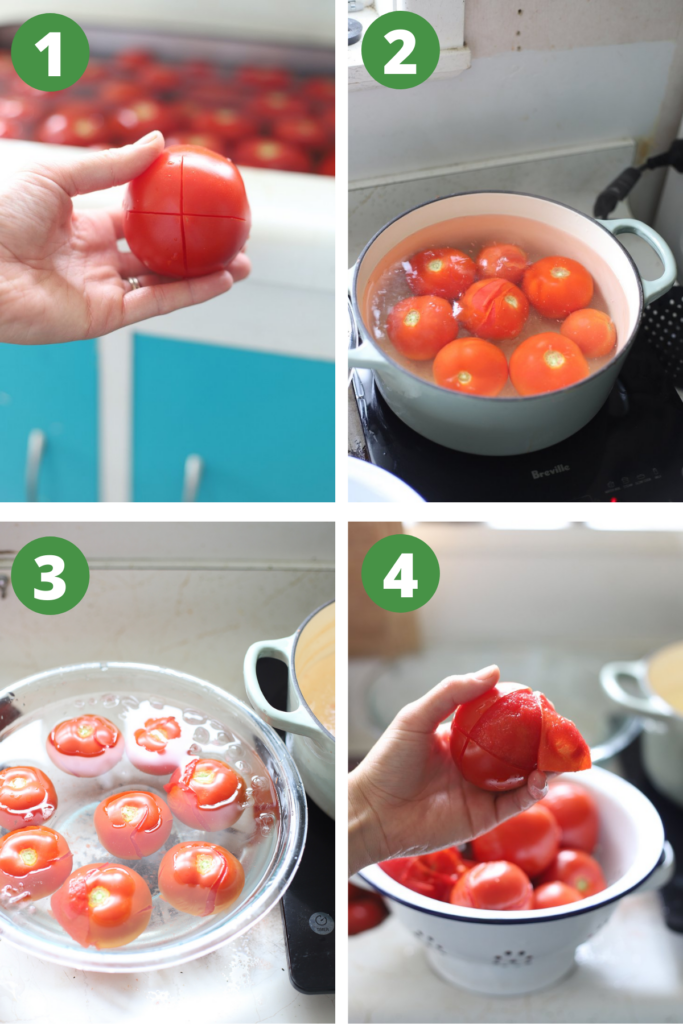
- Score a cross in the bottom of the tomatoes
- Place several tomatoes in the boiling water for about 30 seconds to 1 minute until the skins start to peel back.
- Use a slotted spoon to transfer the tomatoes to the ice water
- Once they are cool enough to handle, remove the skins - they should slip right off.
Grill (my prefered method)
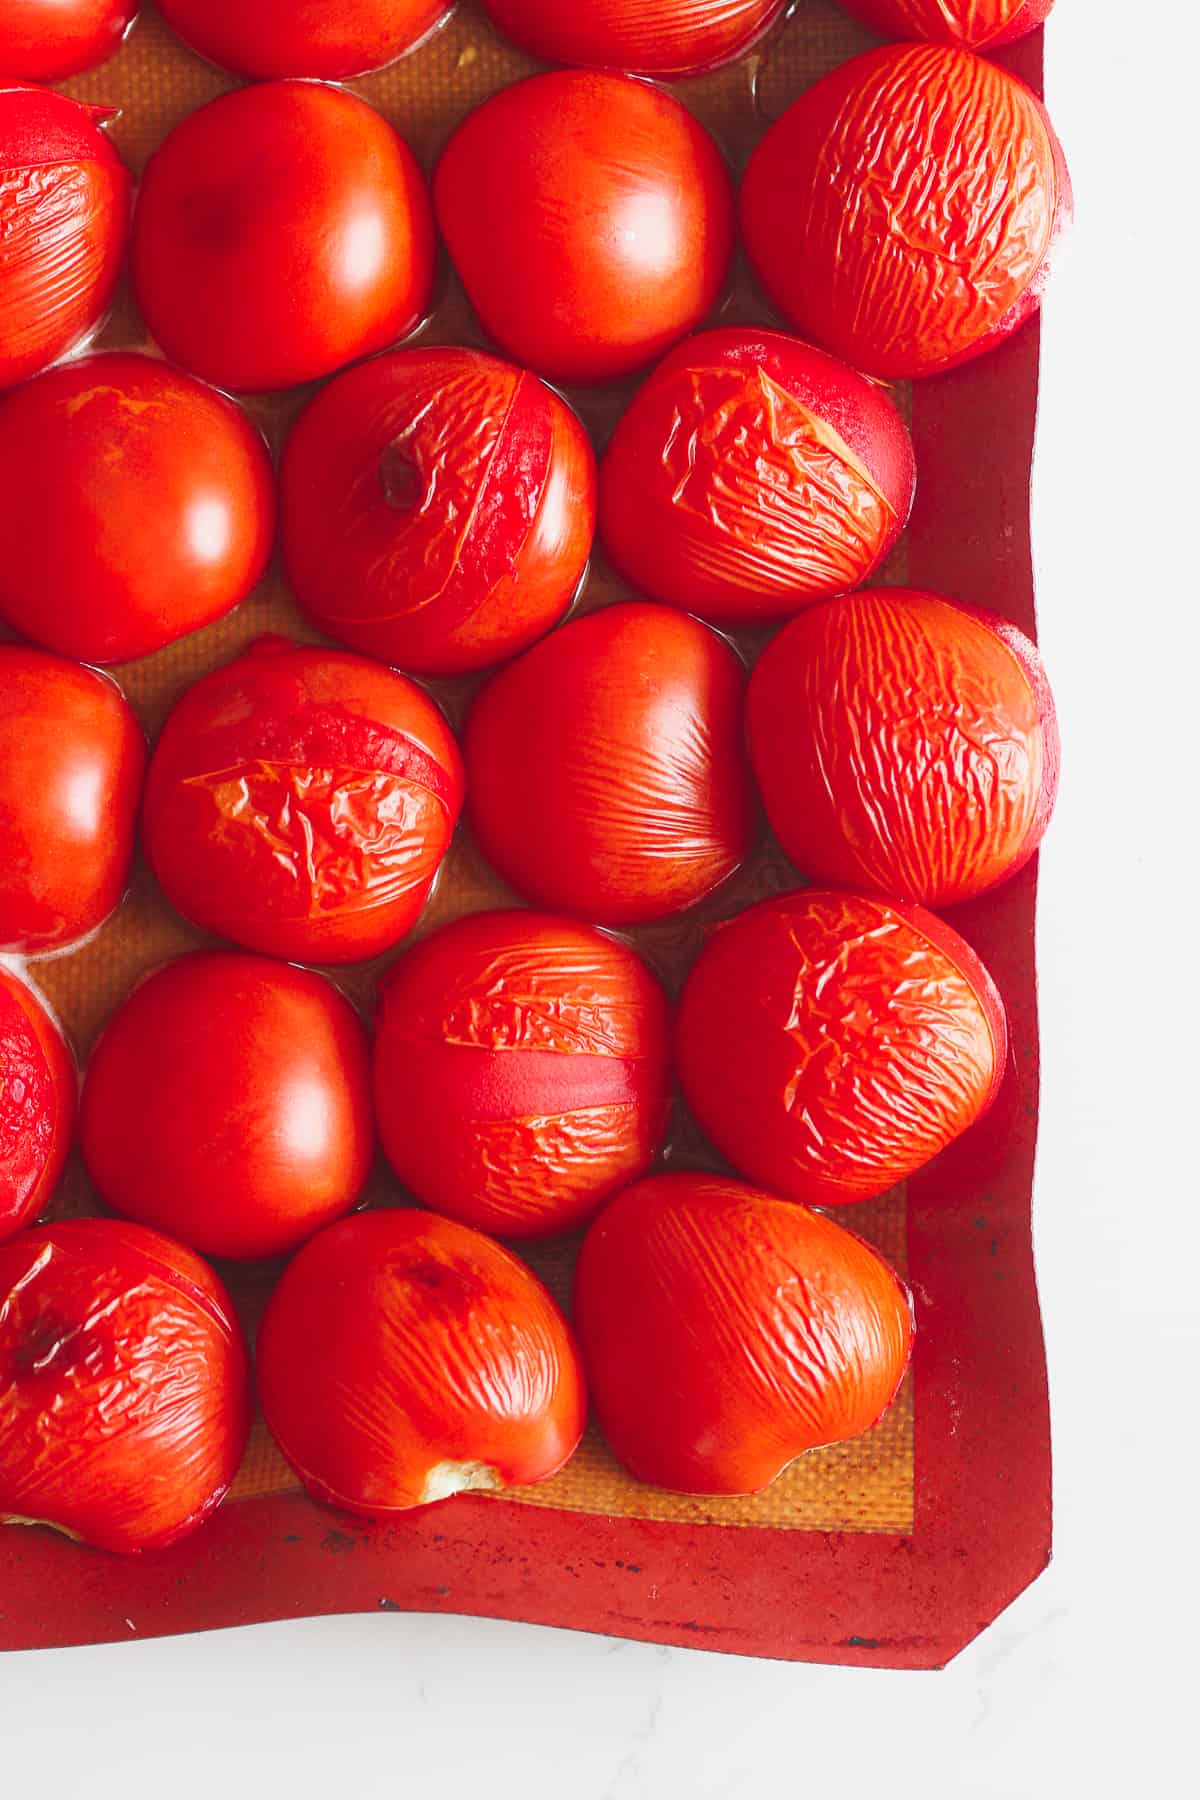
Line a large rimmed oven tray with baking paper or a silicone liner. Slice the tomatoes in half and place skin side up on the tray. Place under the pre heated grill (as hot as it can go) for a few minutes, keeping a close eye on them. Once the skins start to blister, remove the tray from the oven. Once they are cool enough to handle, slip the skins off and discard.
Step 3: Core and chop tomatoes
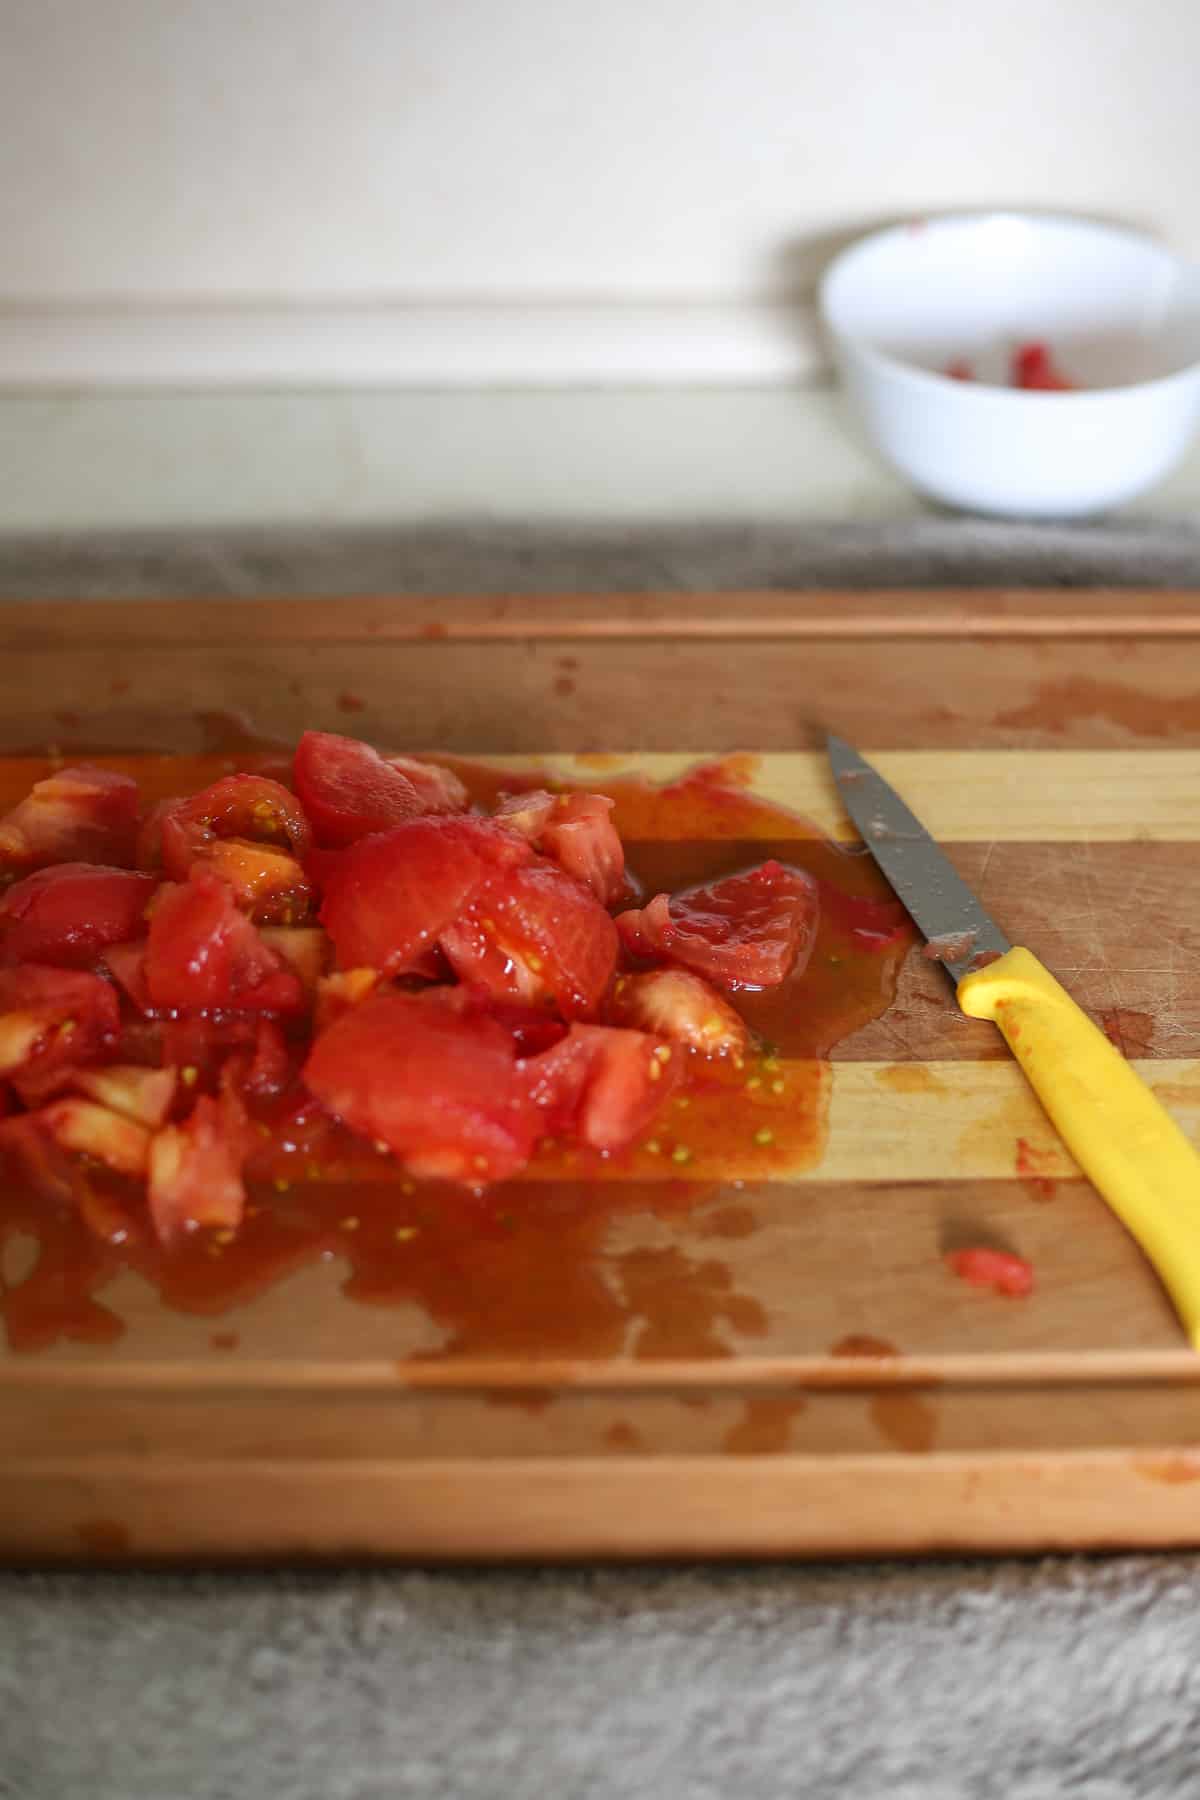
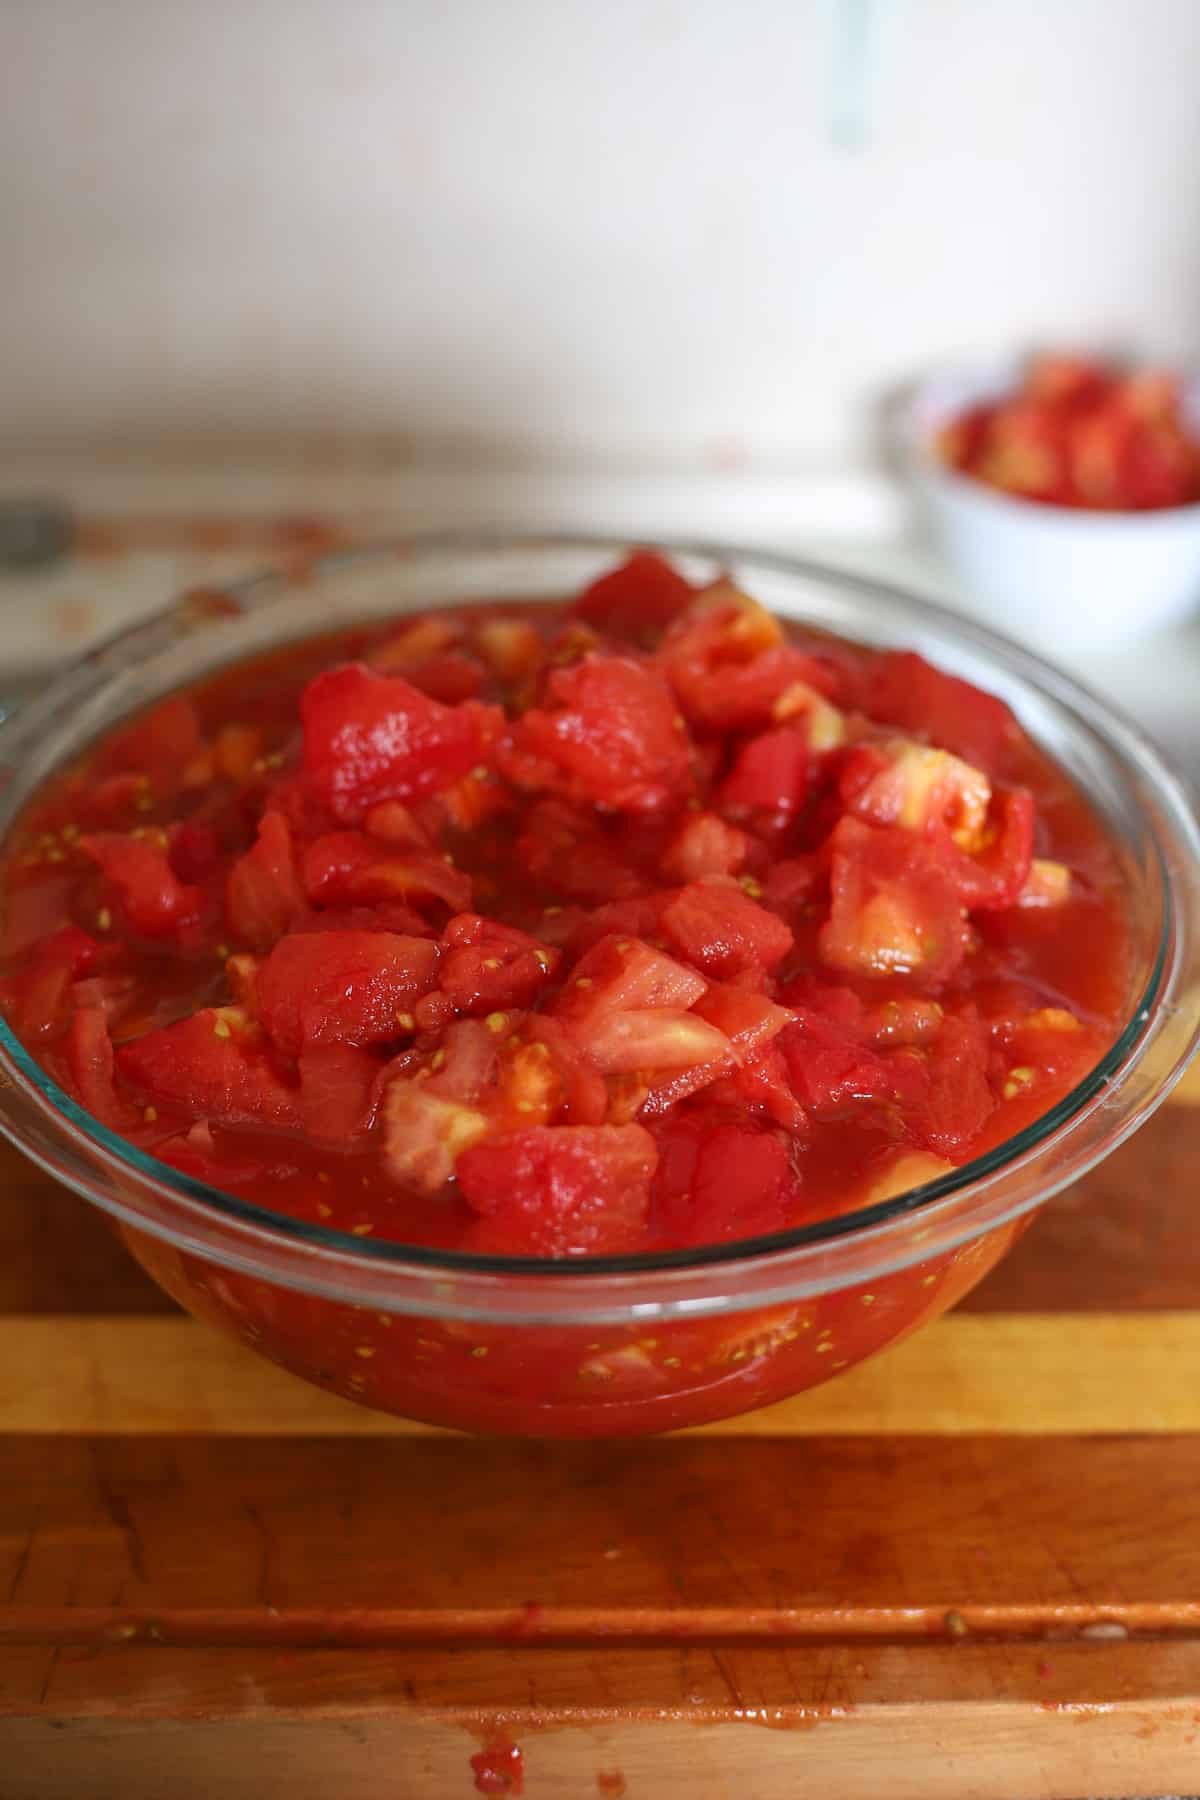
Slice the tomatoes in half, remove the core and then roughly chop them to your desired size. Place in a large bowl or jug along with the juices.
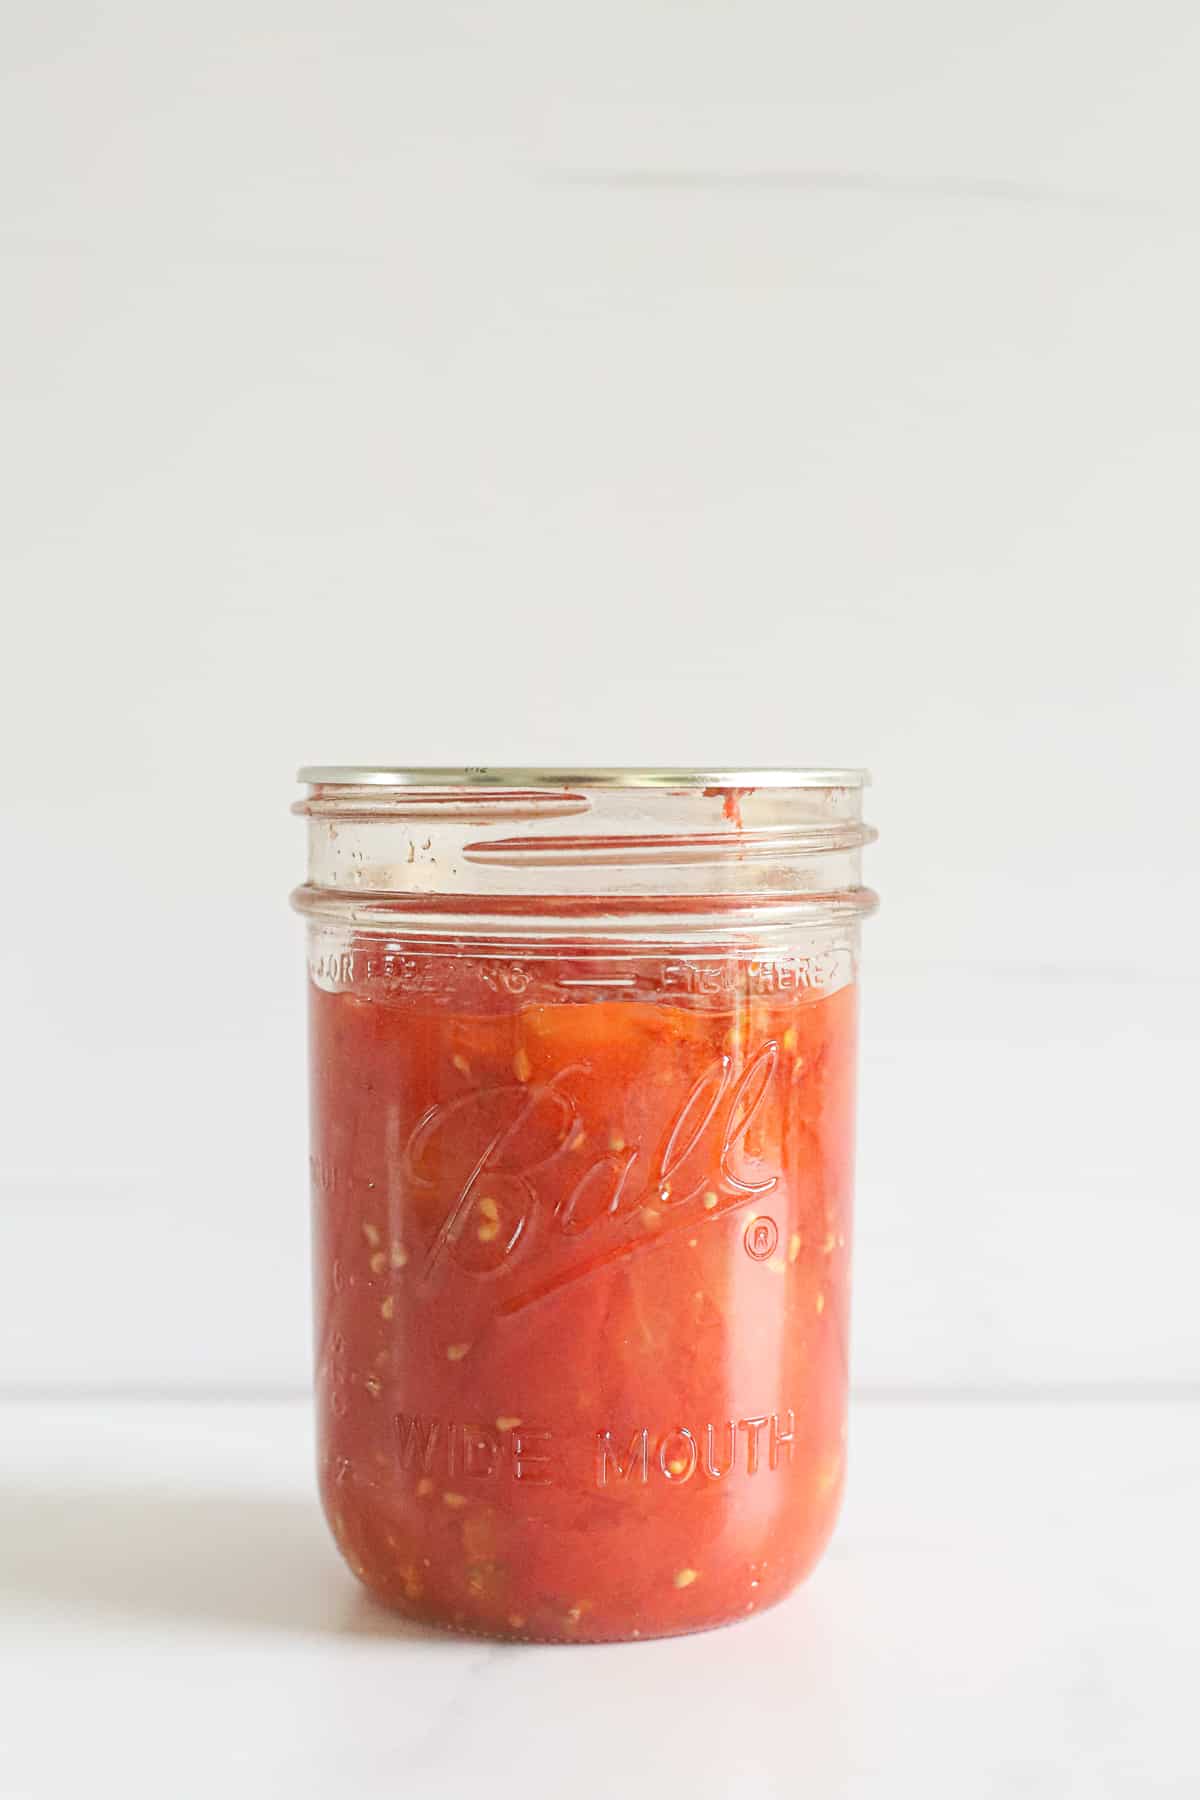
Step 4: Fill your jars
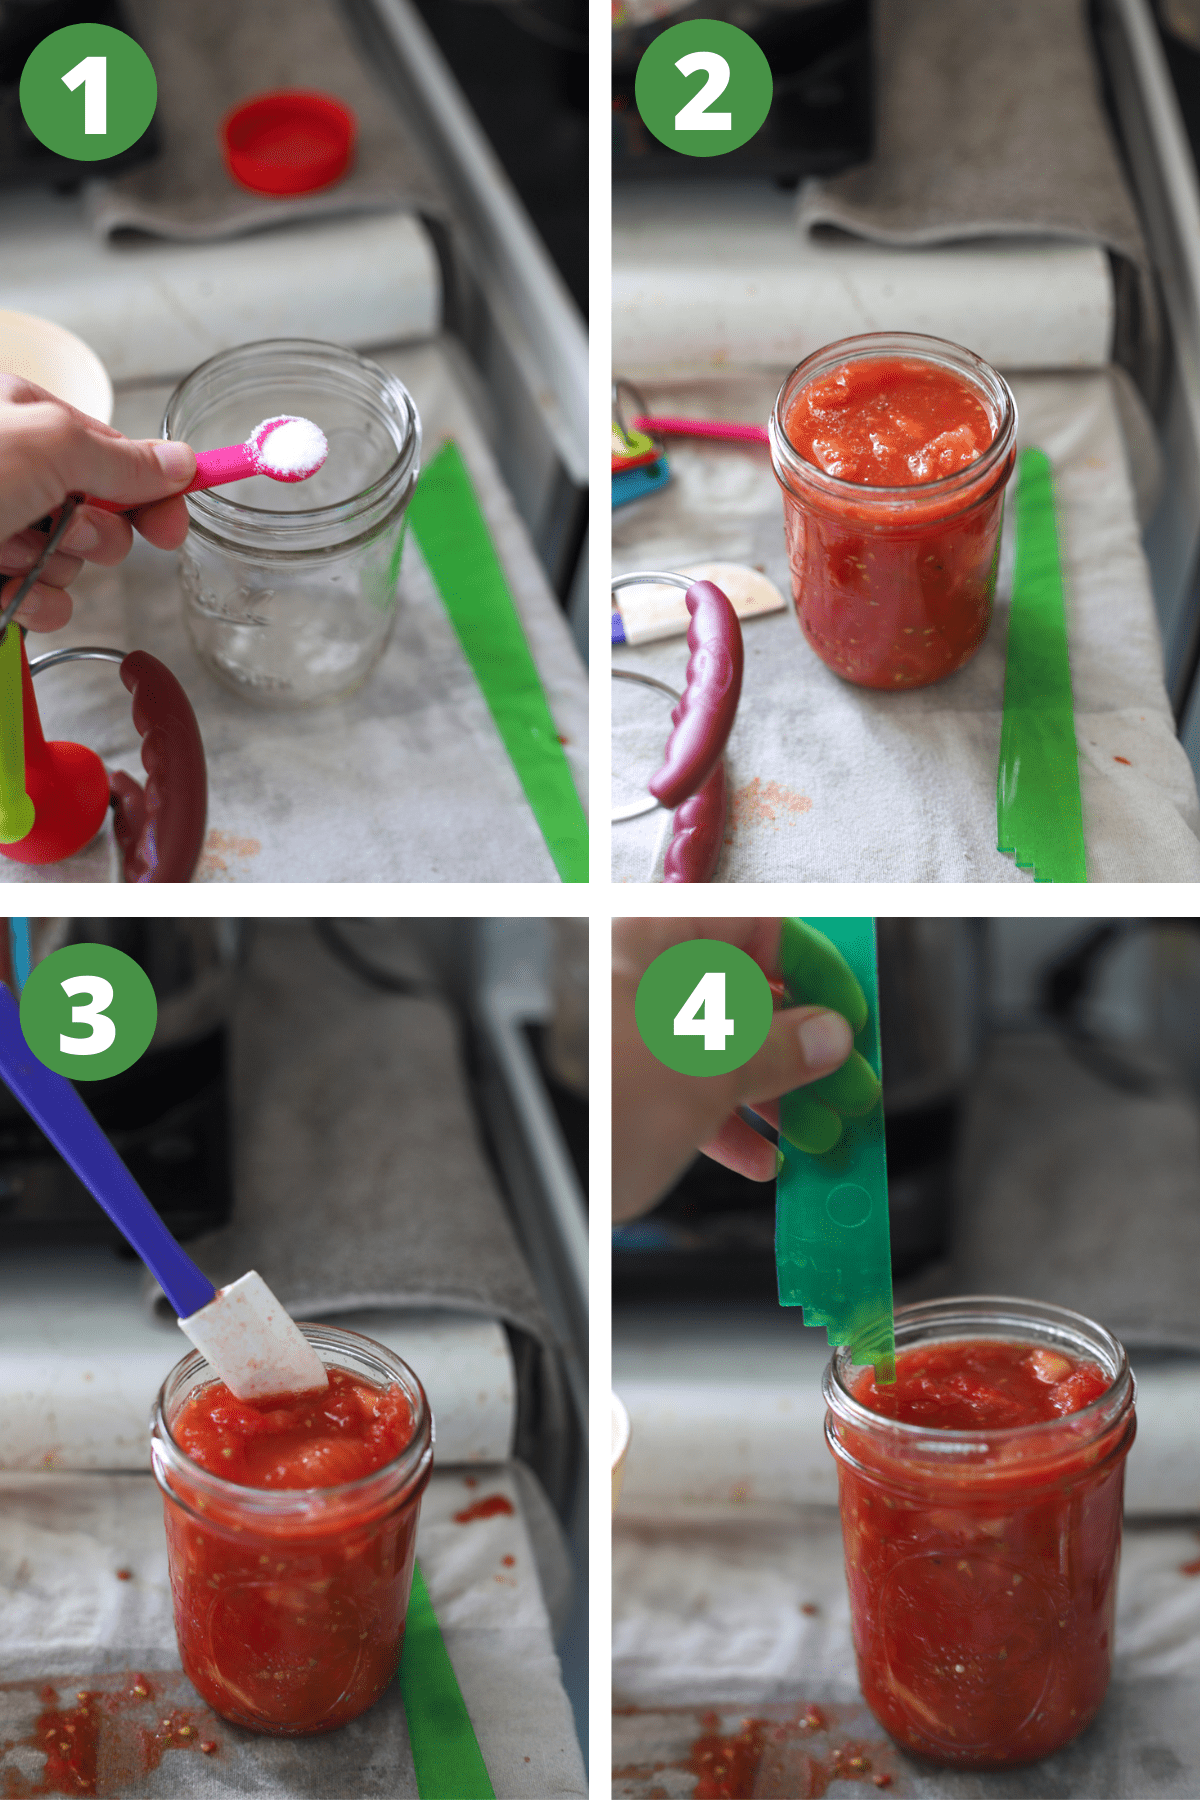
- Add ¼ teaspoon citric acid or 1 Tablespoon bottled lemon juice to each hot pint jar.
- Fill one jar at a time with diced tomatoes using a canning funnel (if you have one), making sure to leave 1.25cm or ½ inch headspace at the top.
- Remove any air bubbles from the jar by sliding a clean wooden chopstick or rubber spatula (you want to avoid knives as they can damage the glass) between the jar and tomatoes to release trapped air.
- Recheck headspace - this is an important step as it can make the difference between the jar sealing or not.
Step 5: Seal and process jars
Use a clean, damp cloth to clean any spillages from the mouth of the jar. Place the lid on the jar, apply the ring/band and adjust until fit is fingertip-tight (don't be tempted to screw it on too tight). Place the jar in the stockpot/canner.
TIP: If you are just starting out, I recommend getting one jar completely ready at a time and placing it in the waterbath while you fill the remaining jars, otherwise the tomatoes will cool the jar down and it could crack when you place the cool jar back into the boiling water.

Repeat steps 4 and 5 until all jars are filled.
Lower the jars into the water bath and ensure water covers jars by at least 1 inch (2.5cm).
Place the lid on water bath canner and bring water to a rolling boil. Process for 1 hour 35 minutes. When the time is up, carefully remove the jars from the pot/canner and set on a clean tea towel on the bench (this is especially important if you have marble or granite benchtops as they can cause the hot jars to crack.)
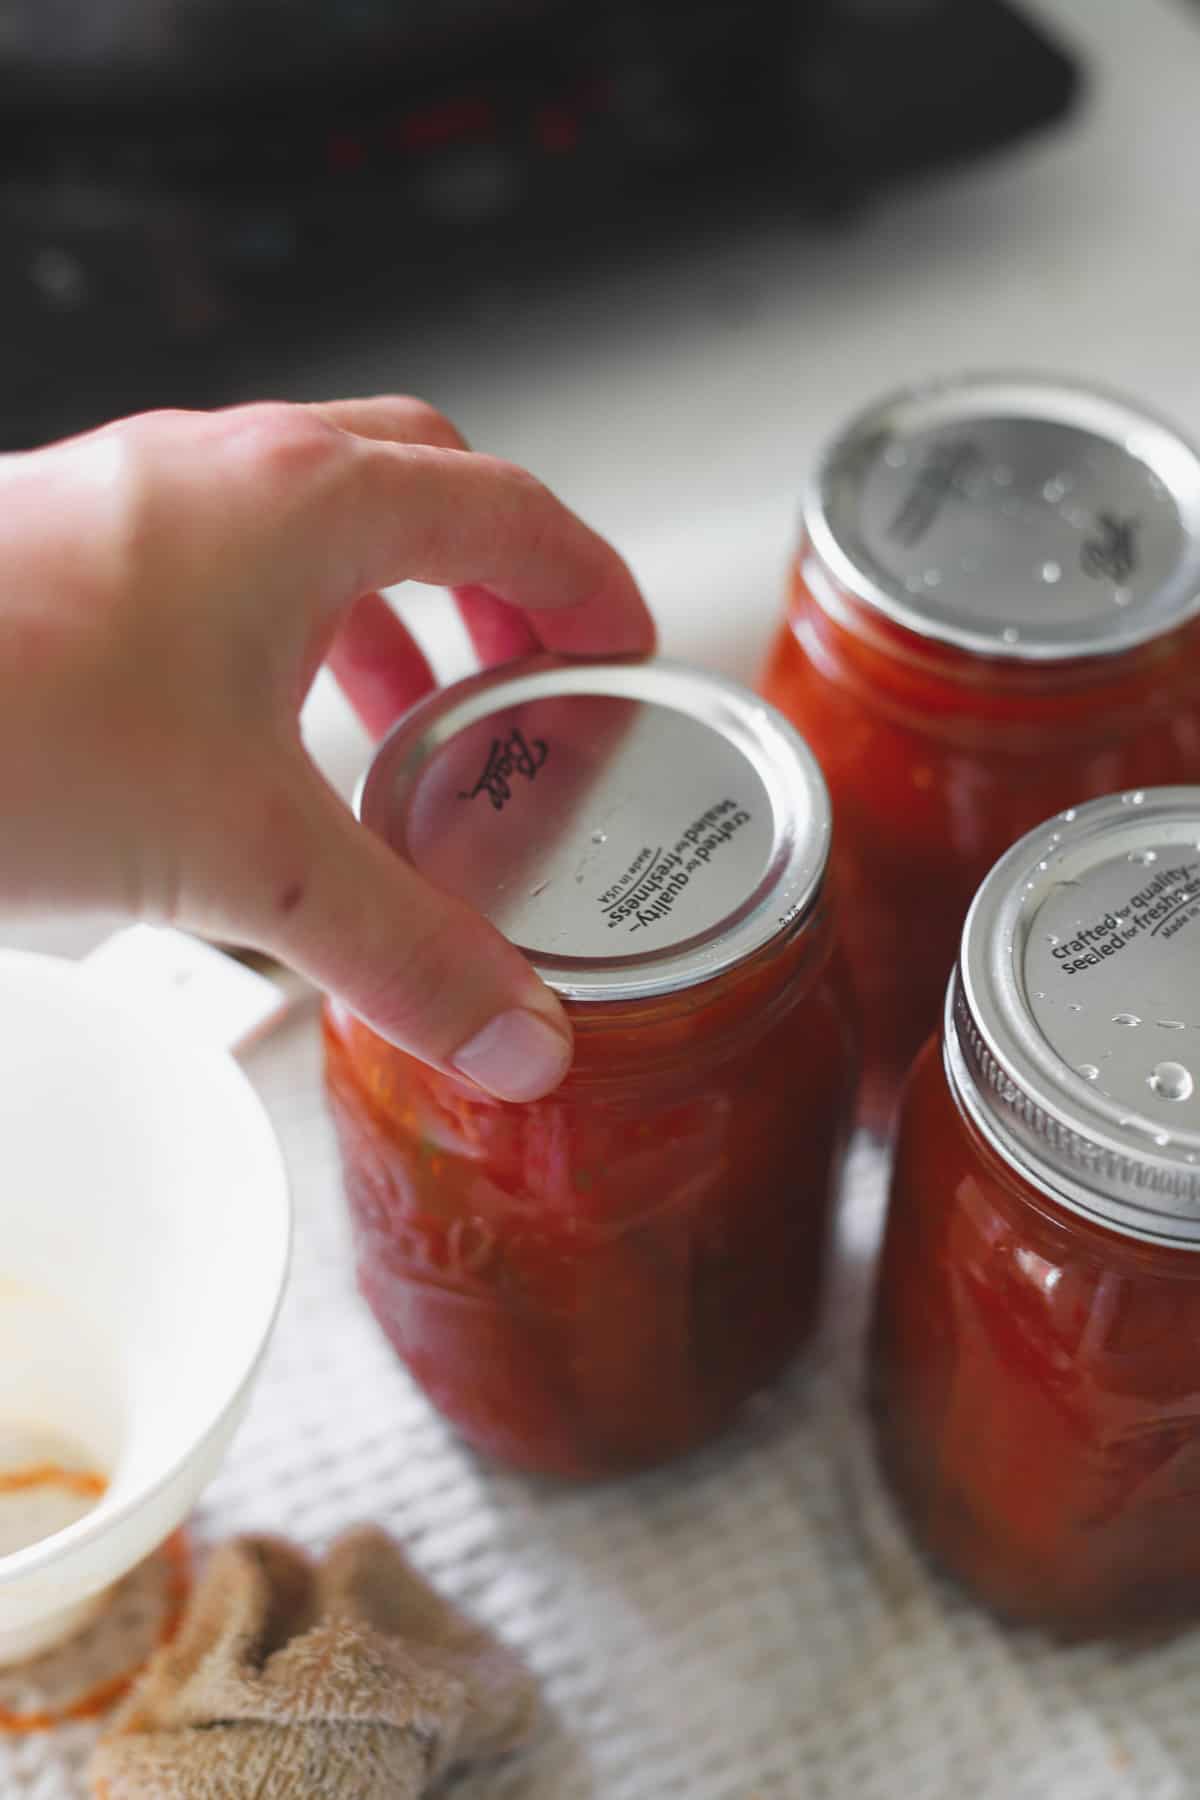
Step 6: Check the seals and store jars
Leave jars undisturbed for 12 to 24 hours and hopefully you will start hearing the "ping" of lids sealing! When you press down on the centre of the lid, it should be concave and not flex. Remove the ring/band and try to prise the lid off with your fingers. If the jar has sealed properly, you won't be able to lift the lid. Wipe down the jars and lids (you don't need to store them with the rings/bands on) label the jars and store in a cool, dark place.
Sealed jars will last in the cupboard for years but the quality of the food will start to deteriorate over time. I work on most things being good for a couple of years. If the jar hasn't sealed in 24 hours, the contents of the jar needs to be either refrigerated and eaten within a couple of weeks or frozen.
FAQ's
Properly canned goods will last almost indefinitely on the shelf, but the quality will start to decline over time. I work on tomatoes being good for 2 years in the cupboard.
Yes! I find this does happen sometimes with tomatoes, but as long as the jars are sealed, they are absolutely fine!
Any jars that didn't seal need to be refrigerated and used within 7-10 days or frozen.
Absolutely! I do this often, just prepare them as if you were going to bottle them (although I often skip peeling them) and freeze in either freezer safe jars or snaplock bags.
Other preserving recipes


If you want more simple + delicious made from scratch recipes, subscribe to my newsletter and follow along on Facebook, Pinterest and Instagram
How to Bottle Diced Tomatoes
Equipment
- 8 pint/500ml glass preserving jars with lids and bands
- Water bath canner (large stockpot)
Ingredients
- 4 kg tomatoes (approximately)
- ¼ teaspoon citric acid or 1 Tablespoon bottled lemon juice per hot jar
Instructions
Step 1: Get prepared
- Prepare your water bath canner - fill stockpot or water bath canner at least half-full with water. Cover and get it simmering - you will need enough water in the pot to cover the jars by 1 inch once they are in there.
- Wash jars and lids and bands in hot soapy water. Keep the jars hot in the water bath.
- Get your kitchen equipment ready - tea towels, knives, chopping boards and anything else you think you might need.
Step 2: Peel your tomatoes
- There are 2 options for peeling tomatoesBlanch and peel - Bring a large pot of water to the boil and fill the clean sink or a large bowl with cold water and ice. Score a cross in the bottom of the tomatoes and place several in the boiling water for about 30 seconds to 1 minute until the skins start to peel back. Use a slotted spoon to transfer the tomatoes to the ice water and once they are cool enough to handle, remove the skins - they should slip right off.Grill (my preferred method) - line a large rimmed oven tray with baking paper or a silicone liner. Slice the tomatoes in half and place skin side up on the tray. Place under the pre heated grill (as hot as it can go) for a few minutes, keeping a close eye on them. Once the skins start to blister, remove the tray from the oven. Once they are cool enough to handle, slip the skins off and discard.
Step 3: Core and chop tomatoes
- Slice the tomatoes in half, remove the core and then roughly chop them to your desired size. Place in a large bowl or jug along with the juices.
Step 4: Fill your jars
- Add ¼ teaspoon citric acid or 1 Tablespoon bottled lemon juice to each hot pint jar. Fill one jar at a time with diced tomatoes using a canning funnel (if you have one), making sure to leave 1.25cm or ½ inch headspace at the top. Use a chopstick or small spatula to remove air bubbles and recheck the headspace. Wipe the rim clean and center the lid on the jar. Apply band and adjust until it is fingertip tight. Place jar in boiling water canner. Repeat until all jars are filled.
Step 5: Seal and process jars
- Use a clean, damp cloth to clean any spillages from the mouth of the jar. Place the lid on the jar, apply the ring/band and adjust until fit is fingertip-tight (don't be tempted to screw it on too tight). Place the jar in the stockpot/canner. TIP: If you are just starting out, I recommend getting one jar completely ready at a time and placing it in the waterbath while you fill the remaining jars, otherwise the tomatoes will cool the jar down and it could crack when you place the cool jar back into the boiling water.Repeat steps 4 and 5 until all jars are filled. Ensure water covers jars by at least 1 inch (2.5cm).
- Place the lid on water bath canner and bring water to a rolling boil. Process for 1 hour 35 minutes. When the time is up, carefully remove the jars from the pot/canner and set on a clean tea towel on the bench (this is especially important if you have marble or granite benchtops as they can cause the hot jars to crack.)
Step 6: Check the seals and store jars
- Leave jars undisturbed for 12 to 24 hours and then check to make sure the jars have sealed correctly. Remove the ring/band and try to prise the lid off with your fingers. If the jar has sealed properly, you won't be able to lift the lid. Wipe down the jars and lids (you don't need to store them with the rings/bands on) label the jars and store in a cool, dark place.
If you tried and loved this recipe, please leave a comment and a rating below!

Amy says
Excellent and simple recipe. I personally thought the roasting tomatoes to be fiddly and extra work (compared to the hot/cold bath) of peeling skins, but the aroma and flavour is lovely and worth the time (if you have it!). Thank you Laura!
Julie says
Hi thanks for this recipe, is it safe for the to be jars be sterilised in the oven, rather than the water bath method?