Do you want to start bottling/canning food but are not really sure where to start? No problem! This post covers all the basics you need to know and equipment you need to get started preserving food!
I have such fond memories of preserving food with my mum and Grandma when I was a kid. Mum would buy boxes and boxes of Golden Queen peaches, Grandma would come and stay and over the course of a few days, they would work together to put them all in jars, ready for us to enjoy all winter long. And yes, these days you can buy a tin of peaches for next to nothing, but they don't even compare to the homemade version!
Now that I have my own kids, I am so determined to give them the same memories and enjoyment that comes from home preserved food. I am still learning (there is so much to learn!) but I will share along the way what I figure out and my favourite preserving recipes.
Even if you are totally new to preserving, I hope that this post is a good starting point for you and don't forget to comment below or email me if you have any further questions!
Why preserve food?
It is easy, convenient and cheap to buy canned food from the supermarket, but once you have tasted a jar of home preserved juicy peaches picked and preserved as soon as they are ripe, or a tin of homemade tomato salsa, you will see what you are missing out on!
The thing I love about preserving is that you have the ability to guarantee a few things that are important (to me anyway!)
- Locally grown, seasonal produce (no tomatoes from Italy!)
- Control over the additives
- Reusable jars - no need to recycle, just use the jars again and again!
- Taste - you will never look at a can of peaches from the supermarket in the same way once you've eaten a freshly preserved bottle
- Variety - you are not limited to jams, bottled fruit and chutneys - the world is your oyster when it comes to preserving food and once you have the hang of preserving, you can flavour your preserves however you like
Equipment needed
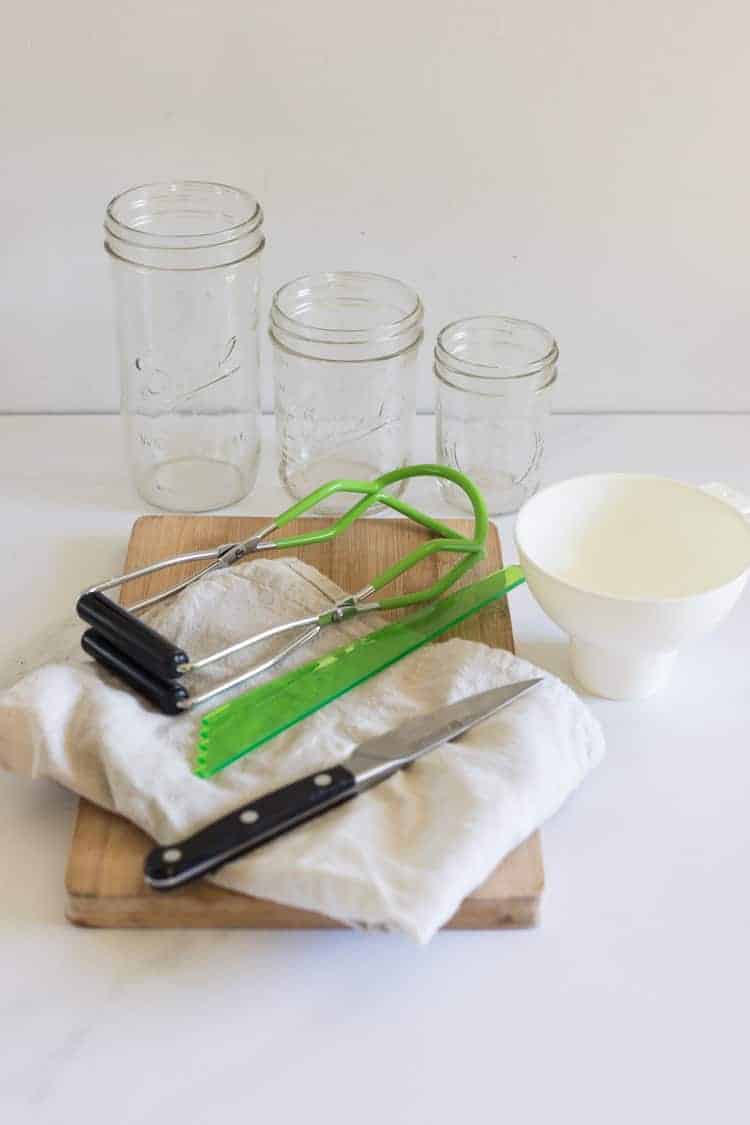
The great thing about preserving is that most of the equipment you need is likely already in your kitchen. While you can buy preserving equipment to make it easier and more productive, to begin with I would recommend getting a feel for it and then if you think you will do a lot of preserving, investing in some good equipment.
Essential equipment
- Preserving jars in a variety of sizes, lids/seals and rings/bands
- Chopping board
- Sharp knife
- Large stockpot (if using water bath method - see below)
- Large pot for boiling the sugar syrup
- Bowls for holding prepared fruit/vegetables
- Tea towels
- Ladle
Not necessary but helpful tools:
- Jar tongs (if using the waterbath method)
- Wide mouth funnel
A note on jars. You can certainly reuse supermarket glass jars as long as the lids are clean and in perfect condition but I recommend using proper 3 piece preserving jars (jar, seal and ring) such as Ball Mason jars or Agee jars.
While buying jars is a big investment initially, they can be used over and over for years to come by just buying new seals. And they will last for generations - I have jars that my Grandma used!
Sterilising the jars
- Dishwasher method - using the dishwasher is my prefered method. Run your jars through the dishwasher on the hottest wash (ours is called hygiene but it may be called sterilise one your machine) This washes and sterilises the jars, it is very easy and the dishwasher keeps the jars warm until you are ready to use them. You just need to plan ahead and make sure you start the dishwasher a couple of hours (or as long as the cycle takes) before you will need them.
- Oven method - Wash & dry the jars thoroughly in very hot soapy water and then place in a 150°C oven for 15 minutes. Leave the jars in the oven until you are ready to use them (I leave the oven turned on)
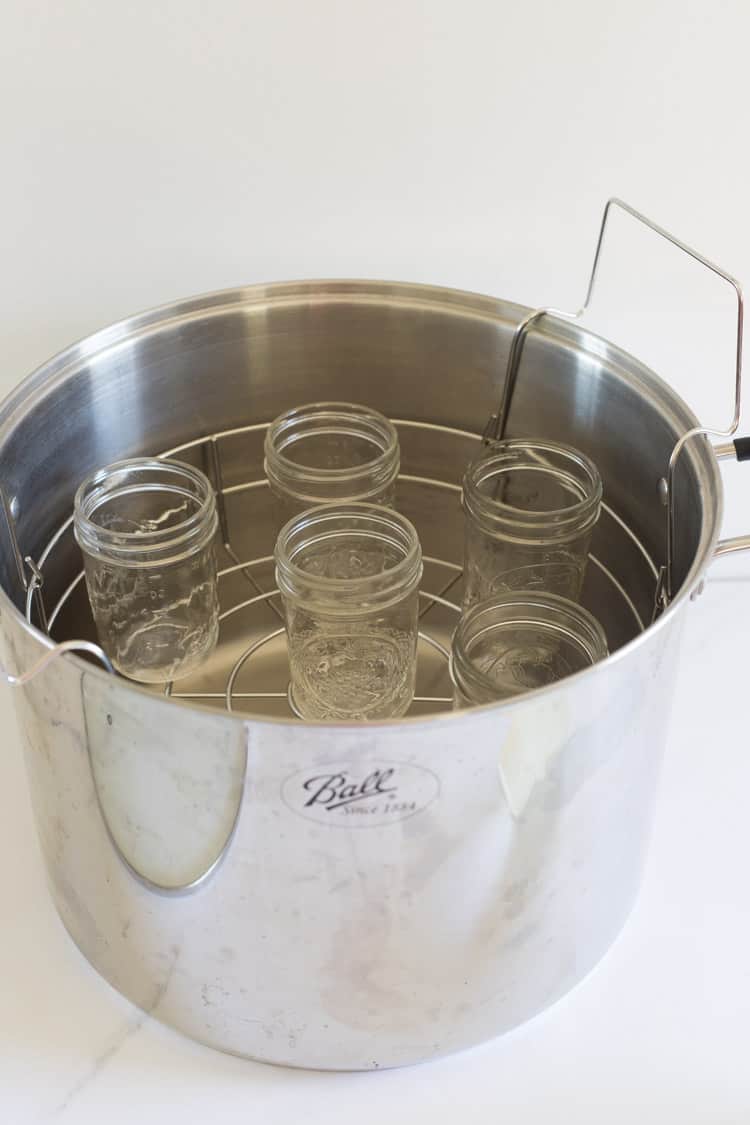
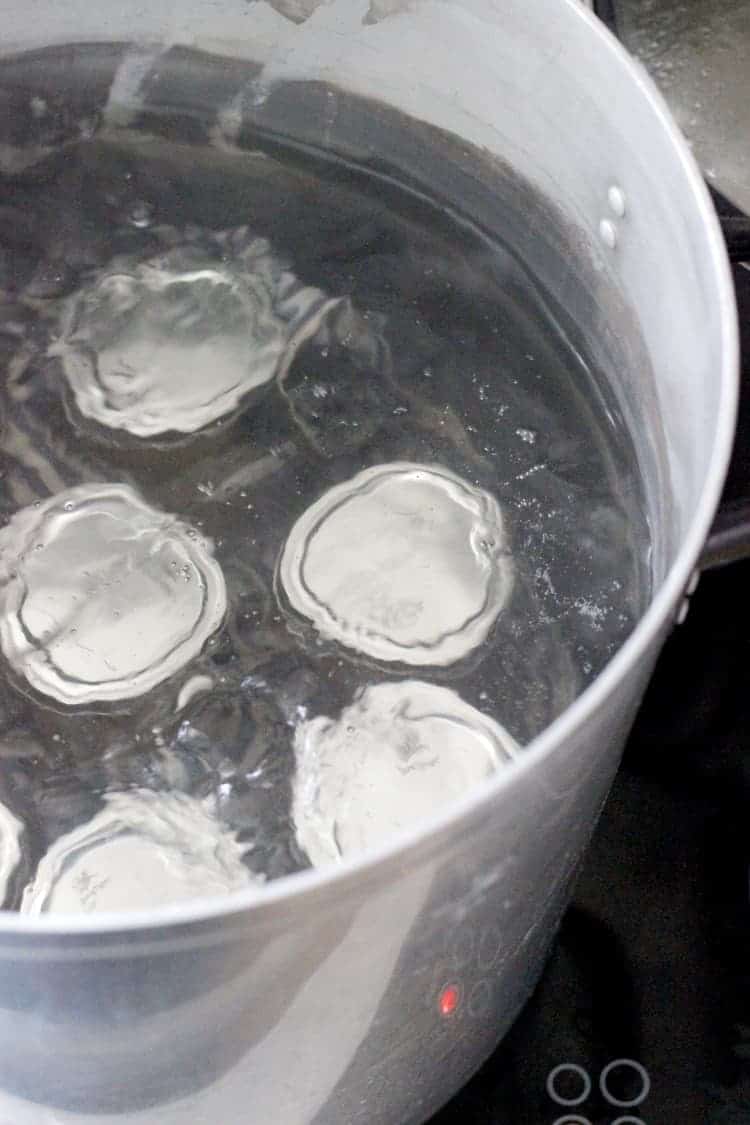
- Water bath method - if you are planning on using the water bath method to heat process your full jars, and the processing time is longer than 10 minutes, you don't actually need to sterilise your jars. If jars will be processed for less than 10 minutes, or if you prefer to sterilise your jars anyway, you can use the water bath to sterilise your jars. Place a canning rack or tea towel in the bottom of the pot (so that the jars are not in contact with the base of the pot) and place the jars in the stockpot or canning pot you are using. Fill up the jars and the pot with water (hot water helps speed up the process) and bring to the boil. Boil for 10 minutes and reduce to a simmer and leave the jars in until you are ready to use them.
- Sterilising seals and rings - this is not necessary! The rings don't touch any food so just need to be clean. If you are using the overflow method, I would sterilise the seals with the jars, or by placing them in a pot of water and bringing to the boil for 10 minutes. If using the waterbath method, there is no need to sterlise or heat the seals.
Whichever way you sterilise your jars, the important thing is that the jars are hot when hot food is added - this is to prevent the jars from cracking due to a sudden change in temperature, e.g. putting hot food into a cold jar, or adding a cold jar straight into the boiling hot water bath.
Hot pack vs cold pack
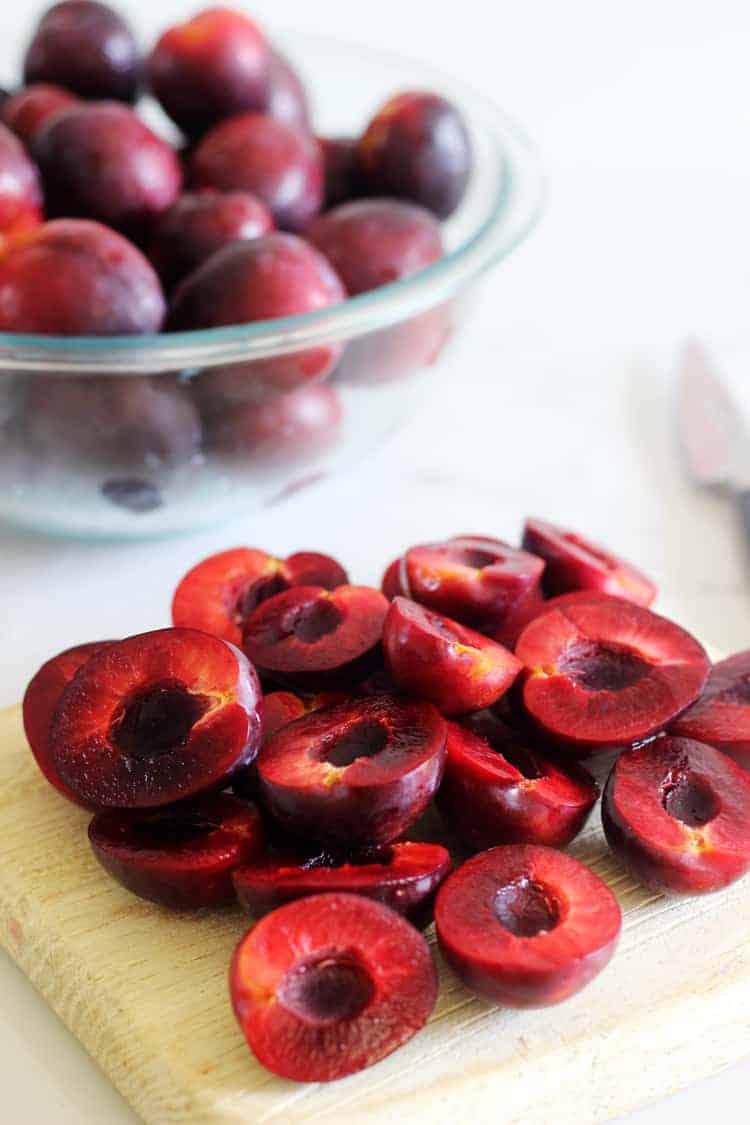
When it comes time to pack the jars (when it comes to bottling fruit), there are 2 options. You can either pack raw fruit into the jars, top with boiling sugar syrup and then process, or cook the fruit in the syrup and then transfer into jars.
Either way is fine, it just comes down to personal preference and how you work best! I prefer to cold pack my fruit into the hot jars and then top with the sugar syrup as I find it easier to pack the fruit into jars first.
Filling jars
If you are using the water bath method, you need to leave the required headspace at the top of the jar to allow for the expansion of the contents of the jar as it is heated. The recipe you are following will specify the headspace required and you must follow this.
To pack fruit into jars, gently pack as many slices or pieces of fruit into the jar as you can before topping with sugar syrup.
To pack jams, salsa, chutney or sauces, use a jar funnel to fill the jar, leaving the correct amount of headspace.
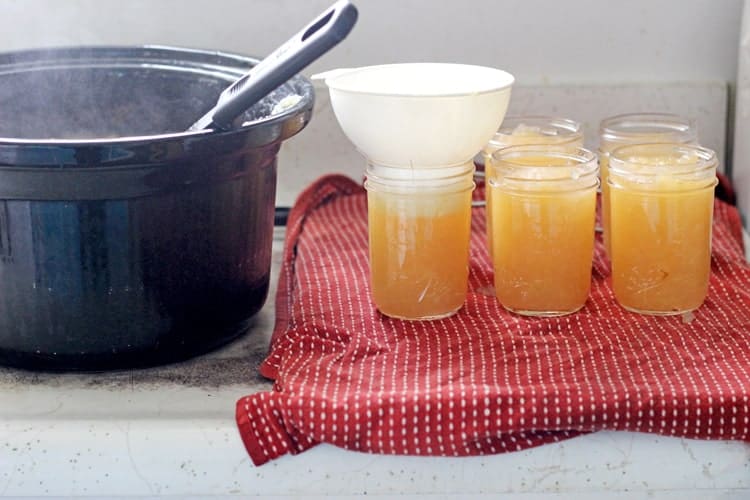
It is also helpful, particularly if you have stone or granite benchtops that keep cool to place a clean tea towel down on the bench to put the hot jars on. Again, hot jars on a cold surface is not ideal. This also doubles as an easy way to clean up as there is always some syrup spillage - just throw the tea towel into the wash at the end!
Once jars are full, use a rubber spatula or chopstick (not a knife as this can damage the jar) and run it around the contents of the jar to remove any air bubbles.
Place the lid on the jar, screw on the ring and the jars are ready to process!
Heat processing the jars
This is where it gets a little tricky. Your mum, grandma and probably her grandma all would have most likely used the overflow method of preserving, which is just filling the jars to the brim, placing the seal on with a ring and either tipping upside down on the bench to seal, or just leaving overnight. They never had any problems other than the odd jar that didn't seal and it was all fine.
The thing is, we have learnt a lot since then and one of those things is around food safety. In New Zealand it is hard to find any definitive information on the correct way to bottle/can food but in the USA the recommended method is the water bath method. This heats the contents of the filled jars to a temperature (100°C) which kills any bacteria in the jars and makes it safe for storing at room temperature for years. Over the last couple of years I have done a lot of reading, learning and preserving and now this is my preferred method. You may still choose to use either the overflow method, processing in the oven (both which I have done with success) or even in the dishwasher on sterilise function but I now only use the water bath method of preserving, simply for peace of mind and the fact that I have a higher success rate with jars sealing.
I have a whole post here on the water bath method!
FAQ's
Do I need to use new jars or can I recycle old supermarket jars?
I have used both but have always had limited success using old supermarket jars.
I highly recommend using proper preserving jars with a band and a new seal. It is an investment but if you check Trademe, look in op shops or ask around, you are likely to be able to build up a collection. My collection includes my Grandma/Mums old Agee jars and new Ball Mason jars purchased from Kiwi Family Kitchen (these are my favourite jars!)
Which size jars are best to use?
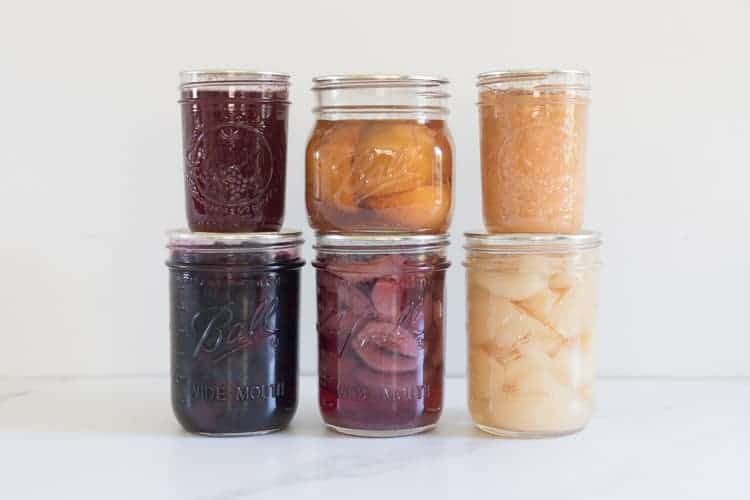
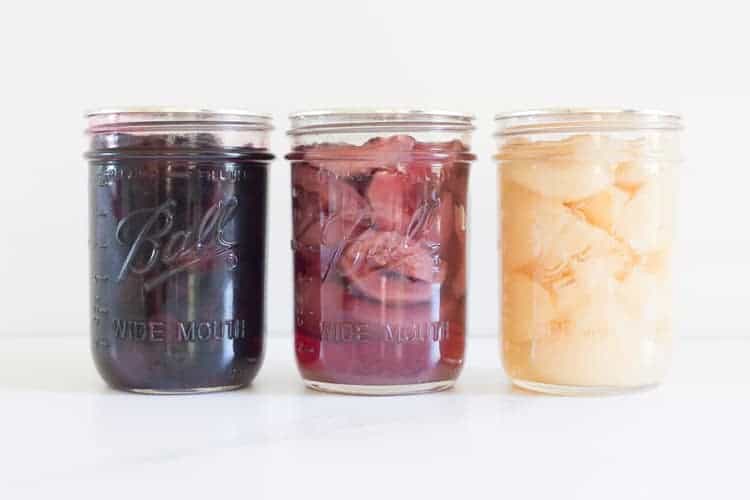
This depends entirely on what you are wanting to preserve. 500ml/1 pint and 250ml/1/2 pint jars are the sizes I use the most but below are the sizes I use and what for:
- 1 litre / 1 quart / 32oz - big batches of fruit e.g. plums, peaches, pears
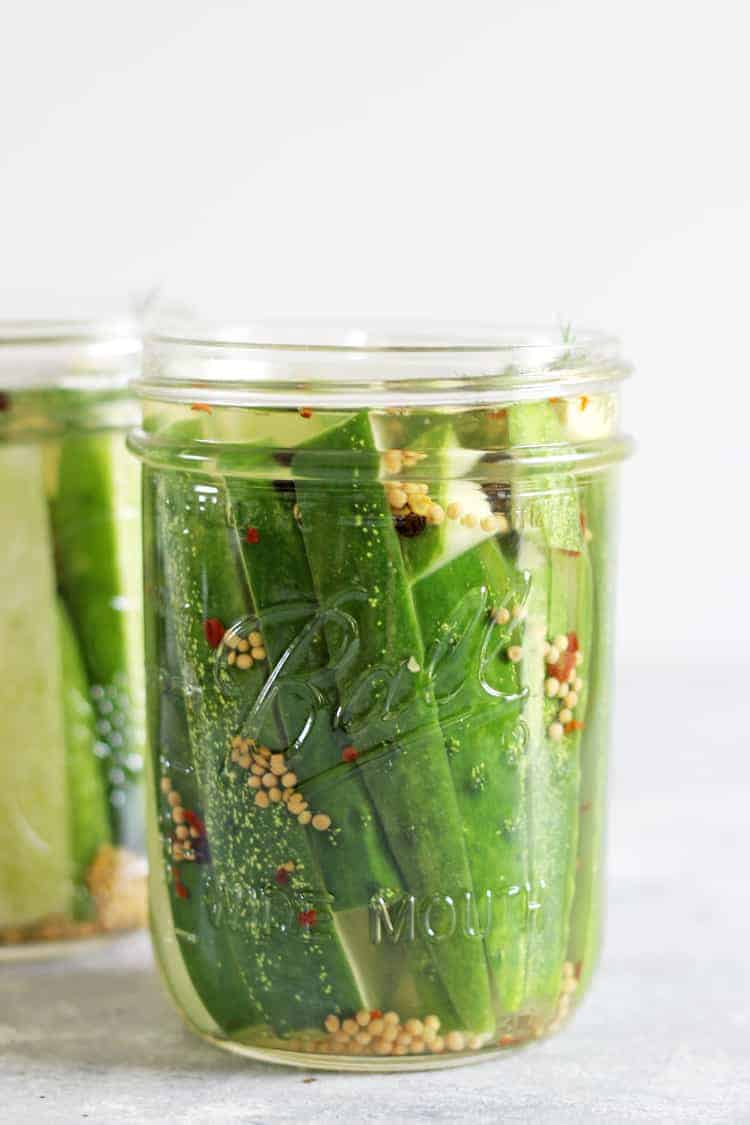
- 500ml / 1 pint / 16oz- fruit, salsa, canned tomatoes, pasta sauces, beetroot, pickles
- 250ml / ½ pint / 8oz - jams, chutneys, relishes, salsa, applesauce
- 125ml / ¼ pint / 4oz - jams, fruit butters and pastes, jellies
Can you preserve fruit without sugar?
You can certainly preserve without sugar or with less sugar but once opened, those jars won't keep as well and will have to be eaten much faster than those containing sugar.
I have a book on preserving using natural sweeteners (honey, maple syrup, agave etc) that I am excited to test out.
What food can you not preserve?
The water bath method is safe for processing high acid foods - any food that has a pH lower than 4.6. There are some fruits and vegetables that are lower in acid such as tomatoes and these require having citric acid added to the jars to get them to a safe level.
Low acid foods such as meat, poultry, seafood and some vegetables require a much higher temperature and must be pressure canned.
Helpful resources:
Ball Canning Website - https://www.freshpreserving.com/
The All New Ball Book of Canning and Preserving
Ball Blue Book - Guide to Preserving
Food in Jars - https://foodinjars.com/
Naturally Sweet - Food in Jars
If you have any further questions, comment below or email me - [email protected] and I will do my best to answer them!

Mark Mathew says
Hi everyone would like some help on this, since what we are actually packing is cooked creamcheese, condensed milk, evaporated milk, cheese and butter as its cooking oil (its like a spread for bread and salads). Does water bathing after packing it helps to preserve it under room temperature atleast maybe a week? Any answers is much appreciated.(We use bottle packing)
Also do we seal it first with plastic seal on the cap or do we seal it after the water bathing?
Laura says
Hi there, you cannot safely water bath dairy products so I can't offer any advice there sorry!
Luci Joan Lawless says
Hiya, dont know if you are still answering messages but i am looking for the exact times for different things. I was told the times were really important but can only see you mention 10 minutes so can you recommend a time for say damsons, strawberries, courgettes
thanks
Laura says
Hi Luci, the times are all totally different depending on what is in the bottle, if they are hot or cold packed and what size jars you are bottling so I can't give you a list - I would recommend finding a Ball Preserving book (there are lots of different ones but they are all great) or checking out their website as they will have a list of all items and times.
Marlene Mason says
Hi, I’m a pickler. I grow all of my food that I pickle. Cucumbers, gherkins, carrots, beetroots. I make our own jam , tomato relish, green tomato pickles & Passata sauce, whole tomato, chopped tomato’s and dehydrated tomato’s. Pesto , dried herbs . I grow my veggies from seeds collected and I swap seeds and seedlings with others in my community. We all compete at local agricultural shows with our pickled goods and other jams as well as veggies and flowers. Natural living is the best way to go .
Laura says
Isn't it fun being able to grow and pickle your own food! I love what you do!!
Lizzy says
Anything you can use instead of a canning rack? Thanks!
Laura says
Yes, either canning rings on the bottom of the pot or a tea towel. Just anything to keep the jars from directly touching the bottom of the pot.
Bevan Grace says
Where do you buy a canning rack?
Laura says
Hi Bevan, I bought mine from Kiwi Family Kitchen as part of a kit. Laura
Denise Smith says
I have been busy preserving food for many many years. Have great success with the overflow method. Started out with water bath but found it limited the number of jars processed at a time. Our fruit trees are plentiful and the fruit glut is huge. I'm busy doing beetroot at the moment. Can't wait to move onto tomato sauces and chutneys. Awesome sense of achievement seeing all the jars lined up in my dedicated cupboard ❤️❤️
Aunty Wendy says
Fantastic info Laura. Thank you. I'm hoping to have another bumper crop of Dad's famous Louisa Plums and have always frozen them...
But I feel a little preserving coming on!
I have lots of tomatoes and want to make my own tomato and sweet basil pizza sauce... and other delicious saucy tomatoey scumpciousness! X
Liz says
I assume oven bottling is similar to water bath? Except I guess some liquid escapes as it doesn't have the pressure of the water to keep it in. I do pickled onions, gherkins etc in the oven.