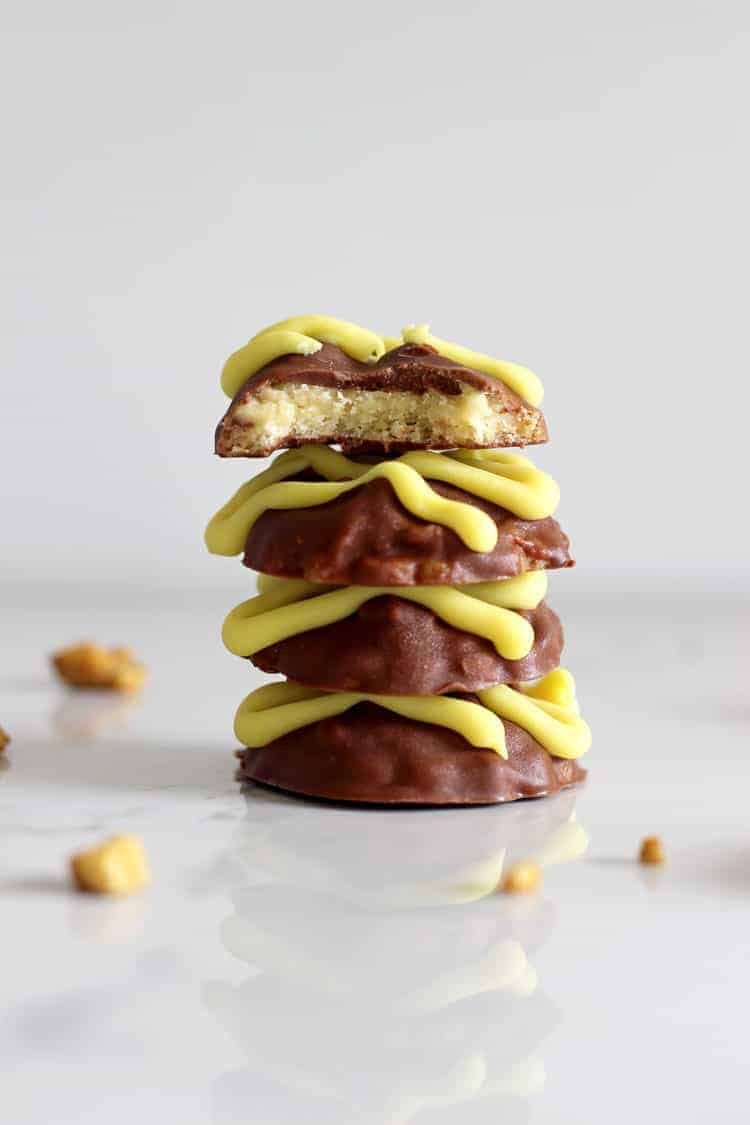
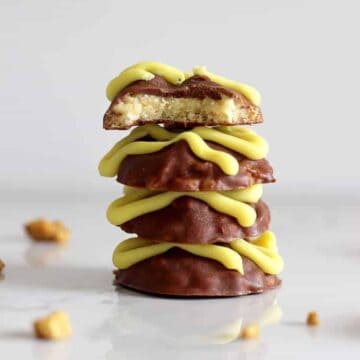
Homemade Squiggles Biscuits! Let me show you how to make a Kiwi classic, the Hokey Pokey Squiggles biscuit at home! Crispy cookie base topped with hokey pokey buttercream, hokey pokey pieces, covered in chocolate and squiggled on!
Some of the links in this post are affiliate links, which pay me a small commission for my referral at no extra cost to you! Thank you for supporting The Kiwi Country Girl.
I just KNOW you guys are going to be as excited about these homemade squiggles biscuits as I am! A few weeks back I asked on my Facebook page which store bought biscuit you wanted me to try and recreate next after how much you all loved Homemade 100's & 1000's Biscuits and Homemade Mint Slices. I was so happy when people asked for Hokey Pokey Squiggles!
If you're not from New Zealand you probably have never heard of these, so let me tell you a little bit about them. I don't buy a lot of biscuits but if I do, squiggles are pretty much the top contender for the spot in the trolley. So when I set out to make them at home, I knew I wouldn't stop until they were just right. Hokey Pokey Squiggles are a plain biscuit (sugar cookie) topped with hokey pokey buttercream, crushed hokey pokey pieces, covered in a milk chocolate shell and topped with a yellow white chocolate squiggle! Even if you're not familiar with them, you will still LOVE these cookies. They're pretty awesome. And so fun!
While homemade squiggles aren't difficult to make, there are quite a few steps so this is quite a wordy post...I'm going to do my best to explain each step really thoroughly to make it easy for you!
The biscuit
The plain biscuit is the base for the whole thing. I used my go to sugar cookie recipe but I swapped the egg for 1 tablespoon of milk. I tested it with both and found that the biscuit with no egg was much crispier. Exactly what we want. I also changed up my method slightly - I made the dough, then rolled it out before chilling it. I usually chill the dough and then roll it but rolling out cold cookie dough is really hard! This way, the dough is still nice and chilled which means the cookies hold their shape perfectly in the oven, however there is no sweating over rolling out hard dough. I used these cookie cutters and used the smallest one (48mm or 1 ⅞") with the crinkled edges. If you only have round cookie cutters, that's totally fine.
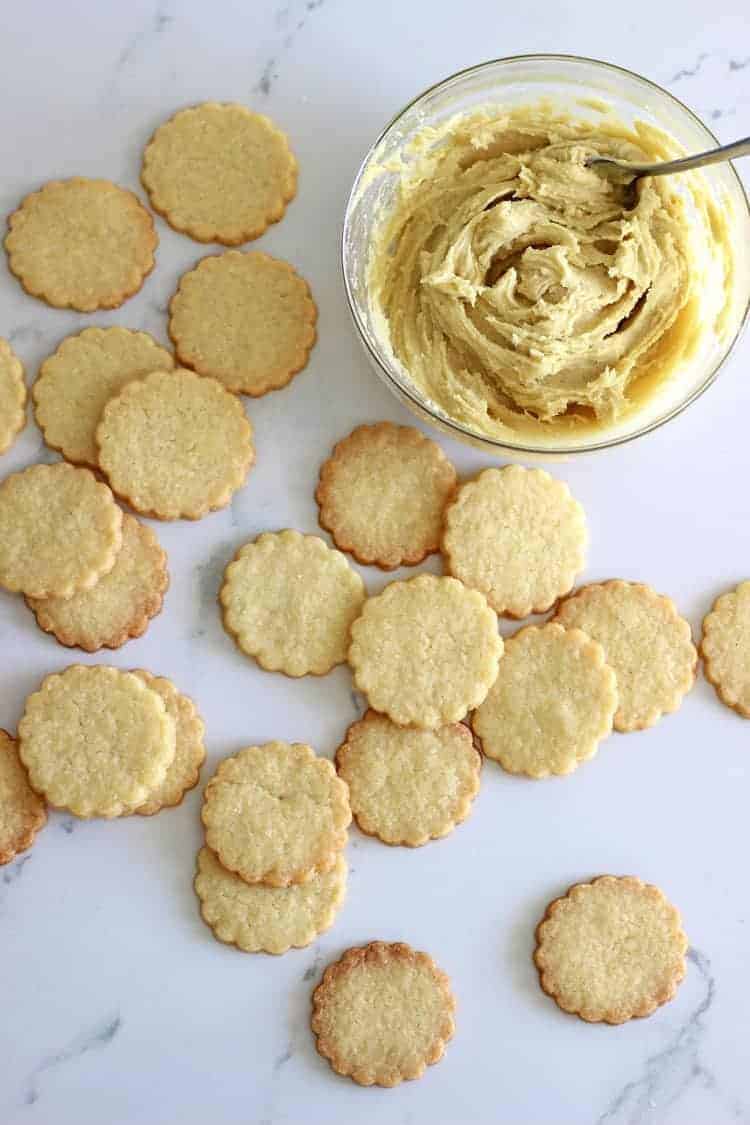
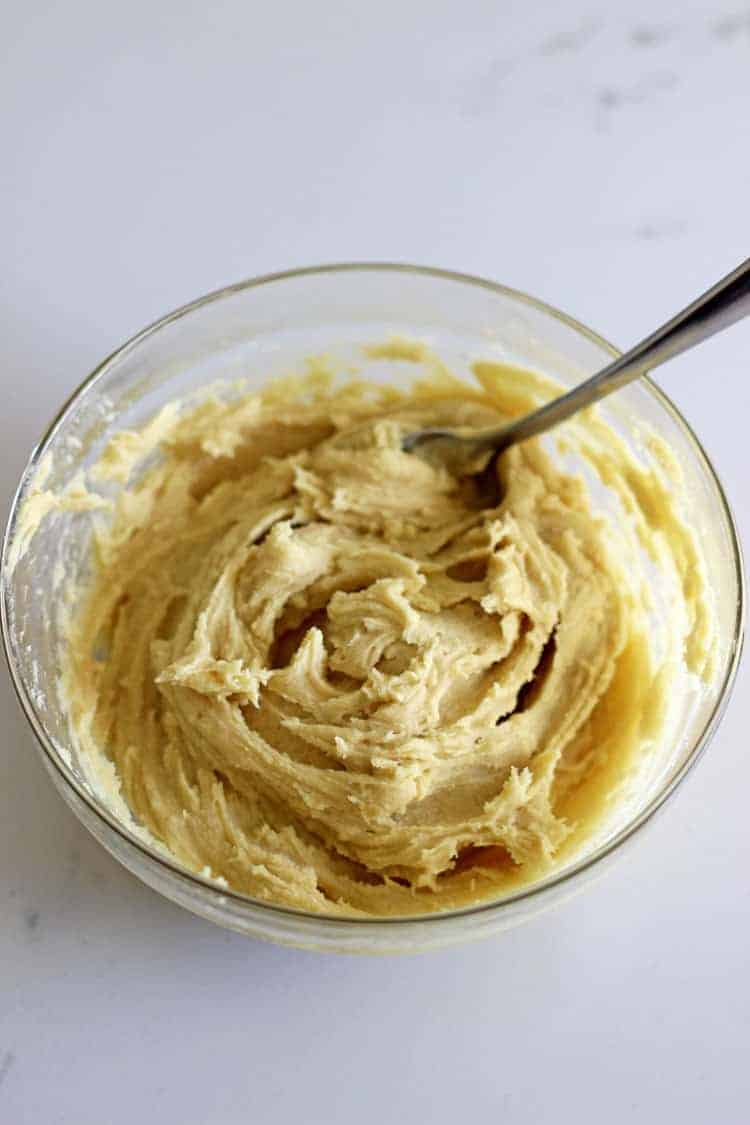
Hokey Pokey Buttercream
This is a simple frosting - butter, icing sugar, golden syrup and milk whipped together and spread on top of the biscuit.
Hokey Pokey Pieces
Making the hokey pokey is probably the most complicated part of homemade squiggles. You have to melt together golden syrup and sugar on the stove until it starts to simmer. Once it starts bubbling all over - HANDS OFF!! Don't stir it, set the timer and walk away. (Don't actually walk away, it's super hot...just watch it!)
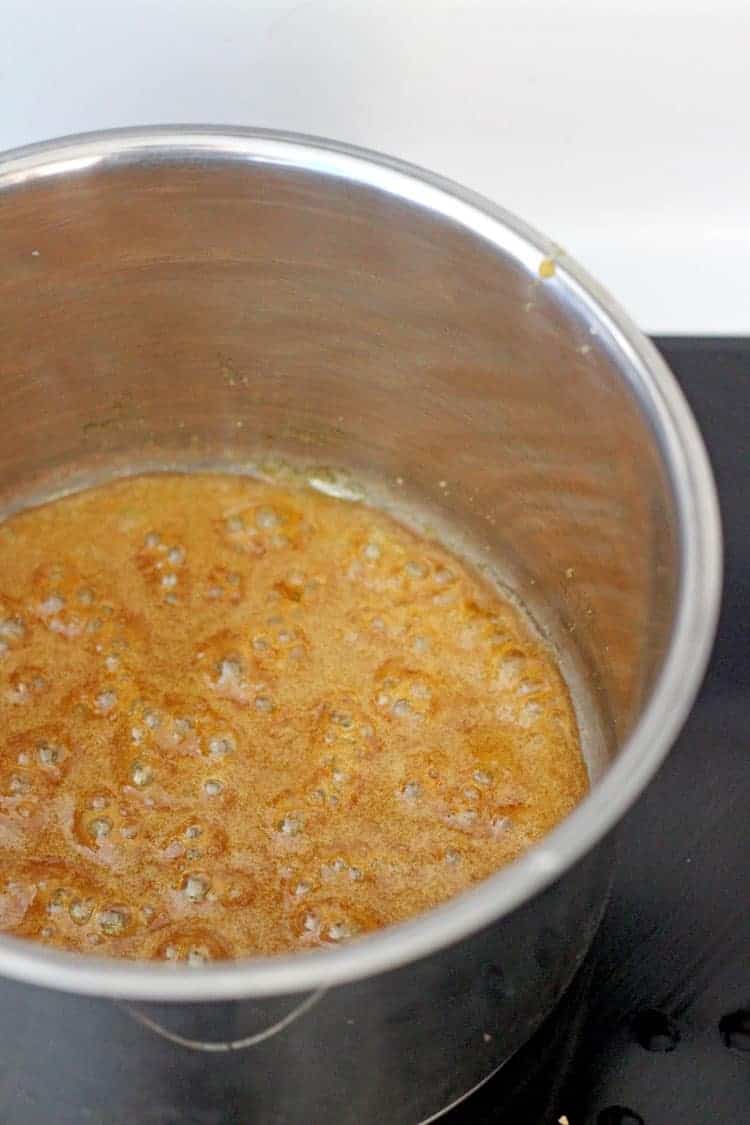
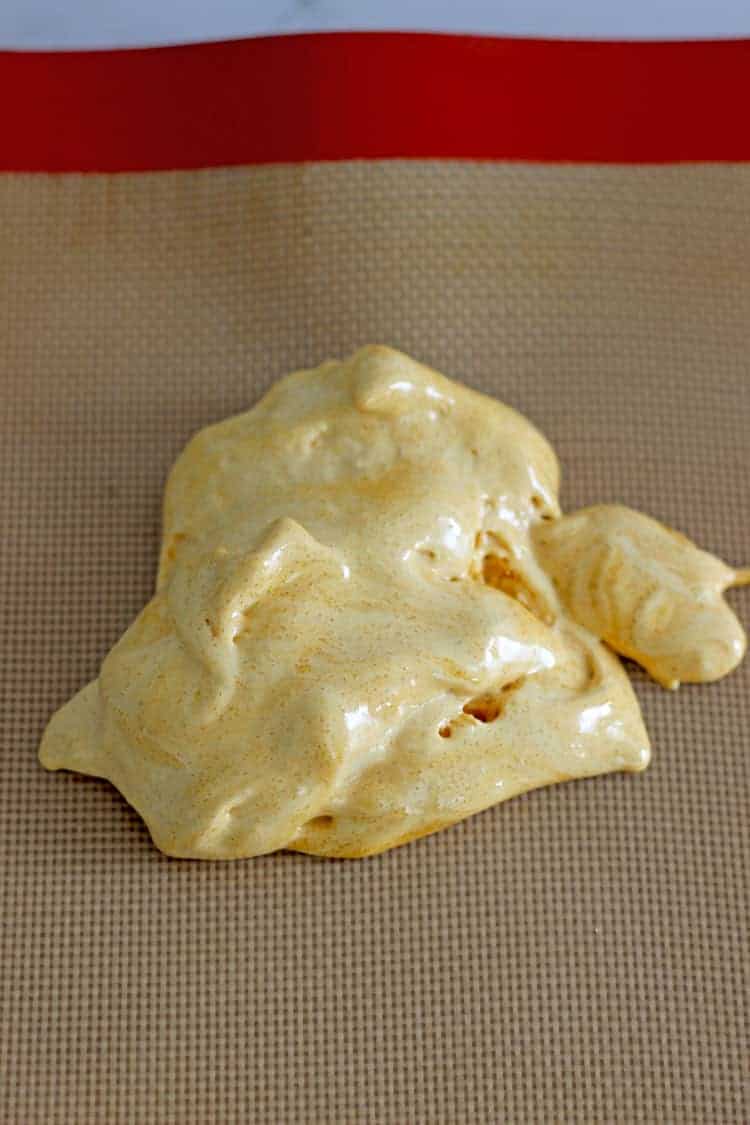
When the timer goes, take it off the heat, stir through the baking soda and watch science happen (nerds unite!) The baking soda reacts with the sugary liquid and it foams up...it's so cool! If you don't want to tackle this whole project, I would still recommend making hokey pokey, especially with kids!
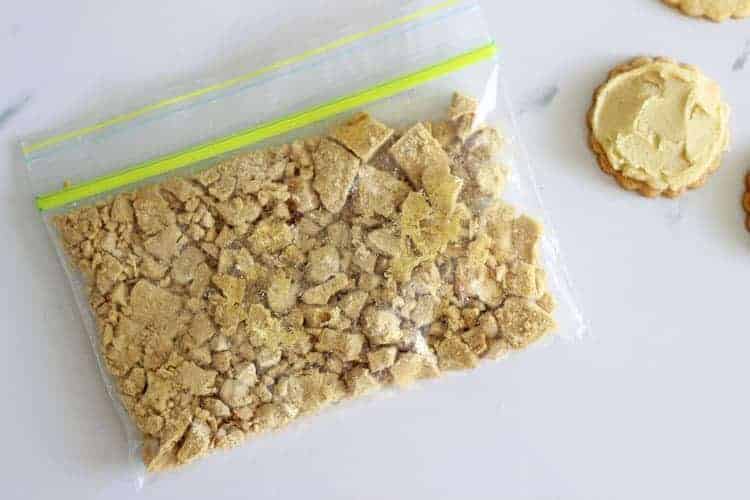
Immediately scrape the hokey pokey onto a prepared baking sheet lined with baking paper (you'll want to prepare this in advance) and put it in the freezer. It will cool at room temperature, but since we are going to be smashing it into tiny pieces, it's better frozen.
Chocolate shell
A super simple chocolate shell. If you've been around for a while you may have seen my recipe for homemade magic shell (or choc whizz) ice-cream topping. This is the same concept. Melted chocolate + coconut oil = a smooth chocolate topping that hardens on the biscuits. Just a note here - I tried with both chocolate chips and Whittaker's milk chocolate. The chocolate chips tasted too much like chocolate chips (such a weird thing to say) but it just wasn't right. The milk chocolate was WAY better! But you can just use what you have on hand.
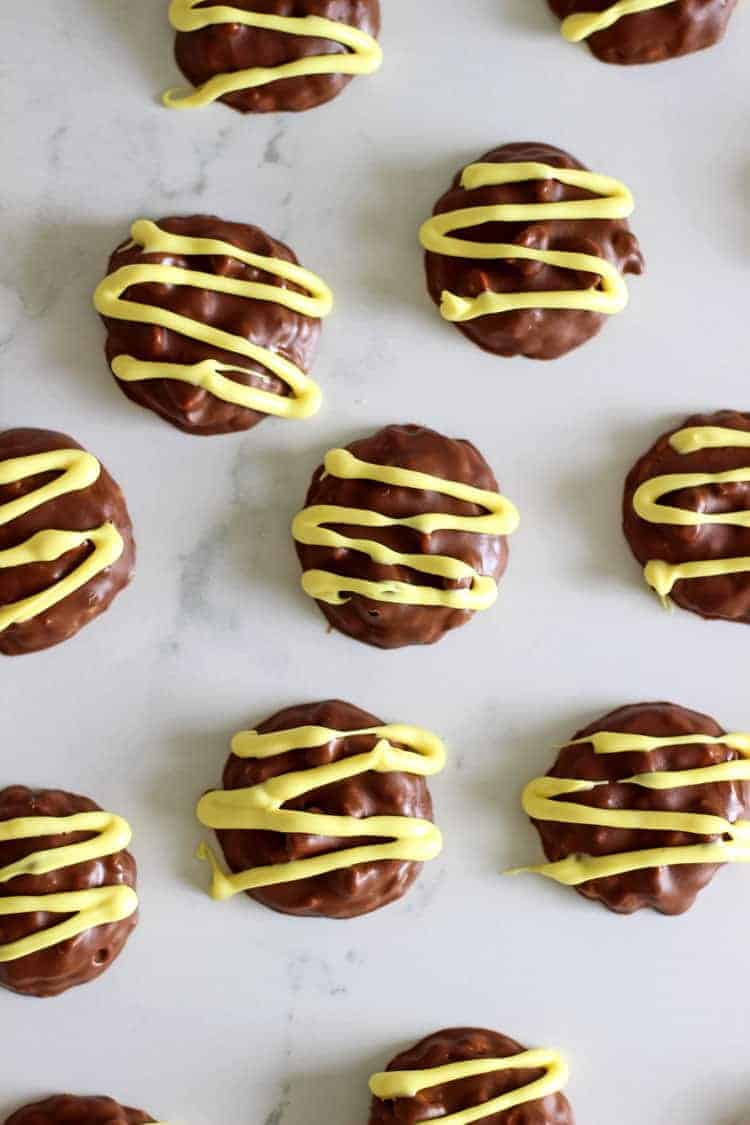
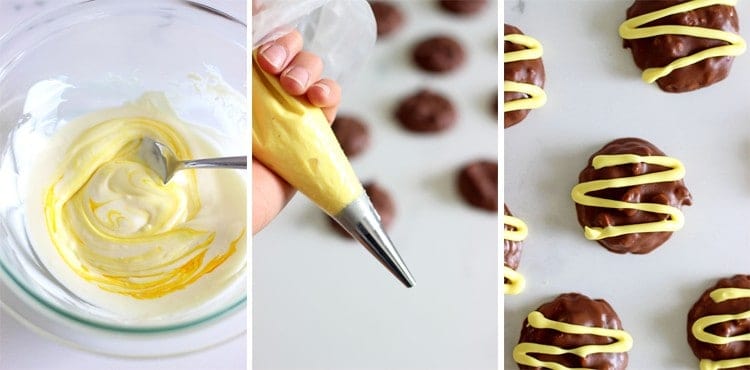
White chocolate squiggle top
This is not at all for flavour, it's purely for looks. But don't leave it off! This is what makes squiggles, squiggles! White chocolate buttons are melted and stir through just a couple of drops of yellow food colouring. Then drizzle it over the biscuits. I used a piping bag with a thin nozzle but you can just put it in a snaplock bag and snip off the end.
Pin this post to your cookies recipe board to save it for later and follow The Kiwi Country Girl on Pinterest for more great recipes!
Once the squiggle has set, you are good to go!
You can store your homemade squiggles biscuits at room temperature but I like them the best kept in the freezer. That way they last longer, stay crunchier and they're a little bit hidden out of sight which means less chance I will eat them all in one sitting...maybe!
Other homemade store bought biscuits to make:
Homemade 100's and 1000's Biscuits
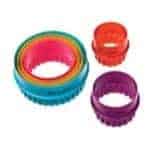
Here are the cookie cutters I used:
Double Sided Round Cookie Cutter - Set of 6
[mc4wp_form]
Made this? Tag me on Instagram @thekiwicountrygirl and hashtag it #thekiwicountrygirl. And if you tried and loved this recipe, please leave a comment and a rating below!
Homemade Squiggles Biscuits
Ingredients
Biscuits
- 60 grams butter (softened)
- ⅓ cup (70 grams) sugar
- 1 tablespoon milk
- ¾ cup (105 grams) flour
- ¼ teaspoon baking powder
- ⅛ teaspoon salt
Hokey Pokey Buttercream
- 50 grams butter (softened)
- 1 cup icing sugar
- 1 tablespoon golden syrup (see note 1)
- 1 teaspoon cream or milk
Hokey Pokey
- 1 tablespoon sugar
- 1 tablespoon brown sugar
- 1 tablespoon golden syrup (see note 1)
- ½ teaspoon baking soda
Chocolate coating
- 200 grams milk chocolate
- 1 tablespoon coconut oil
White chocolate squiggle
- 100 grams white chocolate buttons
- 2 drops yellow food colouring
Instructions
Biscuits
- Cream the butter & sugar in the bowl of a stand mixer or in a large bowl using a hand mixer on high speed until light in colour & fluffy.
- Add milk, flour, baking powder & salt and mix on medium-high speed for a couple of minutes until a dough forms.
- Roll the dough out on a piece of baking paper or on a silicone baking mat so that it is about 3-4mm thick - you will have a rectangle approx 30cm x 20cm big. Transfer the paper or mat with the dough onto a baking tray and refrigerate for at least 30 minutes.
- Pre-heat the oven to 180°C.
- Once the dough has chilled, use a 48mm (1 & ⅞") (or similar) round cookie cutter (with crinkled edges if you have one) and cut out as many cookies as you can. Transfer them to a lined baking tray. Re-roll the leftover dough to make more cookies. You should get at least 25 cookies.
- Bake for 10-12 minutes until the cookies are just starting to go golden on top. Remove from the oven and allow to cool for 10 minutes before transferring to a cooling rack.
Hokey Pokey Buttercream
- Add all ingredients to a medium sized bowl and using a stand mixer or hand mixer combine on high speed until fluffy. Set aside.
Hokey Pokey
- Prepare a baking sheet or tin by lining it with baking paper or a silicone baking mat. Make sure you have room for this in the freezer.
- Melt together golden syrup and sugars in a small pot on the stove until it starts to simmer. Once it starts bubbling all over, stop stirring and set the timer for 2 minutes. Don't stir it again until the timer has gone off, just let it bubble away.
- When the timer goes, take it off the heat and stir through the baking soda using a rubber spatula. The baking soda will react with the sugary liquid and foam up. Immediately scrape the hokey pokey onto the prepared baking sheet and put it in the freezer. It will cool at room temperature, but since we are going to be smashing it into pieces, it's better frozen.
- Freeze until the hokey pokey is hard (around 40 minutes). Place the piece of hokey pokey into a snaplock bag and using a rolling pin, smash into small pieces. You want the pieces to be no bigger than peas. Place the bag back in the freezer until you assemble the biscuits.
Assemble the biscuits
- Spread about ½ teaspoon of hokey pokey buttercream on each biscuit and top with hokey pokey pieces. Set the biscuits aside while you prepare the chocolate shell.
Chocolate coating
- Have a baking tray lined with baking paper or a silpat liner ready to place the chocolate covered biscuits on.
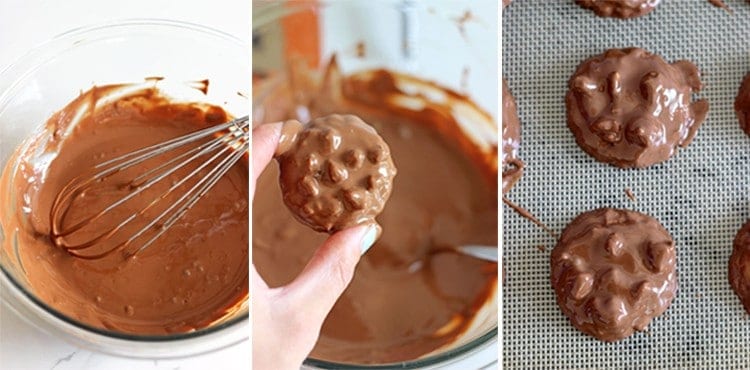
- Melt the chocolate & coconut oil in a medium sized microwave bowl for about 1 minute, stirring every 30 seconds, until melted and smooth. You can also do this using a double boiler.
- Dip each biscuit into the chocolate making sure the whole biscuit has an even covering. Allow any excess to drip back into the bowl. Place on the prepared baking tray to allow the chocolate to harden - if it is a warm day, you may want to place them in the fridge for 15 minutes to speed up the process.
White chocolate squiggle
- Melt the white chocolate buttons in a small microwave bowl for about 1 minute, stirring every 20 seconds until almost melted. You can also do this using a double boiler. Let it sit for a minute or so and the heat from the chocolate will finish the melting process. White chocolate can be a bit trickier than regular chocolate, but this trick helps me get it right each time.
- Add the yellow food colouring and stir until combined.
- Spoon the yellow chocolate mixture into a piping bag fitted with a small nozzle, or a snaplock bag that you can snip the corner off.
- Pipe squiggles onto the biscuits and allow to set.
- FINALLY! You're all done! Now enjoy the biscuits. Squiggles will keep in an airtight container at room temperature for 4-5 days, for a week in the fridge or a month in the freezer. I love them out of the freezer the best!
Notes
- If you don't have Golden Syrup you can use honey instead. The flavour won't be exactly the same but it's a close enough substitute if you can't get Golden Syrup

Anne says
Hi Laura, thanks so much for the recipe! I fell in love with Squiggles '96 (don't live in NZ) and have been looking for a good recipe ever since. Awesome!
My first batch is sitting in the fridge. Probably not for too much longer :))
Louise says
These are delicious! I tried the recipe for a school fundraiser but they might all get eaten at home…
Kirsten T. says
My husband and I honeymooned in New Zealand from the US almost 10 years ago, and got addicted to Squiggles. Oncd a year we pay a hefty shipping fee to buy a few packages and savour them for a week or two. When I came upon this recipe I was elated--they are JUST like the real deal, and we even made them minis which are easier not to feel guilty about eating 10 at a time! Thanks Laura for sharing this--soooo good!
Kate says
I love squiggles and can eat a packet on my own. I found this recipe - it is amazing. A bit fiddly to make (chocolate coating on biscuits) and I made a big mess in the kitchen but well worth it. Can't believe how like the real thing they are. Thanks xxx
Stacey says
Made these yesterday for my friend who lived in Auckland for 9 years. She has enlightened me about these delicious cookies and I think she will love the homemade ones when I gift them to her tonight!
I am already thinking of emulating these in cupcake form, since the hokey pokey buttercream is so darn tasty! Maybe a chocolate cake topped with hokey pokey frosting, white chocolate ganache filling, and topped with bits of hokey pokey and a final chocolate drizzle...
Laura says
That sounds DELICIOUS!!!
Diana says
As I'm using the Edmonds GF flour mix and it doesn't contain any xanthan gum or gar gum in their flour mix would you recommend I add some? Also what's the best method to coat these biscuits in the melted chocolate? Do you place it on a fork & dip into the chocolate to coat? Any advice appreciated.
Laura says
Hi Diana, I have no experience baking with gluten free flour sorry! For coating them, I usually just use my fingers. Dip it in one side and then flip it over (you could use forks here if you prefered!) It's definitely a messy process!! Laura
Victoria says
Um, YUM! These were my favourite cookie as a kid (and as an adult, if I'm being honest). I've recently gotten into baking, so I might have to give this one a bit of a bash! I mean, they don't have to LOOK pretty, right? Ha. No one can resist a good ol' Squiggles!
xo, Victoria
Laura says
They're the best right!! Yes definitely give them a go! There are lots of steps but they're all simple...you can do it! Would love to see how you get on 🙂 And even if they're not pretty, they'll still taste great!