Oreos, oreos, oreos!
Homemade oreos!!!
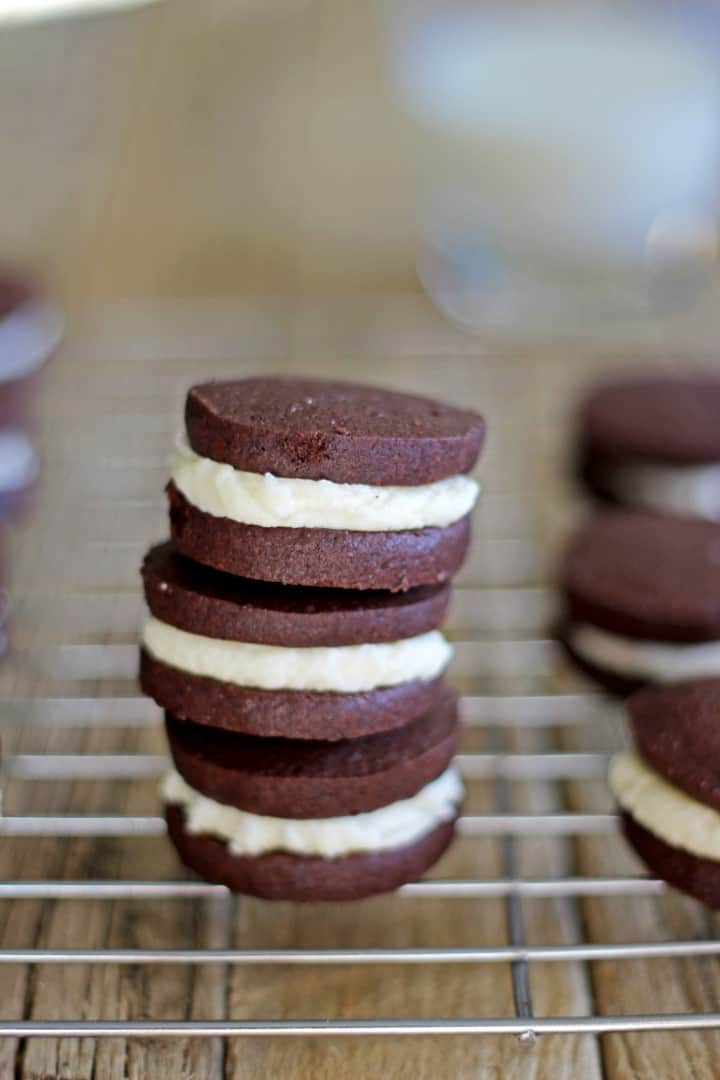
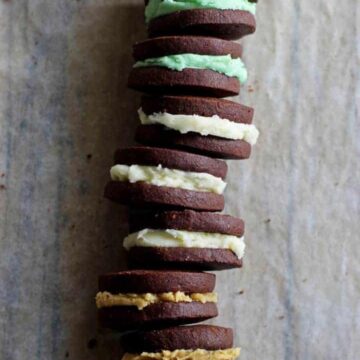
Guys, I haven't been this excited since I made these! But I'm super super excited to share these homemade oreos with you...and to make them even better, not only have we nailed the classic chocolate vanilla oreo, we have mint filling...and peanut butter!!
Life goals complete.
I don't buy a lot of cookies but if I do, it's always Oreos. Mostly because I like using them to make other things (hey, cheesecake crust) but also because they're delicious. So of course, I had to make them.
When I decided I wanted to give these a go I thought about how to get the cookies perfectly round. Rolling out the dough, cutting circles and then transferring them to a tray seemed tedious and time consuming so I racked my brains until I remembered my Mum's super simple slice & bake cookies. Duh! Make a round roll of cookie dough and just slice em up. Perfect! I even used pretty much the same recipe, just subbing out the brown sugar and adding cocoa powder...and lots of it to get that super dark chocolately colour and flavour of oreos.
Once you've made the dough you need to roll it up. Take your time making the rolls as round as you can so that the cookies will be a nice shape. They will probably squish down a little as you slice them but as long as the dough is well chilled, they should stay pretty round.
Chilling the dough here is mandatory, otherwise they will not slice well and will spread too much when you bake them. Chill the dough for at least 4 hours in the fridge, or if you can't wait that long, for 1 hour in the freezer.

Bake time is also crucial here. I tested them at 10 minutes, 12 minutes and 14 minutes. They were cooked through at 10 minutes but the cookies that were baked for 14 minutes were WAY crunchier. I'm usually a soft cookie kinda gal, but when it comes to oreos, crunch is exactly what we are going for. Any longer than 14 minutes and the cookies will start to burn around the edges, so keep a close eye on them after about 12 minutes in the oven.
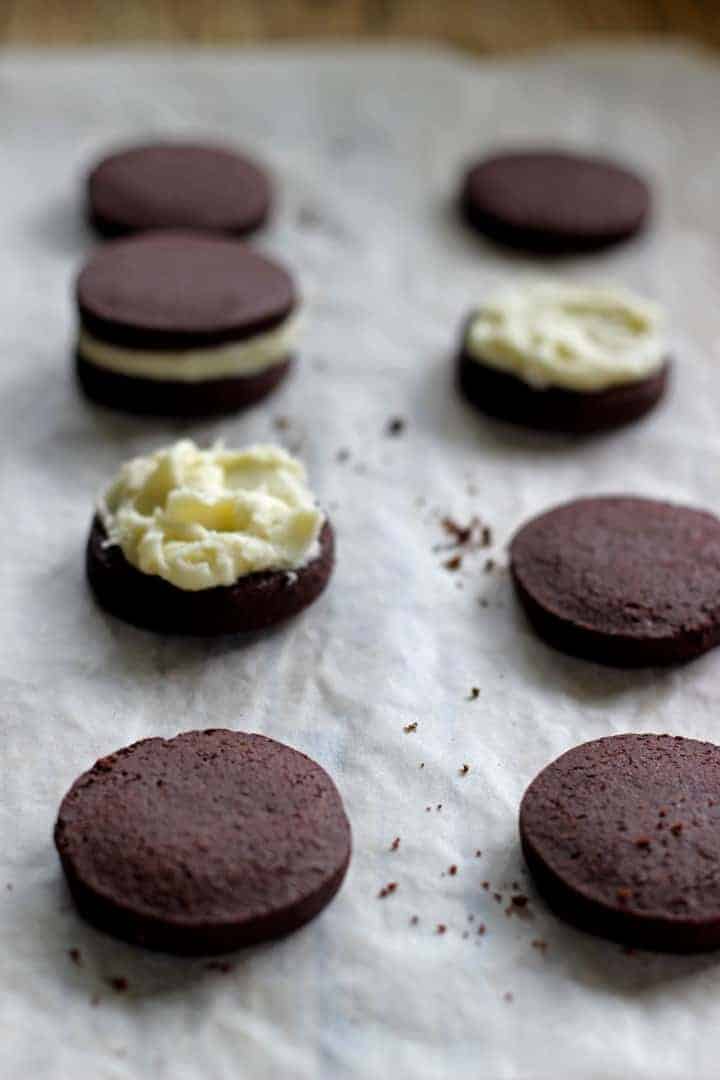
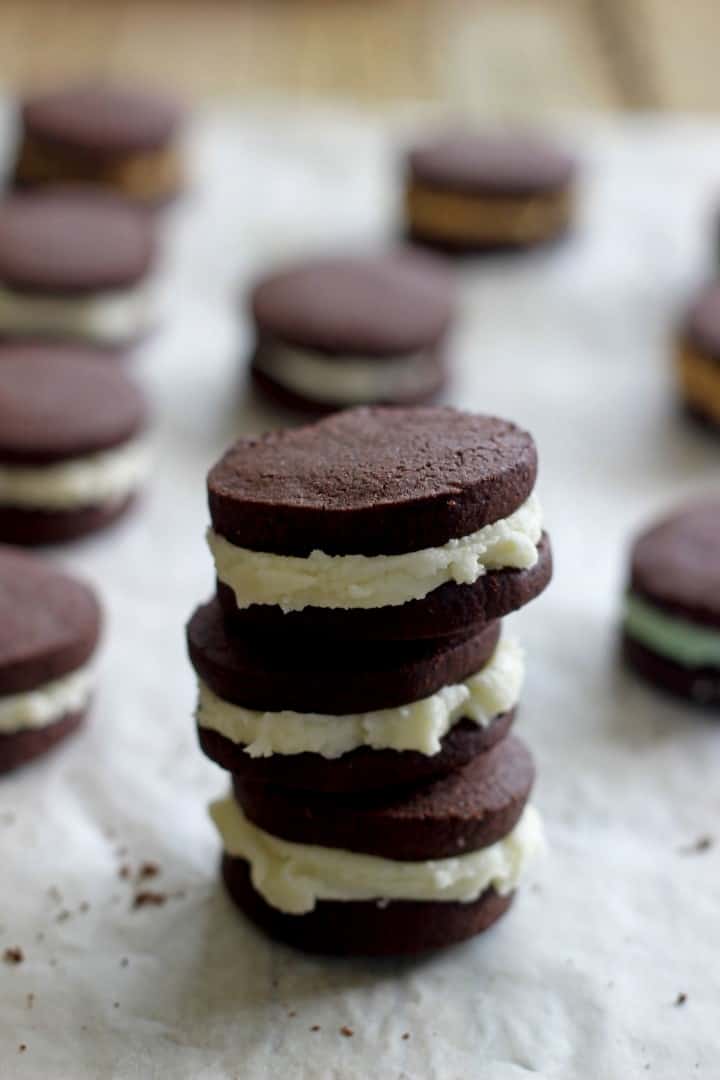
Once the cookies are baked, let them cool completely while you move on to the best part...the frosting!
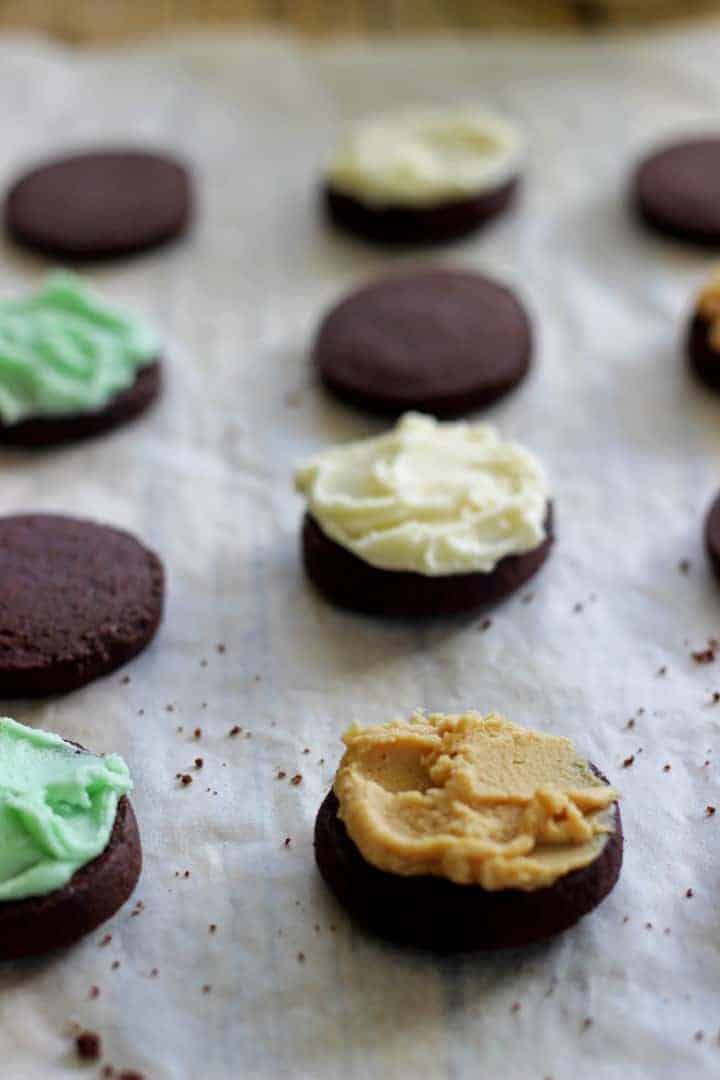
I started with a basic vanilla frosting which was perfect for homemade oreos. Buuut then I thought I would get a little creative and mix it up a bit. We can only get classic vanilla oreos here in New Zealand and I have major cookie jealousy with all the flavours we are missing out on. Not any more! A little peppermint extract and green food colouring makes mint oreos and peanut butter makes...um, peanut butter oreos. Duh. Both delicious! You could even get super creative and have vanilla frosting but add different food colouring to match them to anything...pink for girls, blue for boys...whatever you like!

They're the perfect combination of crunchy, sweet and fun. And they are impossible to resist so make sure you have a glass of milk handy...you'll need it after 2 of these guys. Ok, 3.
Fine, 5. I ate 5! You try not to!
[mc4wp_form]
Ingredients
- Oreos
- 125 g butter softened
- ½ cup sugar
- 1 egg
- 1 teaspoon vanilla extract
- 1 ½ cups flour 210g
- ½ cup cocoa powder
- 1 tablespoon cornflour
- ½ teaspoon baking powder
- ½ teaspoon salt
- Frosting
- 40 g butter really soft
- 1 ½ cups icing sugar sifted
- 1 ½ tablespoon milk
- To make flavours
- For vanilla - 1 teaspoon vanilla extract
- For mint - ½ teaspoon peppermint extract + a few drops of green food colouring
- For peanut butter - 1 tablespoon peanut butter
Instructions
- Cream butter & sugar in the bowl of a stand mixer on high speed until light & fluffy.
- Add the egg and vanilla and beat until well combined.
- Add flour, cocoa powder, cornflour, baking powder & salt and mix in well.
- Split dough in half and shape each half into a roll about 30cm long, try to make it as perfectly round as possible. Wrap in plastic wrap and chill in the freezer for 1 hour, fridge for at least 4 hours and even overnight. At this point, you can also put the rolls in the freezer to use at a later date.
- Pre-heat the oven to 180 degrees C.
- Remove the cookie roll from the fridge or freezer and unwrap. If using frozen dough, allow to thaw in the fridge for an hour or so.
- Using a sharp knife, carefully slice into ½ cm thick slices, trying not to squish the rolls. Lay out the cookies on a lined baking tray and bake for 12-14 minutes, checking them at 12 minutes. You want to bake them for as long as possible before they start to burn, in order for them to be as crunchy as possible. 14 minutes was perfect for me.
- Allow to cool on the tray for 5 minutes, then transfer to a cooling rack. Allow to cool completely before filling them with frosting.
- To make the frosting, using either a mixer or by hand, combine butter, icing sugar and milk until it is a spreadable consistency, adding more milk or icing sugar as necessary. Add the ingredients required to make the flavour of frosting you want. You can even split the plain frosting in 3 and add smaller amounts of each flavouring to have all 3.
- Spread a good amount of frosting on 1 cookie and sandwich another on top. Repeat with all cookies.
- Cookies will keep in an airtight container for 1 week but will start to soften over time. For maximum Oreo crunch, eat within 2 days

Kim @ Land of Zonkt says
Oh how fantabulous!
I don't know how you made oreos better but you did. These are fab.
I'm loving all the flavours. so very cool.
PS... I'd eat 5 too.
Thanks for linking up to YWF xx
Laura says
Hehe thanks Kim! The flavours were soooo good! 🙂
jayne says
Oh wow I am pinning these - they would be a hit with big an little kids I think. love your 3 flavours too - yum!
Laura says
I didn't test them on little kids but they were definitely a hit with the big kids! You could put any flavoured frosting in there too...I think I'll do strawberry next time...yum!
Vicki @ Boiled Eggs & Soldiers says
My girls are obsesesed with Oreo's so I'm going to help them make these on the weekend! Thanks for sharing the recipe with YWF too. x
Laura says
Woohoo!! I totally get their obsession...Oreo's are my favourite too! I hope you all like them!
Claire @ My Pink & Green Life says
Okay, wow, these look positively to die for and I MUST make them... although that might be a little dangerous as Eric doesn't like chocolate, so I'd have to eat them all myself and girlfriend does NOT have self-control around chocolate. 😛
Laura says
OMG he doesn't like chocolate??? Whaaat!! I kind of feel your pain - Josh doesn't like mint or peanut butter flavours with chocolate so I had to eat all those ones...hehe!!
Lisa @ Chocolate Meets Strawberry says
Oooh how exciting! It's so satisfying when you can recreate things like this at home and they turn out even better than the storebought version. I bet these would be better than actual Oreos! Love that you have created three different fillings for these too Laura - they all sound so good!
Laura says
Thanks Lisa!! I was so excited to make these! The fillings were all so good I still can't choose which is my favourite!
Kirsty says
Yay! So cool. I'm pretty sure I've bought peanut butter Oreos in NZ (I think they were Oreos brand anyway). I just quickly looked on Countdown website and they sell strawberry flavor Oreos, but no mention of peanut butter. I got mine from Pak n Save.
Laura says
Ooooo I'll have to keep an eye out! We're heading to the States in June and I actually think I'm going to need to take an extra suitcase to bring back food! Haha