If you love canned spaghetti, you need to know how to make it at home. Here is our family recipe, with step by step photos and instructions!
Up until a few years ago, I had NO idea you could make your own bottled spaghetti. We were at Josh's parents house for breakfast and Carol bought a jug of spaghetti to the table. It looked like bought spaghetti but it certainly didn't taste like it - it was SO much better!
The following year I helped Carol make it and since then we have become obsessed with this homemade spaghetti - Sadie too! And because you guys are loving all the preserving recipes I've been sharing, I knew I had to write this one up too.
Before we get started:
We use the overflow method to bottle this spaghetti. If you follow me on Instagram you'll know I've been talking a lot lately about why I am moving away from this method of preserving. The more I read into it, the more I think that using tested recipes and proper methods of heat processing jars of food is the way to go, purely from a food safety point of view.
That being said, my Granny and Mum have both bottled fruit using this method forever with no problems, and I have too. The only reason I'm moving away is because I love trying new things and the science behind how preserving is done using a water bath method makes a lot of sense to me. If you are interested in learning more, I can highly recommend the Blue Book Guide To Preserving (affiliate link) for lots of really useful information.
Anyway, the point is - we have always used the overflow method for this spaghetti. As with anything, if a jar doesn't seal you can't store it at room temperature. It must be refrigerated and eaten immediately or frozen. If you open a jar and it looks, smells or tastes a bit weird, get rid of it. If you are not comfortable with using this method we did try the water bath method with a few jars which I will explain below, so feel free to try that way.
So let's get into how we make spaghetti!
Click here to pin this to your preserving recipes board on Pinterest to save it for later.
You need:
- Jars with sealable lids (we use 500ml Agee Jars)
- Tomatoes, onions, sugar, plain salt and dry spaghetti
- A few basic kitchen things such as chopping board, food processor, knife, a large pot, ladle, a wide mouth jar funnel is helpful and a couple of tea towels.
Step 1: Sterilise your jars and wash lids/seals
I find the easiest way to sterilise your jars or bottles is to run them through the dishwasher on the hottest wash (ours is called hygiene but it may be called sterilise on your machine) This washes and sterilises them and as long as you keep the door shut until you are ready for the jars, it will keep them warm too! If you don't have a dishwasher, wash them thoroughly in hot soapy water and place them in the oven at 150°C for at least 15 minutes or until you need them.
Tip: Always prepare more jars than you think you will need. It is easier to put them back in the cupboard than to try to wash and sterilise one or two extras.
Wash the lids and seals in warm soapy water. We usually place the seals in a bowl and cover them with boiling water until we are ready to use them.
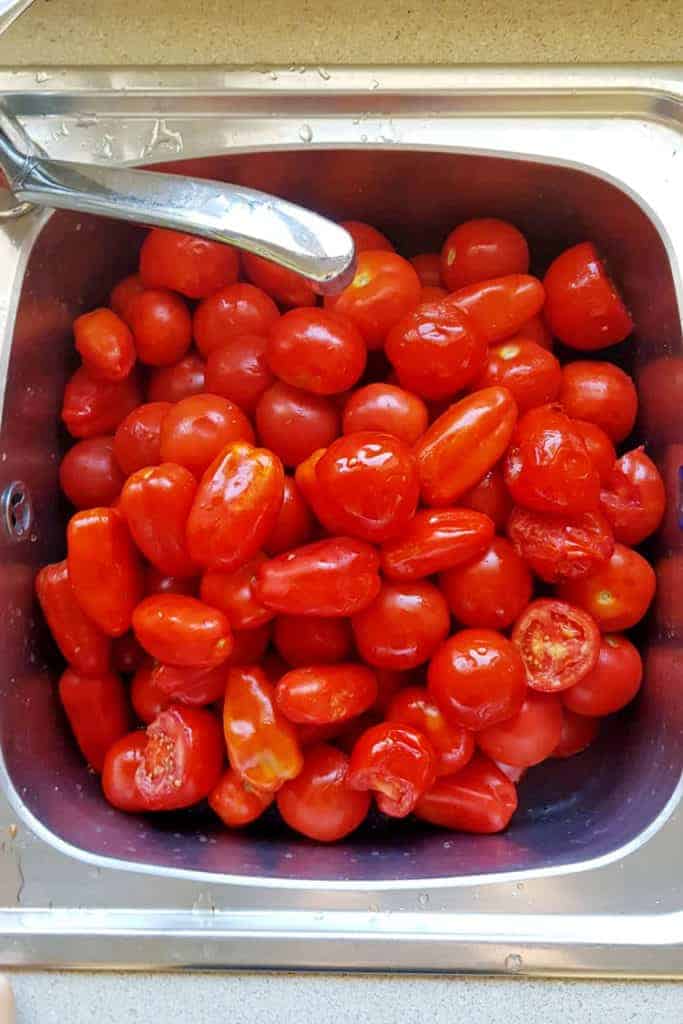
Step 2: Wash and prepare the tomatoes
Firstly, you need to wash the tomatoes. We put the tomatoes in the clean sink, fill it with water and give them a quick wipe down. This is also a good chance to inspect the tomatoes for any blemishes that need to be cut out.
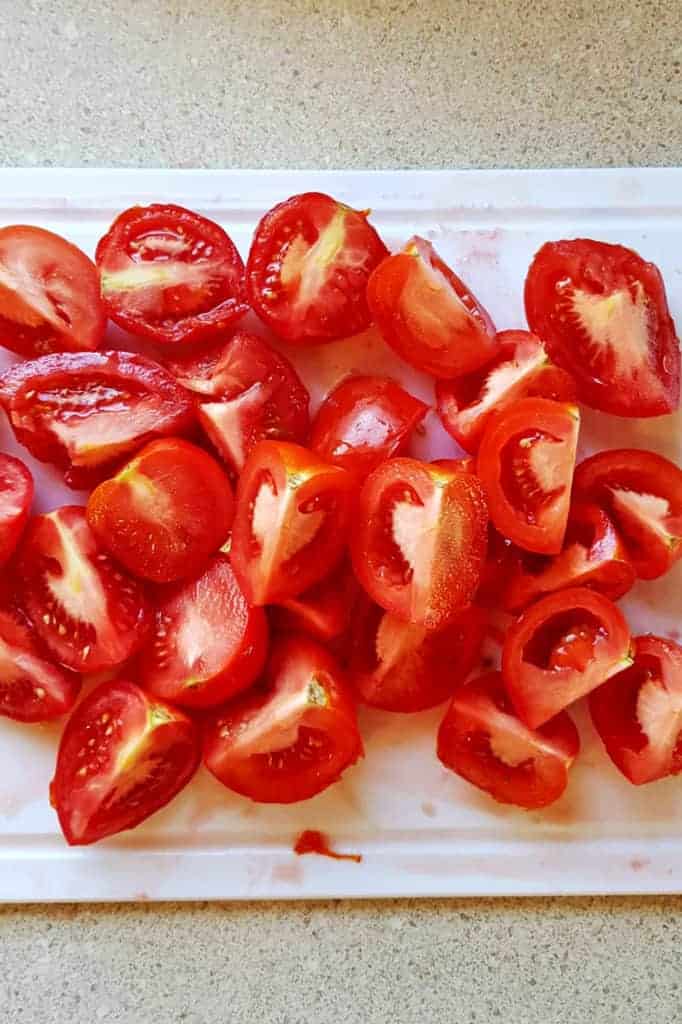
After washing them, chop them into a halves or quarters and place them in a food processor. Blitz them until they are sauce like and pour into a large (the biggest one you have!) stockpot on the stove. While you are blitzing the tomatoes, add the onions to the mix too and blitz them up as well.
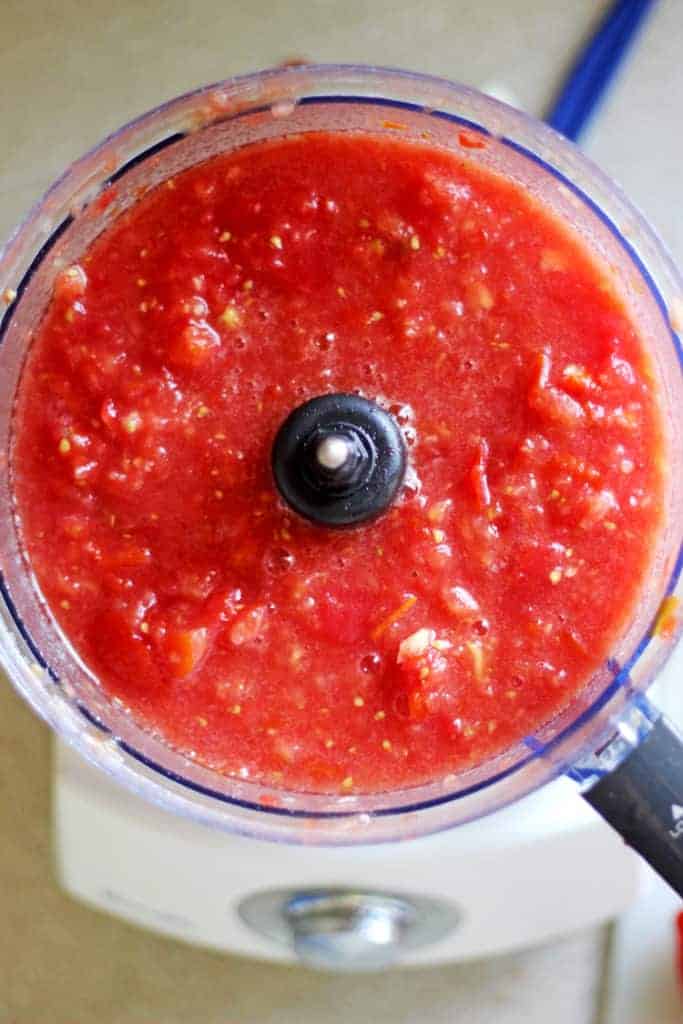
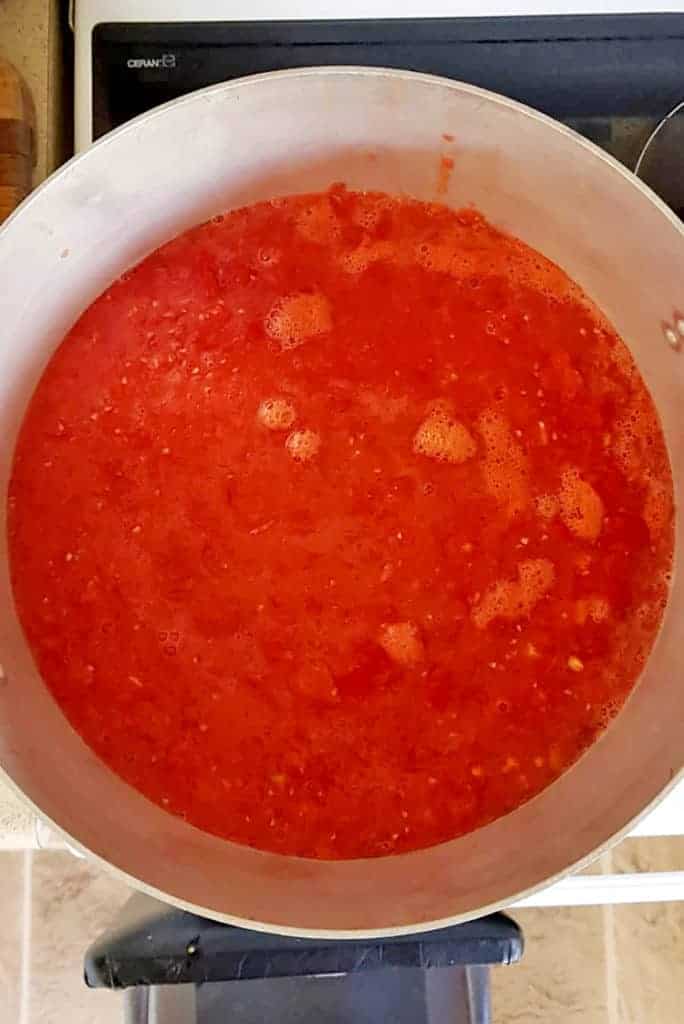
Once all the tomatoes and onions are in the pot, bring it to the boil. This can take a while so we usually have the heat turned on as we are adding tomatoes. This speeds up the process slightly. Once the mixture is at a rolling boil, cook for 15 minutes.
Step 3: Cook the spaghetti
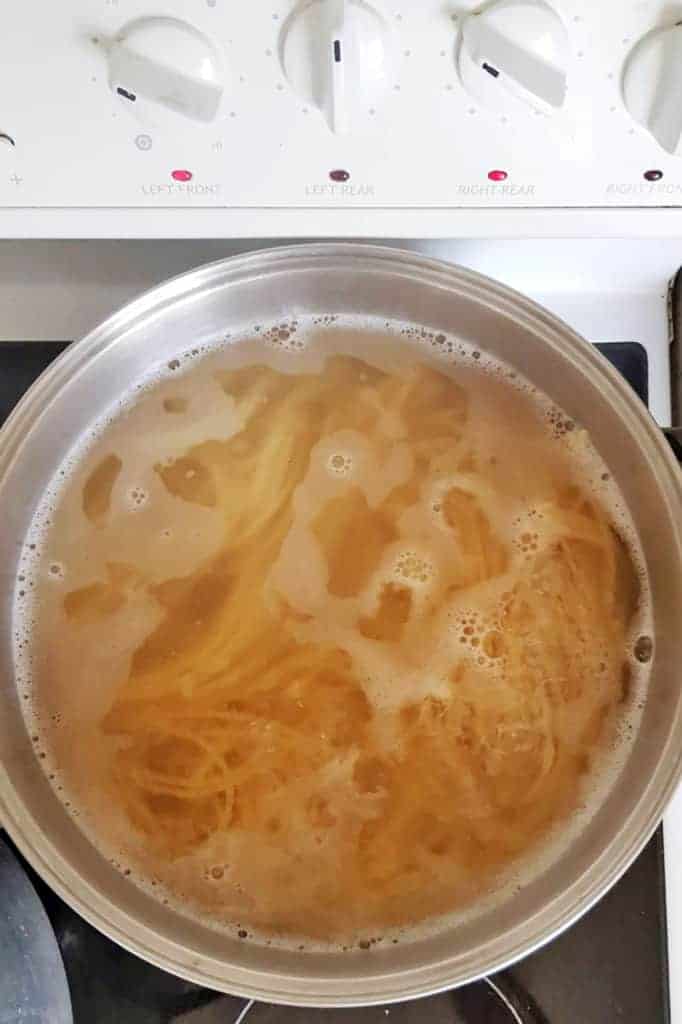
While the tomatoes are cooking, cook one packet of dry spaghetti. Bring a pot of water to the boil (don't add any salt) and cook the spaghetti for 10 minutes.
Step 4: Mix it all together
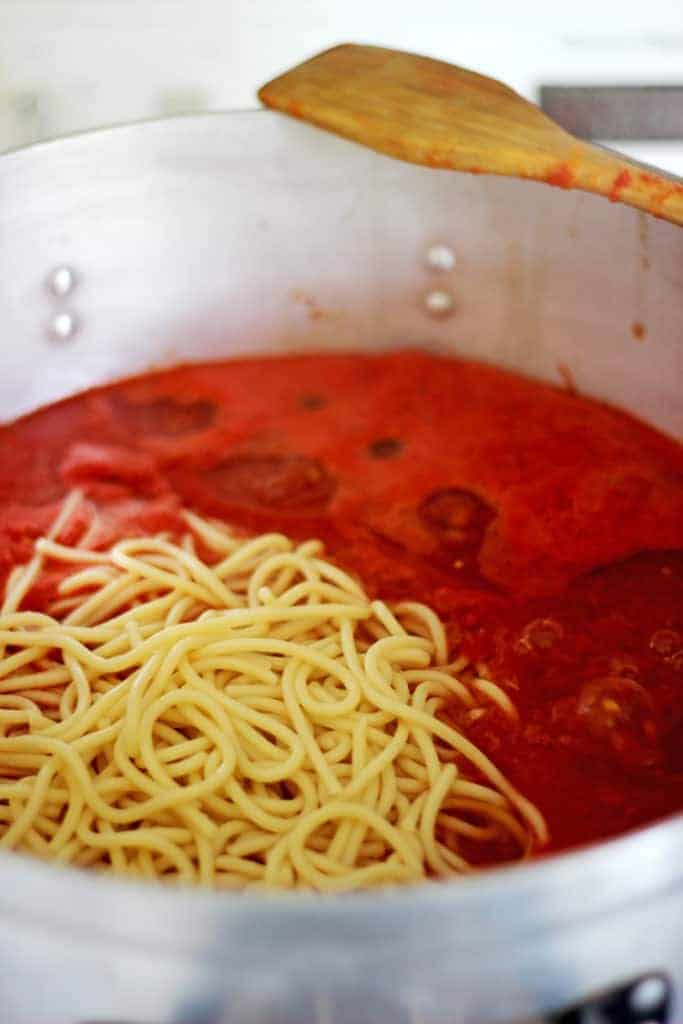
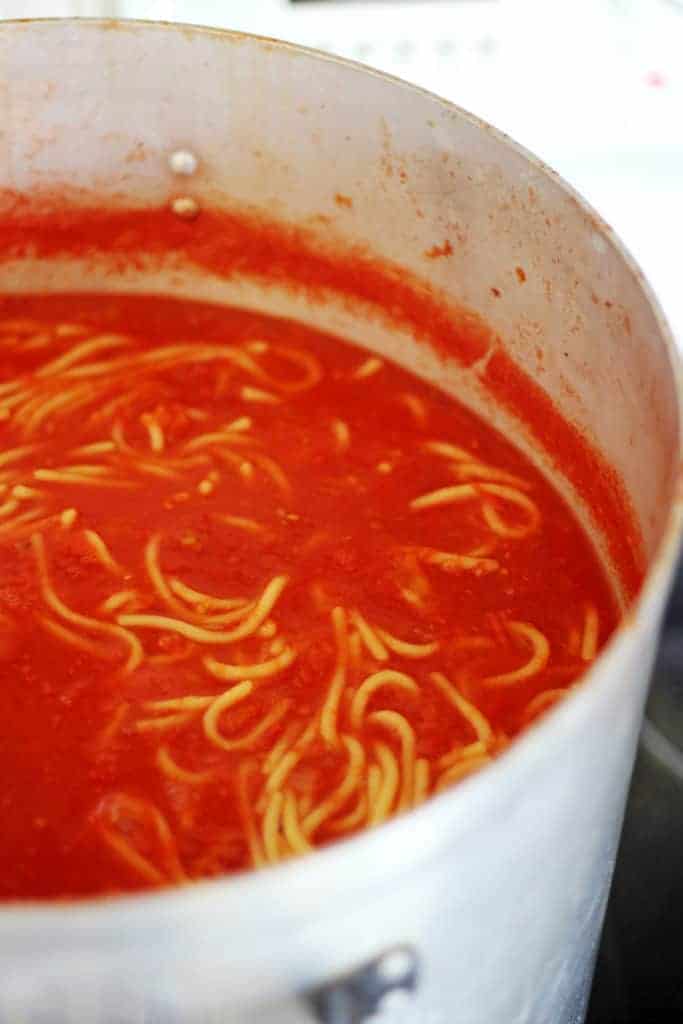
Once the tomatoes and spaghetti are both cooked, drain the spaghetti and add it to the tomato and onion mixture along with the salt and sugar. Mix it together and bring it back to the boil. Once it is boiling, cook for a further 30 minutes. At this stage, you will need to babysit the spaghetti. It can catch on the bottom of the pan pretty easily, so it's worth taking the time to stir it constantly. Once it has finished cooking, take the pot off the heat as you put it into jars.
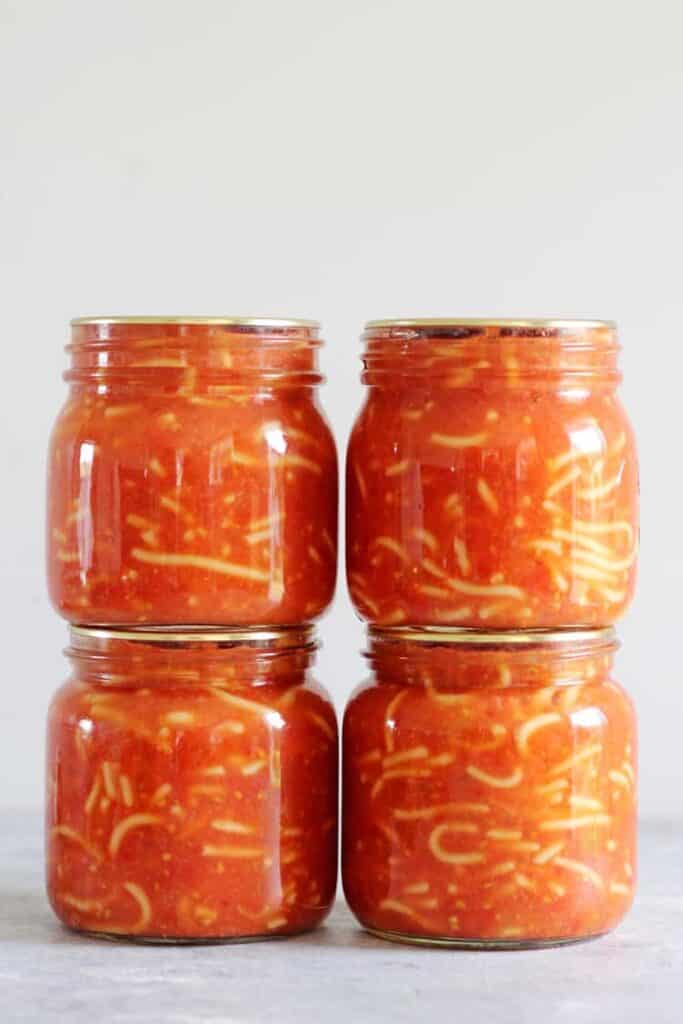
Step 5: Put it into jars
This is where it gets messy! Pouring spaghetti into jars is never going to be the cleanest job but if you have a plastic jug, a ladle and a wide mouth funnel it can be a little easier!
Remember that the jars need to be hot when adding the hot spaghetti, so we like to work 2 at a time, pulling them out of the oven or dishwasher and adding the spaghetti.
Fill a plastic jug with some of the spaghetti mixture. Use the ladle to pour the spaghetti into jars (using the funnel to guide it if you have one). You want to fill them until the spaghetti is as close to the top as you can get it, without it spilling over the rim of the jar. Run a clean spatula or chopstick around the inside of the jar to remove any air bubbles.
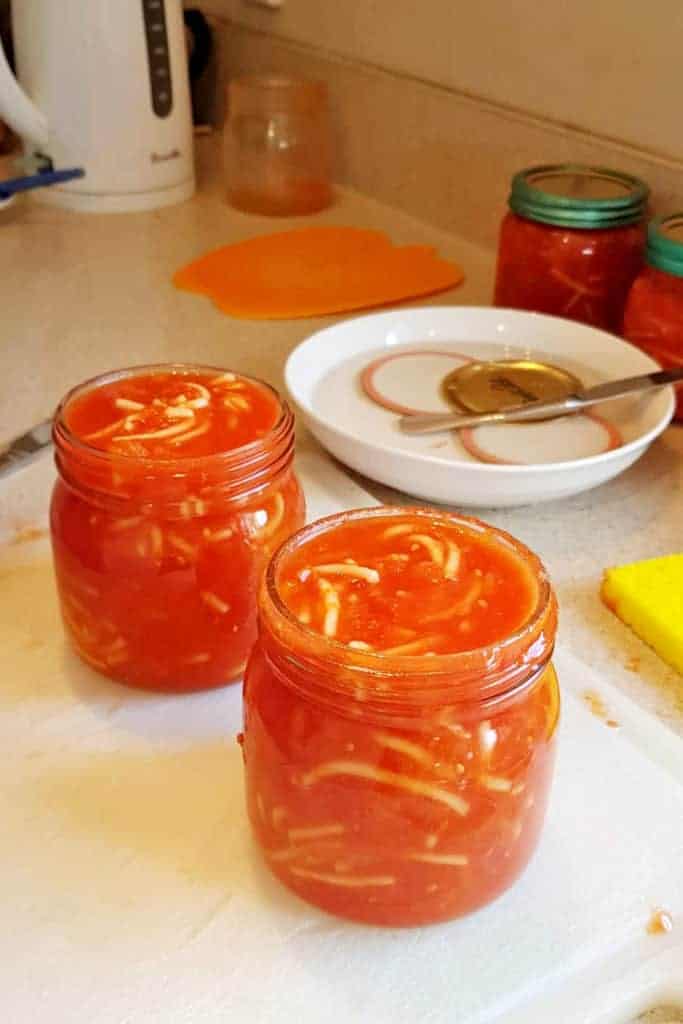
Using a clean damp cloth, wipe around the rim of the jar to remove any juice or seeds and if needed, top up the jar with a splash of boiling water to get the liquid right to the top.
Carefully place a seal on the jar and screw the ring/lid on tightly. Place the jar to the side and move on to the next one. You're done!
How to do this using the water bath method:
If you are more comfortable using the water bath method to process the jars, here is how we did it. Please note, this is not a tested recipe as we are apparently the only people on the internet who make bottled spaghetti!
Fill your biggest stock pot with enough water to submerge the jars and cover them with at least 3cm of water and bring it to the boil. You will need to place a clean tea towel or wire rack on the bottom so that the jars are not in direct contact with the pot.
Before filling the jars we added ¼ teaspoon of citric acid to the jar. This is what I do when bottling diced tomatoes and according to the Blue Book Guide To Preserving, that it what you should do when bottling any kind of tomatoes as it raises the pH level of the tomatoes to bring them into the high acid food zone that makes them safe for storing on the shelf. I realise that following this logic is contradictory to how we bottle them using the overflow method, but as I am learning about the water bath method and safe preserving, this is how I will be starting to do things.
Continue to fill the jars with spaghetti, however you will want to leave a gap at the top of about 1.2cm. Run a clean spatula or chopstick around the inside of the jar to remove any air bubbles. Then place the seal and the lid on.
Place the jars into the boiling water (a set of jar tongs is a super useful tool here) and once all jars are in the pot, bring it back to the boil and process the jars for 90 minutes. Once that time is up, turn off the heat and leave the jars in the water for a further 5 minutes before removing them from the water.
90 minutes might seem like a long time, but the only information that I've been able to find on water bath canning pasta (which can often be frowned upon) is from the Edmond's Cookbook, so I'm happy to use that as a guide.
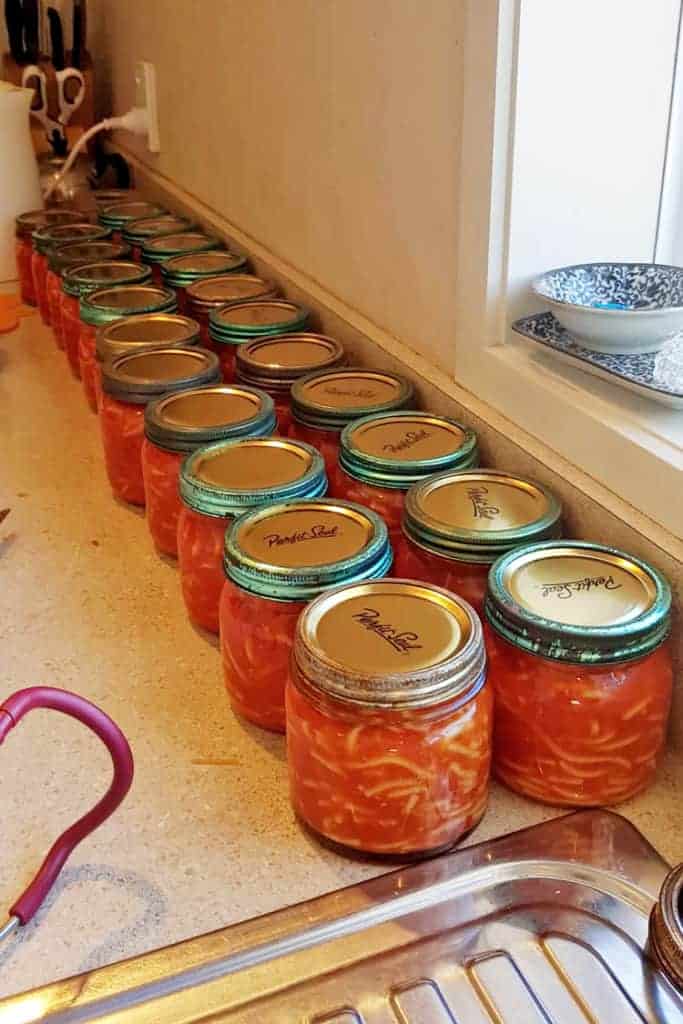
Step 6: Checking the seals
Once the jars have been processed, leave them sitting on the bench overnight. In the morning, check the seals. Remove the rings from the jars and if they have sealed, the seal will be concave and you won't be able to prise it off using your finger. If the jar has sealed, give the jar a clean with a damp cloth and store in a cool dark place. Properly sealed jars will keep for at least a year.
If the jars haven't sealed they cannot be stored at room temperature but they are still safe to eat. Just place the jar in the fridge and eat within a week. Alternatively, you could transfer the contents of the jar to a freezer proof container and store it in there.
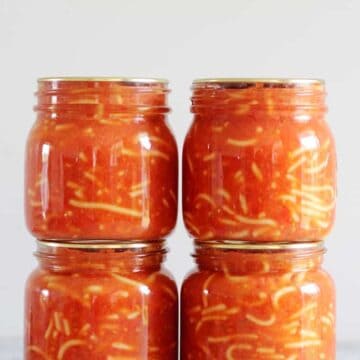
Now you can enjoy homemade spaghetti that is so much tastier than the bought stuff! If there is anything I haven't covered in this post, feel free to comment below and I will do my best to help.
Other preserving recipes you might like:
- How to preserve plums and other stonefruit (oven method)
- How to bottle feijoas (overflow method)
- Homemade Bottled Gherkins (Dill Pickles) (overflow method)
- How to freeze green beans
- How to bottle beetroot (overflow method)
Made this recipe? Tag me on Instagram @thekiwicountrygirl and hashtag it #thekiwicountrygirl.
Homemade Bottled Spaghetti
Ingredients
- 5.5 kg tomatoes
- 3 onions
- 500 grams dry spaghetti
- 2 Tablespoons plain salt (not iodised)
- 2 Tablespoons sugar
Instructions
Step 1: Sterilise your jars and wash lids/seals
- 2 hours before you need the jars, run them through the dishwasher on the hottest wash (ours is called hygiene but it may be called sterilise on your machine) Keep the door shut until you are ready for the jars as it will keep them warm until you are ready to use them. If you don’t have a dishwasher, wash the jars thoroughly in hot soapy water and place them in the oven at 150°C for at least 15 minutes or until you need them.Wash the lids and seals in warm soapy water. We usually place the seals in a bowl and cover them with boiling water until we are ready to use them.
Step 2: Wash and prepare the tomatoes and onions
- Put the tomatoes in the clean sink, fill it with water and give them a quick wipe down. Inspect the tomatoes for any blemishes that need to be cut out.After washing them, chop them into a halves or quarters and place them in a food processor. Blitz them until they are sauce like and pour into a large (the biggest one you have!) stockpot on the stove. While you are blitzing the tomatoes, add the onions to the mix too and blitz them up as well.Once all the tomatoes and onions are in the pot, bring it to the boil. This can take a while so we usually have the heat turned on as we are adding tomatoes. This speeds up the process slightly. Once the mixture is at a rolling boil, cook for 15 minutes.
Step 3: Cook the spaghetti
- Bring a pot of water to the boil (don’t add any salt) and cook the spaghetti for 10 minutes. Drain when cooked.
Step 4: Mix it all together
- Add the drained spaghetti to the tomato and onion mixture along with the salt and sugar. Mix it together and bring it back to the boil. Once it is boiling, cook for a further 30 minutes. At this stage, you will need to babysit the spaghetti. It can catch on the bottom of the pan pretty easily, so it’s worth taking the time to stir it constantly. Once it has finished cooking, take the pot off the heat while you are filling the jars.
Step 5: Put it into jars (the overflow method)
- Remember that the jars need to be hot when adding the hot spaghetti, so we like to work 2 at a time, pulling them out of the oven or dishwasher and adding the spaghetti.Fill a plastic jug with some of the spaghetti mixture. Use the ladle to pour the spaghetti into jars (using the funnel to guide it if you have one). You want to fill them until the spaghetti is as close to the top as you can get it, without it spilling over the rim of the jar. Run a clean spatula or chopstick around the inside of the jar to remove any air bubbles.Using a clean damp cloth, wipe around the rim of the jar to remove any juice or seeds and if needed, top up the jar with a splash of boiling water to get the liquid right to the top.Carefully place a seal on the jar and screw the ring/lid on tightly. Place the jar to the side and move on to the next one. You’re done!
Step 5: Put it into jars (the water bath method)
- Fill your biggest stock pot with enough water to submerge the jars and cover them with at least 3cm of water and bring it to the boil. You will need to place a clean tea towel or wire rack on the bottom so that the jars are not in direct contact with the pot.Before filling the jars add ¼ teaspoon of citric acid to the jar. Continue to fill the jars with spaghetti, leaving a 1.2cm a gap at the top. Run a clean spatula or chopstick around the inside of the jar to remove any air bubbles. Place the seal on the jar and screw on the lid/band until just tight.Place the jars into the boiling water (a set of jar tongs is a super useful tool here) and once all jars are in the pot, bring it back to the boil and process the jars for 90 minutes. Once that time is up, turn off the heat and leave the jars in the water for a further 5 minutes before removing them from the water.
Step 6: Checking the seals
- Once the jars have been processed, leave them sitting on the bench overnight. In the morning, check the seals. Remove the rings from the jars and if they have sealed, the seal will be concave and you won’t be able to prise it off using your finger. If the jar has sealed, give the jar a clean with a damp cloth and store in a cool dark place. Properly sealed jars will keep for at least a year.If the jars haven’t sealed they cannot be stored at room temperature but they are still safe to eat. Just place the jar in the fridge and eat within a week. Alternatively, you could transfer the contents of the jar to a freezer proof container and store it in there.

Debra says
I do SpaghettiOs and the WB time for them is 45 minutes. I’m just curious why you do 90 minutes WB? And could you also tell me what type of noodles that you used? I realize it’s spaghetti but it was it like not whole wheat?
Laura says
I struggled SO much to find any information on how long to waterbath this for, as my mother in law has only ever used the overflow method for this but I wanted to try water bathing instead! The 90 minutes came from an old cookbook that I found with that time in it, so I went with that! The spaghetti we use is just regular dried spaghetti pasta - not whole wheat. We can't get the O's pasta here, otherwise I would love to try that!
Henriette says
I have made my own Spaghetti in tomato sauce for years and have never added extra acid. I would like to do this now as some of the tomatoes are lower in acid these days. Can I add the citric acid to the above bulk recipe once it is ready to bottle or do I add it to each bottle? Also, how much should I use? Thanks
Laura says
Hi Henriette, I always add it individually to each bottle to be sure each jar gets the correct amount.
Danna Townsend says
Just a question you add citric acid when you do the boil method do you add it to the other method you do
Laura says
Hi Danna, yes I have been lately, the original recipe doesn't say to do it but I have been just to help raise that acidity level like I do with all tomato based products that don't contain vinegar!
Karl says
Be careful of botulism! You have to make sure that the tomato sauce has a low enough PH, otherwise it can be very dangerous (even fatal). To kill the spores you'll need a pressure canner.
Laura says
Hi Karl - this recipe is definitely not advertised as a "tested and safe for home canning" recipe, more as a nostalgic recipe for those who remember their grandmothers making this spaghetti! I've done a whole lot of research and have found absolutely nothing on canning spaghetti (water bath or pressure canning!) so we just continue to do what works for us!
Andrew Vine says
Thank you so much. My mum made this recipe once when I was a kid and it was great and loved it so much, she can't remember where she got it from.
I'm sure she did the water boil method and it lasted for months till we demolished it all lol.
Elle says
I am so glad I found this recipe! I am big into canning everything I can from our garden, and my kids love Alphaghetti so I want to try making my own this year! Do the noodles not get soggy from being cooked and then sitting in the liquid? Could I boil the tomatoes until it reaches appropriate heat and thickness then add the dry noodles right before canning?
Thanks!
Laura says
Somehow it doesn't go soggy! It's pretty great! I'm not sure how it would go adding the noodles dry, I think they would end up needing more liquid as they will absorb a lot of the liquid from the tomatoes so I couldn't really say with confidence it would work well!