Bottling plums and stone fruit is the perfect way to preserve the summer harvest to enjoy all year round. If you are new to bottling fruit, here is an easy to follow, step by step tutorial on exactly how to do it!
Update September 2020: I now exclusively use the water bath method for canning/bottling everything as an extra layer of food safety. I will be updating instructions over the next few months to share how I do that. I have never had any problems bottling them this way but now prefer the water bath method in terms of ease and having a higher success rate with jars sealing. You can read all about water bath canning in this post. Laura
When I was a kid, bottling season was always a big deal in our house. My grandma would come and stay to help my mum bottle boxes and boxes of peaches, pears and more. On the other side of my family, my Granny also used to bottle a lot of fruit, especially plums.
Our wardrobes were always full of colourful bottles of fruit and I don't think a bought tin of peaches ever crossed the threshold to our house!
Click here to Pin this to your food preserving board on Pinterest to save it for later.
Fast forward to now and even though bottling fruit is nowhere near as commonplace as it used to be, it's such a great way to preserve summer fruits to enjoy all year round! It's not cost effective to buy the fruit (my mum said they used to buy peaches for less than $1.50 per kg which made it worthwhile) but if you have a tree or know someone with one, it's well worth doing.
It can seem like a scary process and that you will need a lot of fancy equipment, but when it comes down to it, it's really quite simple and you probably have everything you need in your kitchen already!
The method I have outlined below is how I preserve my fruit. I am writing a post explaining more in detail the other methods of sterilising bottles and heat processing jars of fruit which I will link to when it is live.
You need:
- Jars with sealable lids (I use Agee or Ball Mason Jars)
- Stone fruit (as much as you have)
- Water
- Sugar
- A few basic kitchen things such as chopping board, knife, a large pot, ladle and a couple of tea towels.
A common question that I get asked is "can I reuse jam/pasta sauce jars to preserve fruit"
The short answer is yes - I have preserved pickles, diced tomatoes and jams in reused jam and other jars. I don't tend to reuse jars for fruit simply because they're not big enough! I like to fit a lot of fruit into a jar. I definitely prefer to use Agee jars (and have just purchased some smaller Ball Mason Jars) that have new seals as this way, I am certain that I am using the best jars I can with the highest chance of them sealing and being safe. If you are not lucky enough to have inherited jars from your mum or Grandma (thanks Mum!) you can buy Agee (or Perfit) jars and seals at the supermarket, from Stevens or check out second hand shops or Trademe for bargain. Briscoes also has a great selection of preserving jars that you can buy.
So let's get into it!
Step 1: Sterilise your jars and lids/seals
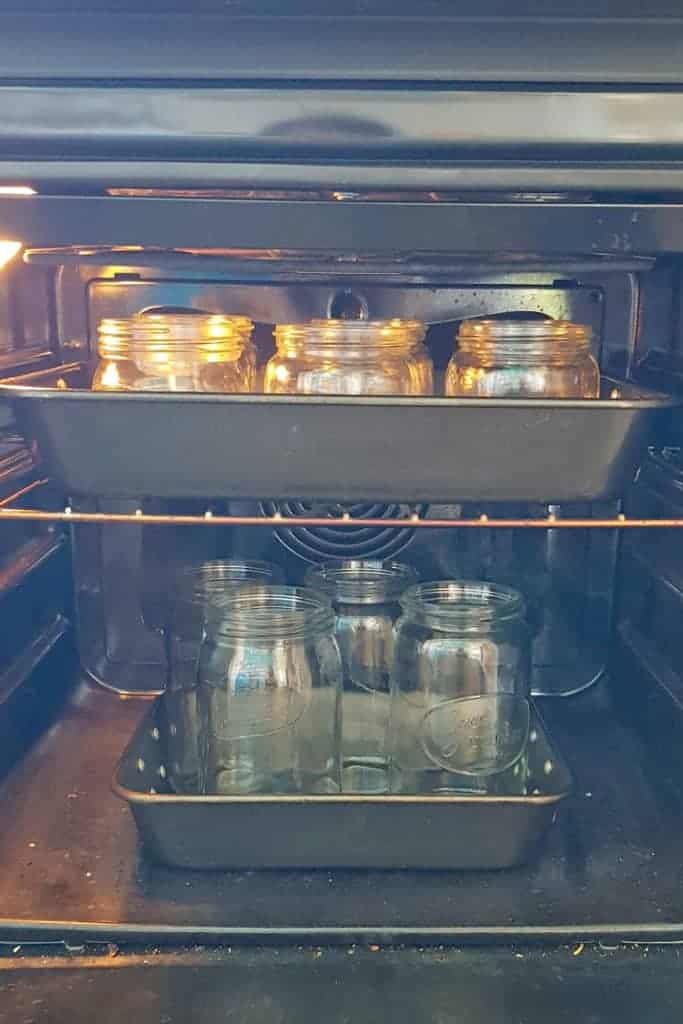
I find the easiest way to sterilise your jars or bottles is to run them through the dishwasher on the hottest wash (ours is called hygiene but it may be called sterilise on your machine) This washes and sterilises them and as long as you keep the door shut until you are ready for the jars, it will keep them warm too! If you don't have a dishwasher, wash them thoroughly in hot soapy water and place them in the oven at 150°C for at least 15 minutes or until you need them.
Tip: Always prepare more jars than you think you will need. It is easier to put them back in the cupboard than to try to wash and sterilise one or two extras.
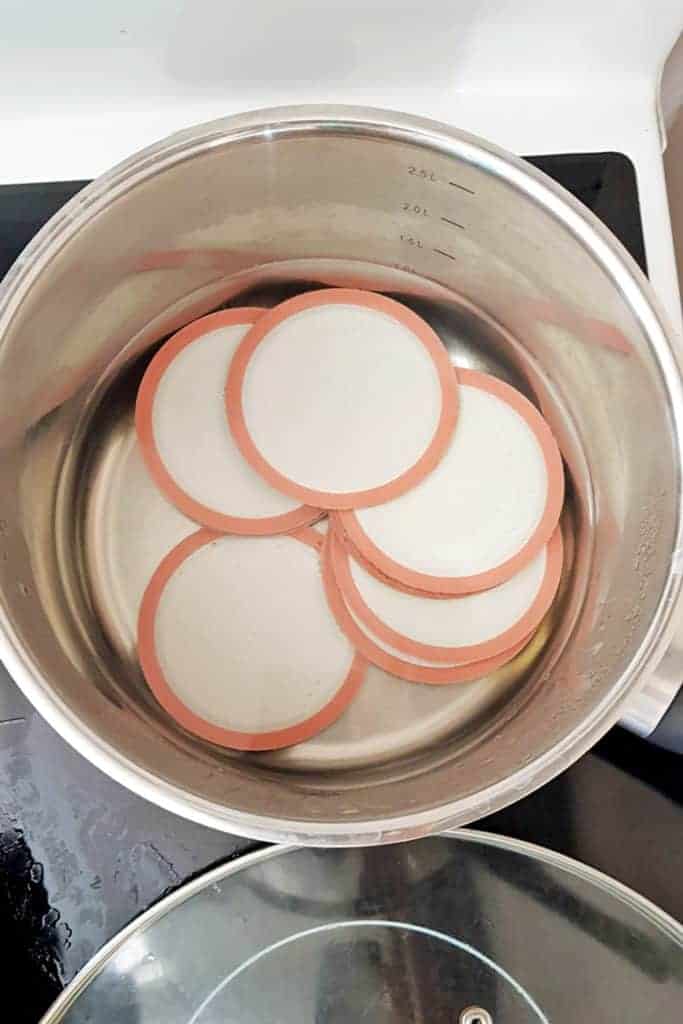
To sterilise my lids and seals I place them in a pot, cover them with water and bring to them to the boil. I then reduce the heat to a simmer and keep them in the water until ready to use.
Step 2: Make the sugar syrup
In a large pot, combine sugar and water to make the sugar syrup that will fill the jars. The ratio of water:sugar is up to you and depends on how sweet you like it. I usually work on the following ratios:
- Heavy syrup - 3 cups water to 2 cups sugar
- Medium syrup - 3 cups water to 1 cup sugar
- Light syrup - 3 cups water to ½ cup sugar
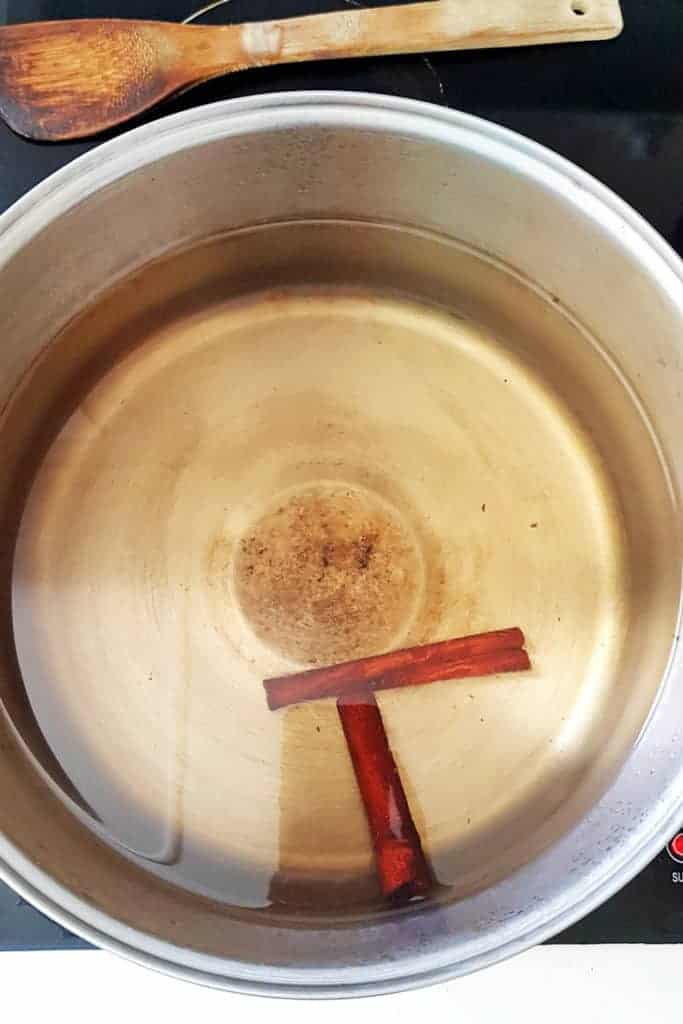
I tend to go for the medium syrup most times, although I did between heavy and medium for these plums as they were quite tart. It is up to you and I have found no difference in how long they keep as long as they have been correctly processed and sealed, but the heavier syrup will keep for longer once opened in the fridge. I also added a couple of cinnamon sticks for extra flavour but that is optional.
Once you have decided on the ratio, add the sugar and water to a large pot and bring to the boil - boil for a couple of minutes until the sugar has dissolved and keep simmering until you are ready to use it. The liquid needs to be hot when it goes into the jars.
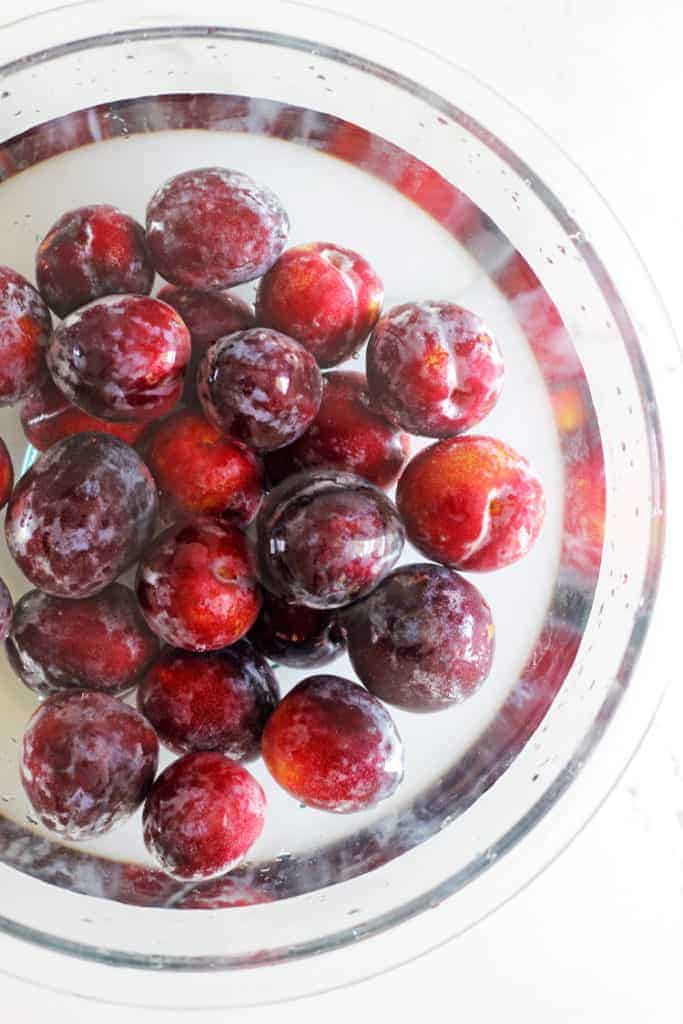
Step 3: Wash & prepare the fruit
While the sugar syrup is cooking, prepare the fruit. I do this differently depending on the fruit I am using but I always wash the fruit first, just by filling up a large bowl or my sink (that has been cleaned!) with water, and just giving the fruit a light wipe down. This is also a great chance to pull out any pieces of fruit that are bruised or very ripe - these are not good to use for bottling, save them and stew them to put in the freezer!
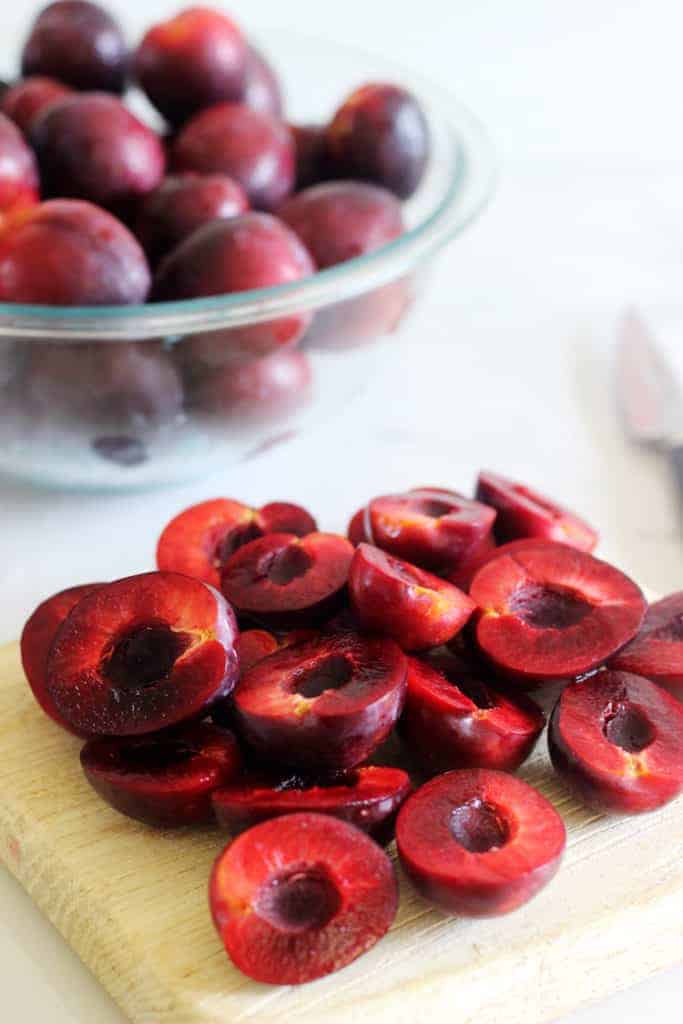
Once the fruit has been washed, peel (if necessary) and slice. Here is how I prepare my fruit depending on what it is:
- Plums and apricots - half and remove the stone. You can leave them whole but I find they pack into jars much better in halves.
- Peaches - peel and slice into segments - discard the peel and stones.
Step 4: Pack the fruit and syrup into jars
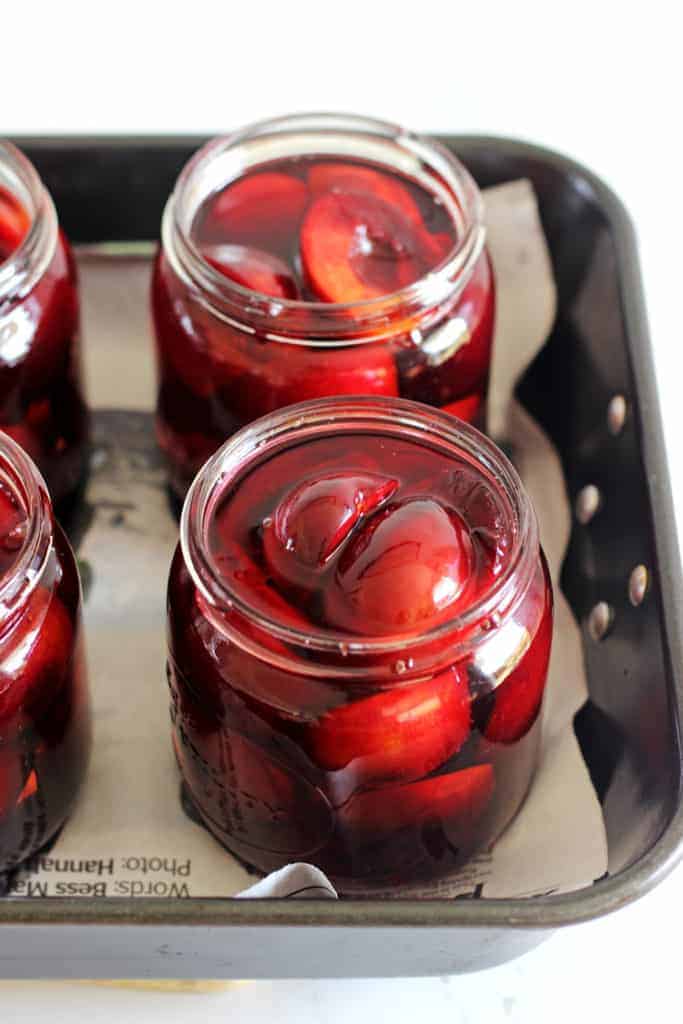
Time to pack the fruit and syrup into the jars! The important thing to remember here is that both the jars and the syrup need to be hot. Pouring hot syrup into cold jars is when breakages happen, so make sure you leave the jars in either the dishwasher or oven until you are ready to use them. If you are new to preserving, it may help to fill one jar at a time with both fruit and syrup until you are confident to pack all the jars at once.
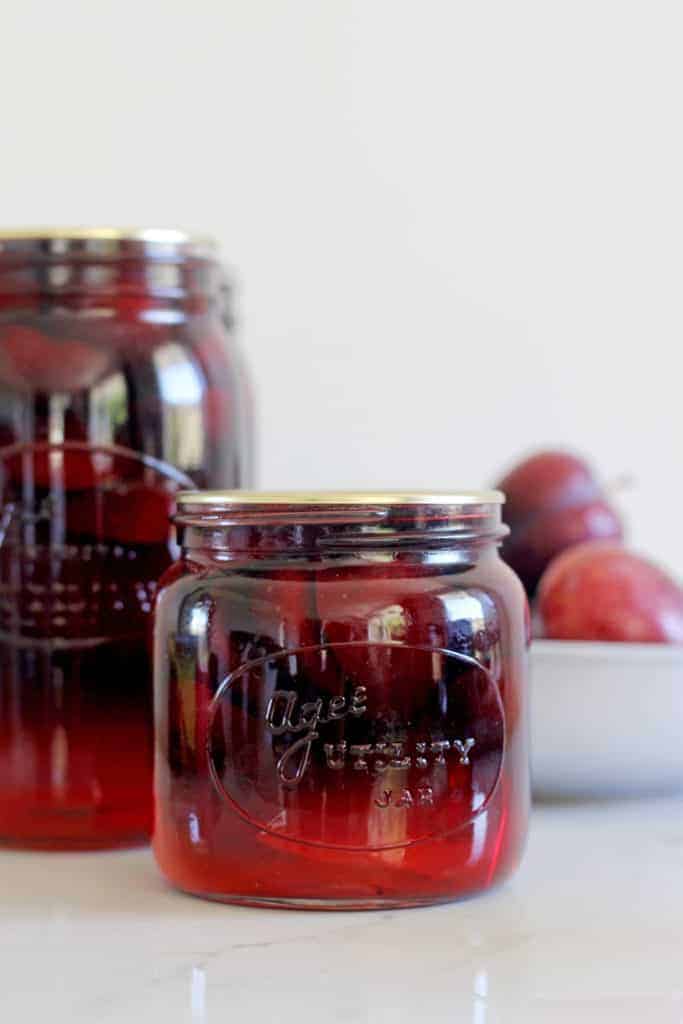
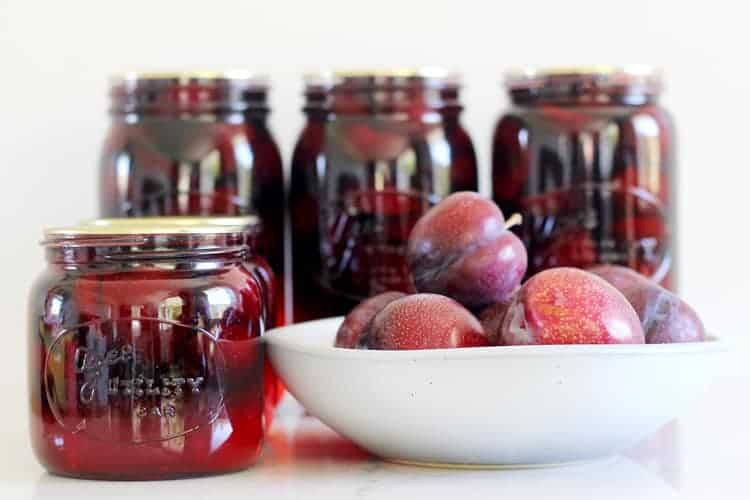
Because I process my jars of fruit in the oven, I like to pack the jars in the roasting tray that I put the jars in the oven into. This saves transfering hot and heavy jars. I line a big flat bottomed roasting dish with newspaper (so that any spills don't burn), take a jar out of the dishwasher or oven and place it in the roasting dish. Pack as much fruit as you can into the jar, leaving a couple of centimeters at the top of the jar. I usually fit about 14 plums (28 halves) into a 1 litre Agee jar or 7 plums into a 500ml jar.
Once you have as much fruit in the jar as you can fit, use a ladle to fill the jar up with the hot sugar syrup. Fill it almost to the top (leaving about 1.5cm) and then run a clean butter knife or small rubber spatula (I usually run this through the dishwasher with the jars) around the inside of the jar to make sure there are no air bubbles in the jar. Use a clean damp cloth to wipe around the rim of the jar.
Use tongs to remove a seal and a lid out of the hot water and carefully place the seal on the jar and tighten the ring around it until you just meet resistance.
Repeat until you have run out of fruit.
Step 5: Heat processing the jars
There are several methods that you can use to heat process the jars once they are packed.
My mum and grandmothers both used to microwave the jars before placing the lids and seals on and then used the overflow method to place the lids on. I have done this before but the more I have researched into bottling methods, the more I like using the oven or water bath method. I explain how to use the overflow method in this post.
Another method for bottling fruit is to process the jars in the oven. I heat the oven to 140°C, place the full jars in the oven and process for the time suggested in a preserving book I have (see below). Once they have processed for the recommended time, remove the jars from the oven and place them on a tea towel on the bench. Leave them overnight and check in the morning to see that the jars have sealed. Remove the rings from the jars and if they have sealed, the seal will be concave and you won't be able to prise it off using your finger. If the jar has sealed, give the jar a clean with a damp cloth and store in a cool dark place. Properly sealed jars will keep for at least a year and I have kept fruit for 2 years with no problems.
Recommended oven processing times for fruits (from The Preserving Book, Lynda Brown)
- Plums - 50-60 minutes (if plums are halved)
- Peaches - 50-60 minutes (halved)
- Apricots - 40-50 minutes
My preferred method is the water bath method. I now use the water bath method exclusively for my preserving. This post will give you more information on this method and why I use it.
I also have a post on water bath preserving peaches which is the method I also follow for water bath preserving plums.
Recommended water bath preserving times for fruit:
- Plums - 20 minutes for 500ml jars, 25 minutes for 1L jars
- Peaches - 20 minutes for 500ml jars, 25 minutes for 1L jars
- Apricots - 20 minutes for 500ml jars, 25 minutes for 1L jars
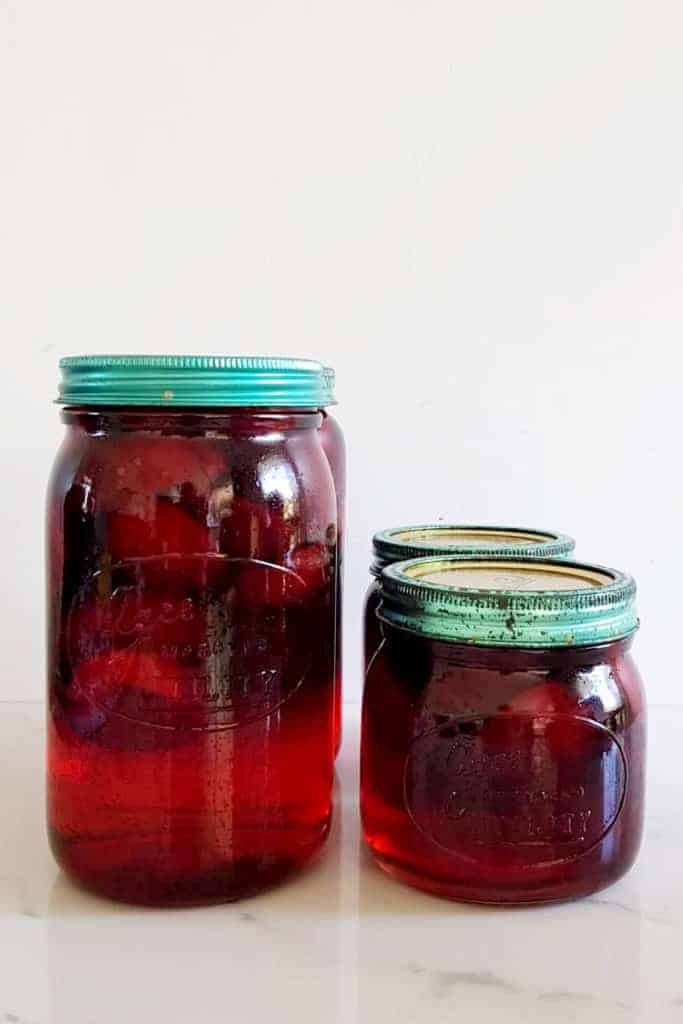
If the jars haven't sealed they cannot be stored at room temperature but they are still safe to eat. Just place the jar in the fridge and eat within a week. Depending on the type of jar you have used (Ball Mason Jars freeze well but I haven't tried with Agee Jars) you can pop the whole jar in the freezer, or you could transfer the contents of the jar to a freezer proof container and store them in there.
That's how it's done! If there is anything I haven't covered in this post, feel free to comment below and I will do my best to help.
Happy preserving!
Made this recipe? Tag me on Instagram @thekiwicountrygirl and hashtag it #thekiwicountrygirl.

How to Bottle Plums (and other stone fruit)
Ingredients
- 5 kg plums
- 15 cups water
- 8 cups sugar (see recipe note 1)
Instructions
Step 1: Sterilise your jars and lids/seals
- 2 hours before you need the jars, run them through the dishwasher on the hottest wash (ours is called hygiene but it may be called sterilise on your machine) Keep the door shut until you are ready for the jars as it will keep them warm until you are ready to use them. If you don’t have a dishwasher, wash the jars thoroughly in hot soapy water and place them in the oven at 150°C for at least 15 minutes or until you need them.To sterilise the lids and seals, place them in a pot, cover them with water and bring to them to the boil. Reduce the heat to a simmer and keep them in the water until ready to use.
Step 2: Make the sugar syrup
- Add the sugar and water to a large pot and bring to the boil – boil for a couple of minutes until the sugar has dissolved and keep simmering until you are ready to use it. The liquid needs to be hot when it goes into the jars. This is optional, but I also added 2 cinnamon sticks to the sugar syrup for extra flavour.
Step 3: Wash & prepare the fruit
- While the sugar syrup is cooking, prepare the fruit. Wash the plums by filling up a large bowl or your clean sink with water, and give the fruit a light wipe down. This is also a great chance to pull out any pieces of fruit that are bruised or very ripe – these are not good to use for bottling, save them and stew them to put in the freezer.Once the fruit has been washed, cut in half and remove the stone. You can leave them whole but I find they pack into jars much better in halves. For how to prepare other types of stone fruit, see the post for more details.
Step 4: Pack the fruit and syrup into jars
- Line a big flat bottomed roasting dish with newspaper (so that any spills don’t burn), take a jar out of the dishwasher or oven and place it in the roasting dish. Pack as much fruit as you can into the jar, leaving a couple of centimeters at the top of the jar. I usually fit about 14 plums (28 halves) into a 1 litre Agee jar or 7 plums into a 500ml jar.
Once you have as much fruit in the jar as you can fit, use a ladle to fill the jar up with the hot sugar syrup. Fill it almost to the top (leaving about 1.5cm) and then run a clean butter knife or small rubber spatula (I usually run this through the dishwasher with the jars) around the inside of the jar to make sure there are no air bubbles in the jar. Use a clean damp cloth to wipe around the rim of the jar.Use tongs to remove a seal and a lid out of the hot water and carefully place the seal on the jar and tighten the ring around it until you just meet resistance.Repeat until you have run out of fruit.
Step 5: Heat processing the jars
- Heat the oven to 140°C, place the full jars in the roasting dishes in the oven and process for 50-60 minutes. Once they have processed, carefully remove the jars from the oven and place them on a tea towel on the bench. Leave them overnight and check in the morning to see that the jars have sealed.
Step 6: Check the seals
- To check the seals, remove the rings from the jars and gently try to prise the lid off using your finger. If they have sealed, the seals will be concave and you won't be able to move the lid. Give the jar a clean with a damp cloth and store in a cool dark place. Properly sealed jars will keep for at least a year and I have kept fruit for 2 years with no problems.If the jars haven’t sealed they cannot be stored at room temperature but they are still safe to eat. Just place the jar in the fridge and eat within a week. Depending on the type of jar you have used (Ball Mason Jars freeze well but I haven’t tried with Agee Jars) you can pop the whole jar in the freezer, or you could transfer the contents of the jar to a freezer proof container and store them in there.
Notes
- How much sugar you use depends on how sweet you want the sugar syrup (see post for more details) The ratio I used is a medium-heavy syrup.
If you tried and loved this recipe, please leave a comment and a rating below!

Rowena says
Plums btw, I realise I didn't say what fruit they were