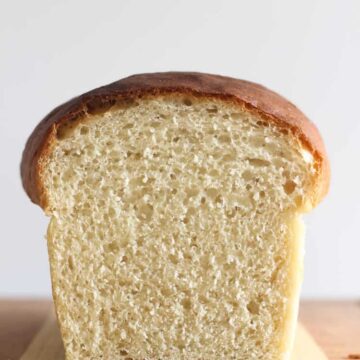
The most simple recipe for basic homemade white bread. Made from just yeast, sugar, water, flour and salt this white sandwich bread will become a staple in your house!
Friends, we are in the middle of a very unsettling time. A strange virus has taken over the world, we have been instructed to stay home and suddenly popping out to the shops for a loaf of bread is something that just can't happen. We can't see our friends, there are no social gatherings happening and all non essential businesses are closed.
It is very overwhelming and there is a whole lot that is completely out of our control. What I am choosing to focus on, is what I can control.
We are so lucky that living rurally, not a whole lot changes for us. We are at home most days anyway and as our kids aren't yet at school we don't have that to contend with either. Our pantry and freezer is stocked, our garden is growing and I am going to be spending this time making even more things from scratch than before.
The thing I want to encourage over this time is coming together as a nation and world and connecting even though we have to physically isolate. We are so incredibly lucky to be isolating in a time where it's never been easier to stay in touch online. Over the weekend I baked a loaf of this bread on my Instagram stories and I was amazed at how many people baked along with me! I will be doing more of this, so if you are on Instagram, be sure to follow along.
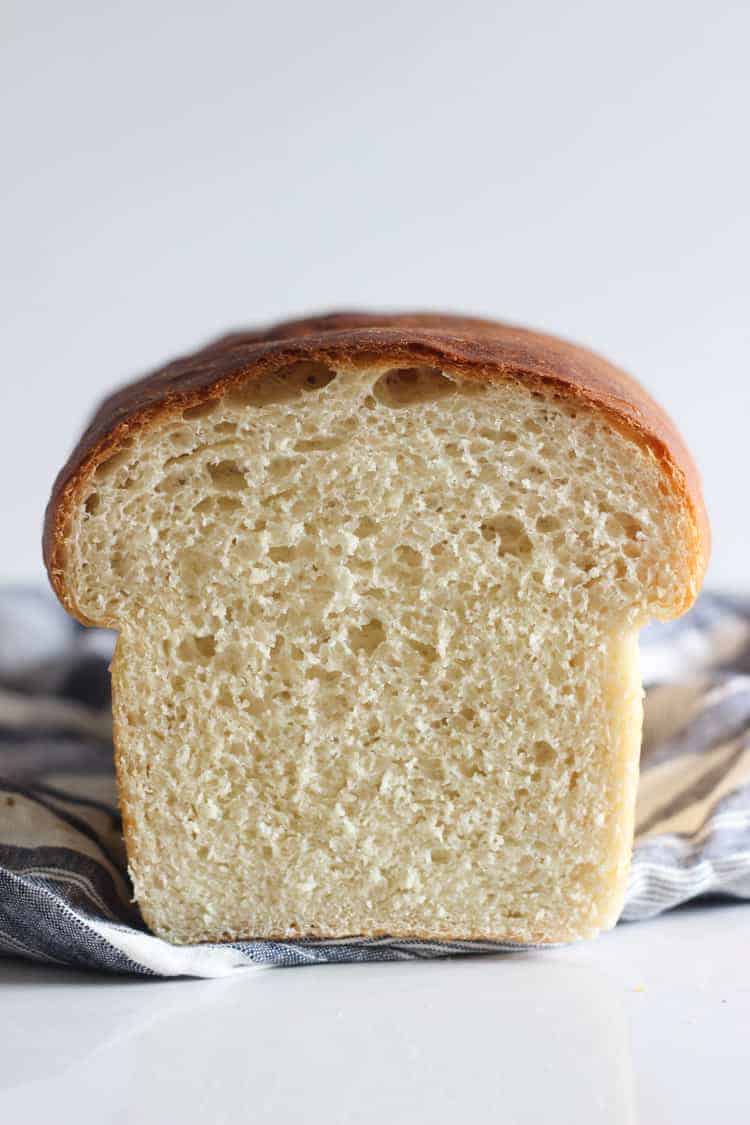
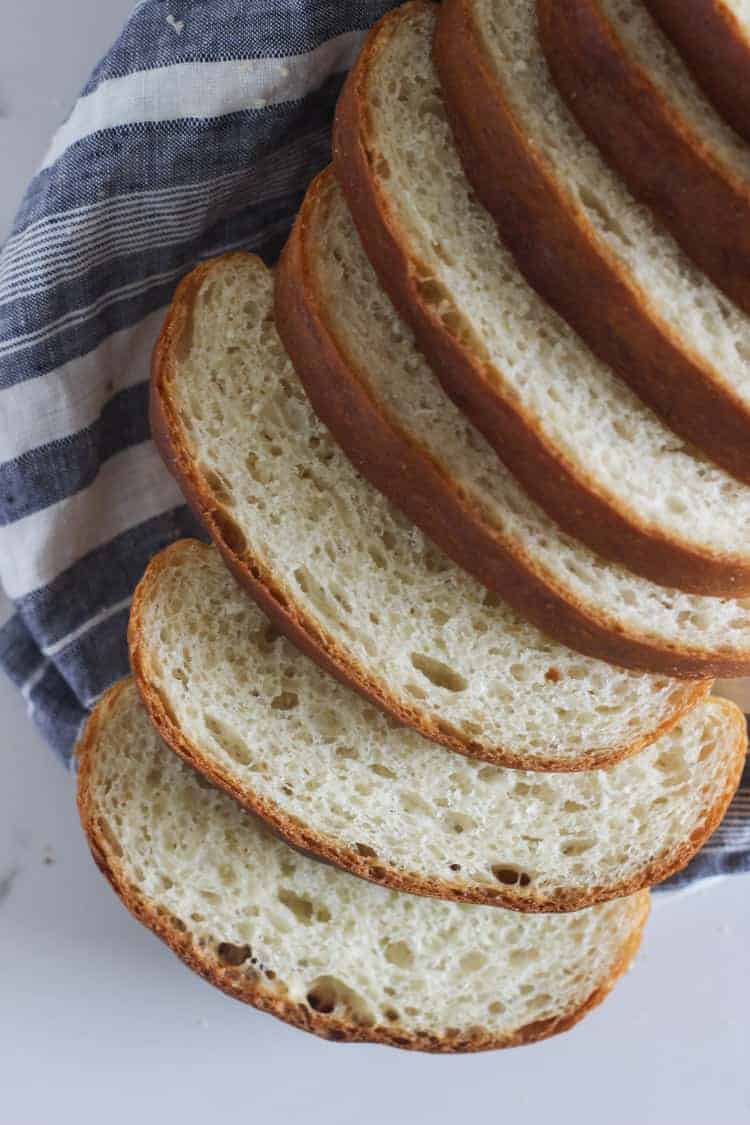
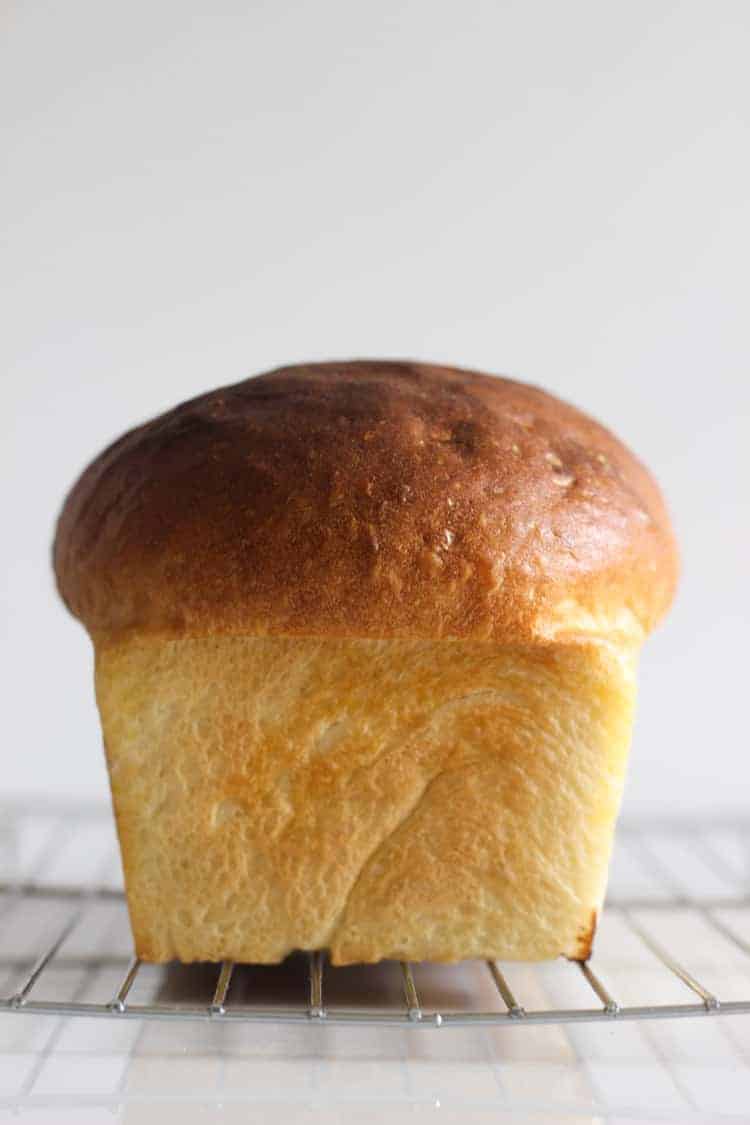
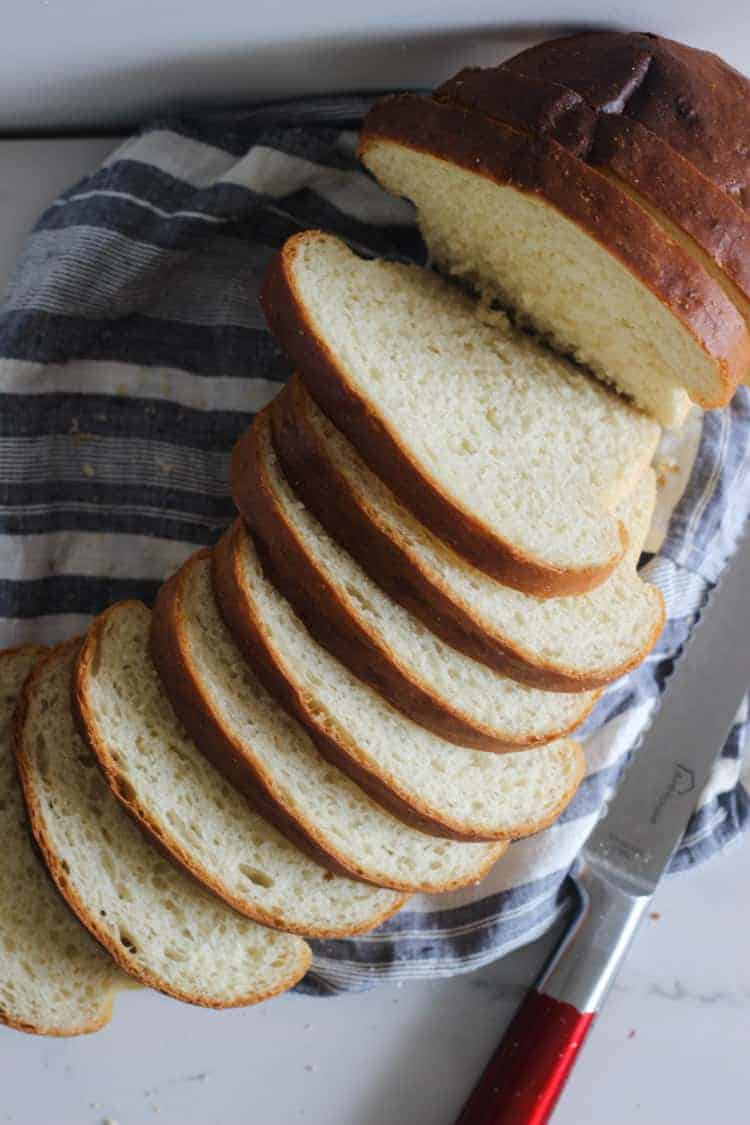
This basic white bread recipe is just that. Simple ingredients, no fancy equipment needed and the softest, fluffiest loaf of homemade white bread that you can make.
It makes amazing sandwiches, toast and freezes really well. You can also turn it into bread rolls very easily (see recipe for details)
Ingredients needed for basic white bread
- Active dry yeast/instant yeast - you can also use Surebake yeast, you just need double the amount
- Sugar or honey
- Warm water - around 45°C/110°F
- Flour - I have used plain and high grade (bread) flour and both work great!
- Salt
- Butter - for brushing on top of the loaf midway through baking - this gives the crust extra crunch and flavour!
How to make basic white bread
- Activate the yeast in warm water with sugar
- Make the dough - add flour, salt and more water
- Knead the dough - 7 minutes in a stand mixer, 10 minutes by hand
- Cover the dough and let it rise - this will take about 1 hour in a warm place
- Shape the dough into a loaf and place in the loaf tin
- Second rise - his will take about 50 minutes in a warm place
- Bake for 30-35 minutes, brushing the top with butter after 25 minutes
Bread baking FAQ's
What type of yeast should I use?
I always use active dried yeast – this yeast needs to be activated before using it in the dough. The reason I like using this yeast is that it’s a safeguard to bread rising failure. You can actually see that the yeast is activated which is essential for the bread making process!
To activate active dry yeast, add it to a small amount of warm water (somewhere between 40-45°C/105-115°F) and sugar (the amount called for in the recipe) and whisk it around and leave it sitting for about 5-10 minutes. It will start to bubble and foam when it is ready. If this doesn’t happen your yeast may either be too old or the water may have been too hot or too cold. Throw it away and start again. When the yeast is activated using warm water it produces carbon dioxide gas, which causes the bread to rise. You can also use instant yeast (use the same amount as active dry yeast) or Surebake yeast which is a mixture of active dry yeast and bread improvers and is typically used in breadmakers. Both these types of yeast can be added directly to the other ingredients without activating the yeast first. You will need to use twice as much Surebake yeast as you would active dry yeast.
Can I substitute wholemeal flour for white flour?
You can't substitute it completely. Wholemeal flour makes a much denser loaf of bread which I find not very enjoyable. If you really want to sub some wholemeal flour in, start with 1 cup wholemeal, 3 cups plain flour and see how that goes. Over the next couple of weeks I will be working on a wholegrain sandwich bread recipe so watch this space!
Where is the best place to leave my bread to rise?
I put my dough to rise in our linen cupboard. The hot water cylinder is in there which makes a nice warm environment. If you don't have a hot water cupboard you can use the following places:
- On a sunny windowsill or other sunny spot in your house
- On top of the fridge or on a high shelf - heat rises
- In your car - this is often a warm spot!
- In the warming drawer of your oven - turn on the warming drawer and place the covered dough in the drawer along with a cup of water to keep the environment humid
- In the microwave - heat a cup of water on high for 2 minutes then place the covered dough in the microwave with the door shut
- You can heat the oven to low or just turn the oven light on, but as you need to heat the oven for baking during the second rise, I prefer not to use this method
What if my bread doesn’t rise?
Your yeast may be old – see above for how to activate the yeast. If your yeast doesn’t activate, it’s no good. Throw it out and start again.
It may simply be too cold where you are trying to rise your bread! If it’s cooler where you live, try putting the bread in the hot water cupboard or preheat the oven to 50°C and then turn off before placing the bread in there to rise.
How do I know when my bread is ready?
When the bread is golden brown and you tap the bottom of the loaf (remove from the tin first) and it sounds hollow, it’s done.
If you have an instant read thermometer you want the internal temperature of the bread to be 88°C/190°F – this post explains it and tested a few different types of breads – it’s a really interesting read if you are keen to learn more about bread baking!
Other easy bread recipes to try:
- Homemade hamburger buns
- Easy French Bread Recipe
- Homemade Bagels
- Homemade English Muffins
- Homemade Soft Pretzels
- 4 ingredient No-Knead Bread
- Pizza Dough
Basic White Bread Recipe
Ingredients
- 1 ½ cups warm water, divided (45°C/110°F)
- 2 Tablespoons granulated sugar (or honey)
- 1 Tablespoon active yeast
- 4 cups flour (plain or high grade)
- 1 teaspoon salt
- 1 Tablespoon softened butter (to brush on the baked loaf)
Instructions
- Activate the yeast - Add 1 cup of the water to the bowl of a stand mixer or a large mixing bowl and whisk in the sugar and yeast. Leave it to sit for 5 minutes or so until it starts to bubble and foam.
- Make the dough - Add the flour and salt to the yeast mixture and start to combine with the dough hook on your mixer or with a wooden spoon if making by hand. Slowly add the remaining ½ cup water as needed to make a dough. You want the dough to be slightly tacky and sticking to the bottom of the bowl but clearing the sides when kneading.
- Knead the dough - Knead for 7 minutes using the dough hook on your stand mixer on low speed, or for 10 minutes by hand on a lightly floured bench, until the dough is smooth, soft and bounces back when pressed gently.
- First rise - Leave the dough in the mixing bowl or place back in the large bowl, cover with a clean tea towel film and put in a warm, draught free place to rise until approximately doubled in size, around 1 hour.
- Shape the loaf - Grease the loaf tin with non stick cooking spray, oil or butter. Punch the dough down to release the air and then gently tip the dough onto a lightly floured surface. Flatten it into a rectangle the length of the loaf tin and fold in half lengthways and tuck in the ends. I repeat this process 2 or 3 times until I have a smooth loaf with tightly tucked in ends. Transfer the loaf, seam side down into the loaf tin.
- Second rise - Loosely cover the loaf again with the same tea towel or greased gladwrap and put it in the same warm place to rise until it has doubled in size again, is round on top and just over the top of the loaf tin. It is ready when the loaf will resist slightly when you gently press down with your finger but will still spring back into shape. This step will take about 45 minutes. Once you have left this to rise, pre-heat your oven to 190°C.
- Bake the bread - Bake for 25 minutes and then remove the loaf from the oven and brush the top with softened or melted butter, letting it drip down the sides into the loaf tin. Place the loaf tin back in the oven and continue baking for a further 5-10 minutes until the loaf is golden brown on the top, bottom and sides and sounds hollow when you tap the bottom. If you have an instant read thermometer, you are looking for an internal temperature of 88°C/190°F.
- Remove from the oven and tip the loaf out of the tin and cool on a wire cooling rack before slicing and serving.
- Store in an airtight container at room temperature for a few days or slice and freeze the loaf.
Notes
After the first rise, punch the dough down and divide into 12 equal pieces. Roll into balls and place side by side in a greased baking tray, leaving about a 2cm gap between rolls.
Allow to rise, covered, for 45 minutes then bake at 190°C for 15 minutes, brush with melted butter and bake for a further 5-10 minutes until golden brown

Monique says
Really yummy and easy, I didn’t grease my pans and paid for it with one whole Side of the loaf being stuck to pan but I also got to eat it while everyone else had to wait so really it was a win! Thanks for the amazing recipe and I’ll definitely follow the instructions properly and grease my pans moving forward 😂💕
Ameria says
Made it exactly as written as best I could lol this is my first bread and I just sliced it and tried some now and it was actually pretty good 🤘🏼😄😄
Hayley says
Second time attempting homemade bread and it came out great thank you! I have some white stoneground flour in my cupboard, do you know if could I use this instead? Would I add more or less etc? Thanks
(sorry I said yeast in my last comment haha)
Laura says
I have not used stoneground flour but I would give it a go and just keep an eye on the dough to see if it needs more water/flour!
Tabitha says
One of the easiest and best slicing breads I have ever made, thanks so much!
Ange says
Will white stoneground flour work for this?
Laura says
I haven't tried it but I can't see why not! You may just need to keep an eye on the dough as you are mixing it and adjust the amount of flour/water to get the right consistency!
Kayla says
This is delicious!
I used honey, 1c rye, 1c wholemeal spelt, 1 & 2/3 white flour, and the rest linseeds + a few pumpkins.
So totally different recipe 😆 but following the quantities & timings. Delicious! Perfect!