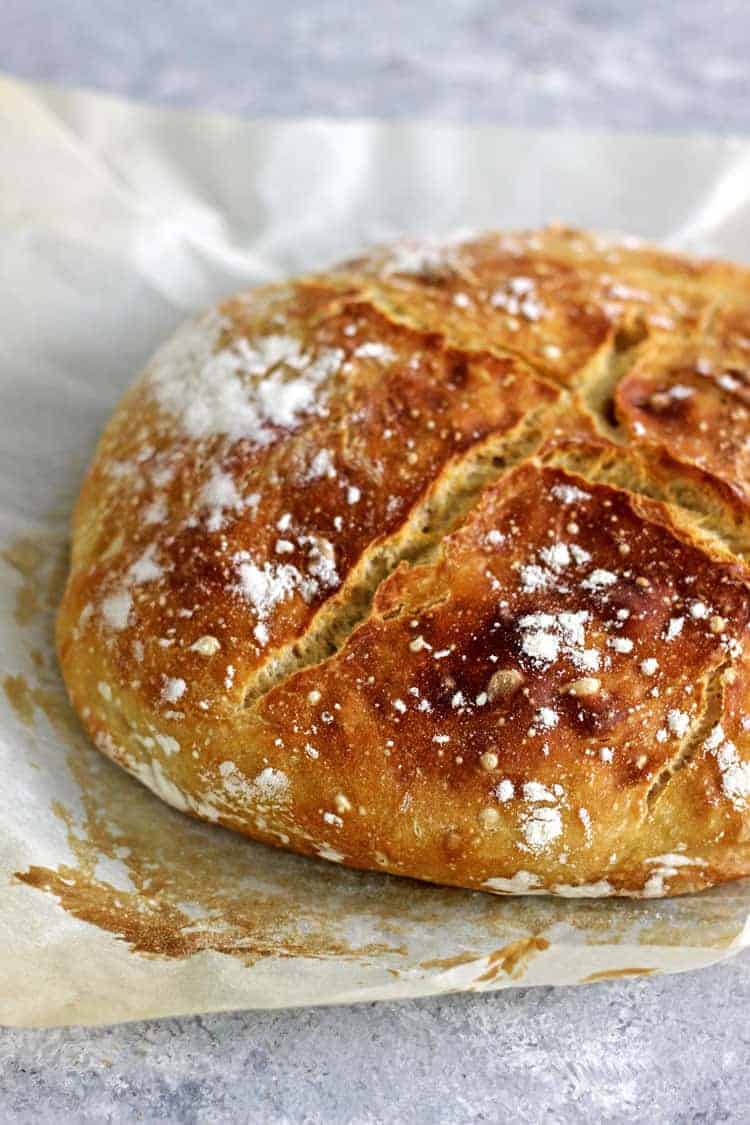
Kicking off the Monthly Bread Baking Challenge with this super easy, 4 ingredient, crusty No-Knead Bread recipe! Mix the ingredients, leave overnight, shape and bake the next day! You'll all be bread makers in no time!
Welcome to the first Monthly Bread Baking Challenge!
In case you missed the intro post yesterday, here's a recap:
Monthly Bread Baking Challenge:
- At the beginning of each month I will post a new recipe for a different type of bread. We will start slowly, and work out way up to more complicated recipes. Each recipe post will be accompanied by step by step photos and instructions, tips and tricks and a video showing you exactly how to do it.
- I want you to bake the same recipe that month and share it with me! Comment on the post letting me know how you got on, email me, or share a picture on Instagram (and if you do, tag it #thekiwicountrygirl)
So let's get right into it! Homemade, crusty no-knead bread!
This loaf of bread is what kicked my homemade bread addiction back into full gear. My sister came to visit a few weeks ago and she had made a loaf of this bread - it was SO delicious! I made her send me the recipe before she left, I made a loaf that night and haven't stopped making it since!

This no-knead bread is the perfect starting point for beginner bread bakers. As the name suggests, there is no kneading involved! It's a really simple matter of mixing together 4 simple ingredients that I bet you have already - plain flour, active dry yeast, salt and water. See?!
The key with this bread is a really long rise time. And I mean LONG! Anywhere from 8 to 24 hours. If I want the bread ready for lunch, I mix up the dough the night before and bake it in the morning, but if you don't need it until dinner time you can start the dough in the morning and bake in the afternoon.
This is definitely not an original recipe - I played around with this recipe that my sister uses but in the end, there was nothing wrong with it at all and I couldn't improve it, so why fix it if it ain't broke?!
It's the most simple recipe, but let's break it down. (There is also a video at the bottom of the post which will be helpful!)
What you need:
- A heavy oven proof dish with a lid. A cast iron dutch oven is ideal for this, but a roasting dish with tinfoil on top will also work.
Step 1: Mix together the 4 ingredients - plain flour, active dried yeast, salt and water. It will form a pretty wet looking shaggy dough. This is perfect.


Step 2: Cover it and leave it to rise for 8-24 hours. The long rise time is how you get away with no-kneading. The long rise time allows the yeast to really do a good job in creating lots of little air pockets in the dough which leads to a nice tender bread.
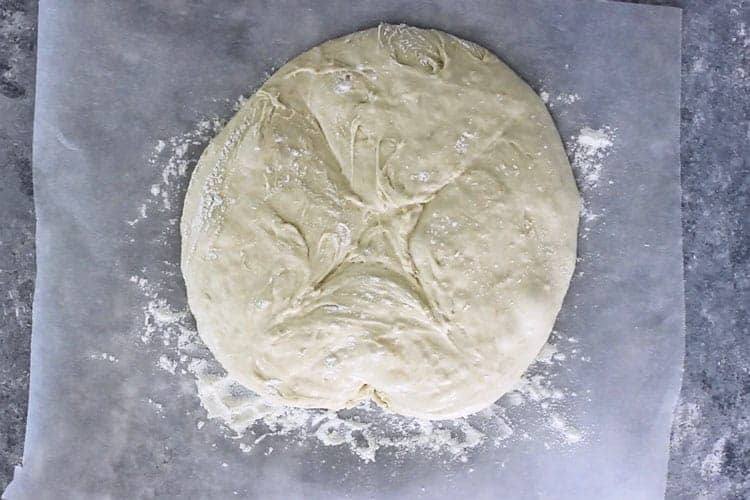
Step 3: Turn the bread out onto a well floured piece of baking paper. Use your hands to shape it into a round loaf. Leave it to rest again. While it is resting, take either a cast iron dutch oven or a roasting dish and place it in the oven as you preheat it. This gets the oven and the baking dish nice and hot which helps kick start the cooking process.
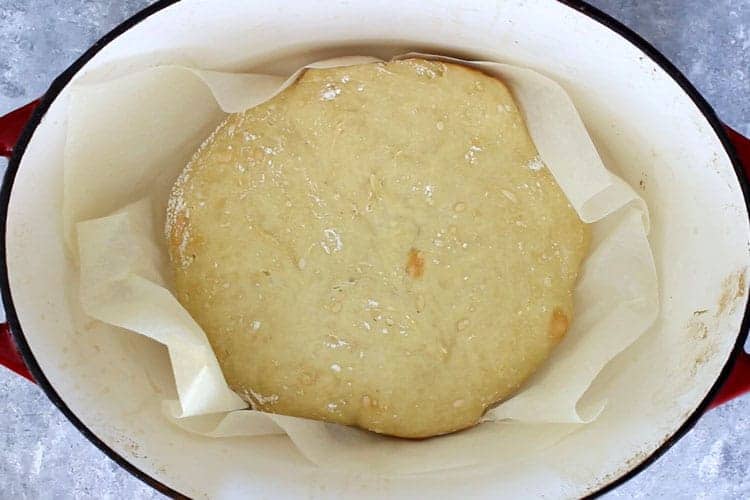
Step 4: After the bread has rested for 30 minutes, take a sharp knife and slash an X in the middle. Remove the baking dish from the oven and lift the baking paper and loaf of bread and place them right into the dutch oven or baking dish and put the lid on. Bake for 30 minutes covered, then take the lid off and bake for a further 15 minutes.

Step 5: Wait for the bread to cool down enough to touch and eat!

Tips for making the perfect no-knead bread:
- If it is cooler where you live, use warm water to give it a boost. This isn't essential and it will still work using cool water but in the middle of winter when you are leaving it on the bench overnight, I've found using warm water helps a lot.
- Active dried yeast is what I use but instant yeast or Surebake yeast will also work. If using Surebake yeast, you will just need to use 1 teaspoon instead of only ½ teaspoon. Instant yeast can be directly substituted.
- If you don't have a cast iron dutch oven/casserole dish, use a roasting dish covered in tinfoil. This is what my sister uses and her bread turns out perfectly!
- Using a serrated knife to create the X on the top is easier for me than just a regular sharp knife.
I can't wait to see how you get on! And if you make this, don't forget to comment below, email me a picture or share on Facebook or Instagram and tag it #thekiwicountrygirl.
And here's the video showing you exactly how to do it
Happy bread baking!
This bread is absolutely perfect served along side a bowl of bacon hock and vegetable soup and if you happen to have any leftover, it also makes the BEST garlic bread! Slice it, spread with butter and crushed garlic and put under the grill for 10 minutes. Perfect!

Crusty No-Knead Bread
Ingredients
- 3 cups flour (approx 420 grams)
- 1 teaspoon salt
- ½ teaspoon active dried yeast (see recipe note 1)
- 1 ½ cups (375ml) warm water (see recipe note 2)
Instructions
- Add all ingredients to a medium sized mixing bowl and stir to combine. Cover and leave to rise at room temperature for 8-24 hours.
- Using well floured hands, turn the dough out onto a floured piece of baking paper and shape into a round loaf. Leave to rest for 30 minutes (while the oven is preheating)
- While the bread is resting, place a cast iron dutch oven or other heavy oven dish with a lid (see recipe note 3) in the oven and heat the oven to 220°C/430°F.
- Once the bread has rested, use a sharp knife to slash an X in the middle of the loaf. I find that using a serrated knife gets a cleaner cut.
- Using oven mitts, remove the dutch oven or oven dish from the oven and carefully place the baking paper with the bread in the dish. Place the lid on (or cover with tinfoil) and bake for 30 minutes. Remove the lid and bake for a further 15 minutes.
- Remove from the oven and allow to cool before slicing and eating!
Notes
- I use active dry yeast but instant yeast or Surebake yeast will also work. If using Surebake yeast, you will just need to use 1 teaspoon instead of only ½ teaspoon. Instant yeast can be directly substituted.
- You can use room temperature water but I have found that if it is colder where you are (e.g. in the middle of winter) using warm tap water gives the bread a nice little boost.
- A heavy cast iron dutch oven with a lid is what I use to bake the bread, but if you don't have one, my sister uses a roasting dish with tinfoil as a lid and this works perfectly well too. Use what you have!
Recipe from It's Always Autumn

Gayle Smith says
I love this bread. I live aboard my 53 ft. Spencer sailboat. We travel the world and this is my go to bread. Flour products are different country to country and this recipe, along with my cast iron dutch oven, has never let me down. Thank you Laura!
PS. Laura is a great help and inspiration. You can email her and she will get back to you. I was new to New Zealand and she quickly answered my questions.
Laura says
Thank you for the lovely feedback Gayle!
Sandra Dale says
Made and cooked exactly as recipe, it was too wet to form into a loaf shape. All ingredients were measured on digital scales, it tuned out looking like yours. When cut it was very wet, and stuck to the knife. It was cut six hours after making, it tasted ok.
Laura says
I'm sorry it didn't work out for you, if you try it again I would try using more flour - maybe an extra 1/2 cup and see if that helps
Don says
I'm retired and learning how to cook a few different dishes and this easy bread recipe is by far the easiest and delicious also makes great toast. Cheers mate. PS always ask a busy person for different ways to do things they often think outside the box .
Glynis says
My first attempt! I am very happy you’ve got me hooked
Glynis says
I am trying this for the first time it has been resting for 4 hours I plan to cook it after 20 hours, my concern is it didn’t look as wet as your batter Should I carry on?
Laura says
Definitely! It's a very forgiving dough!
Nessa says
I saw your recipe on refil nation and thought I'd try it. I'm thinking of doing a few stretch and folds to help with gluten formation. Will see how it goes and post back if it turns out
Christine says
Hi would anyone know if we can substitute with rye flour? and if so do we need to modify the cooking /baking process? Much thanks
Ada says
Hi Laura, I love making this bread! Works perfect every time and super easy. I’ve seen you make this on Facebook story and just wondering what seeds or extras you add and rough quantities?
Kind Regards, Ada
Laura says
Hi Ada, I have been adding about 2TBSP each of linseed, rolled oats and sunflower seeds! Sometimes I add slightly more water too
Royston says
Hi Laura. Can high-grade flour that I use in breadmaker be used or is plain flour better suited to this version?
Chris Long says
Hi Laura, I have made many attempts at this recipe..it looks and tastes awesome the top/side crust is fine but the bottom is always too tough/chewy texture..hard to cut with a knife.
I cook it in a dutch oven but only let it rise for an hour or so..do you think that could be the cause?
Do you know how I can fix this thanks.
Thanks
Laura says
Hi Chris, it seems like a funny thing but I find that using a good quality baking paper in the bottom of the dutch oven actually makes all the difference to the loaf not being too brown and tough on the bottom!
Madeleine says
Hey there, what a cool discovery. I’m just making mine now, waiting for it to bake! 😊 Two questions as I just want to make sure I’m getting the bread as fluffy as possible: 1) Mine came out extremely wet. I didn’t want to play with the promotions on my first time, but is it supposed to be so sticky that it just barely stays in a loaf shape and gets all stuck to my hands? 2) Does handling the dough partway through the rise mess it up?
Laura says
Hi Madeleine! It is quite a wet dough but if it is too sticky to handle and shape, add a bit more flour. It should hold it's shape as it rises. And I would try to leave it alone as it rises too. Laura
iulia simtion says
Hi Laura, I started making this bread in lockdown (April 2020) and i haven’t stopped since. It is exactly my kind of bread and it really is easy peasy! So thank you very much. You’ve made this bread enthusiast very happy!
Leora says
Hi — do you activate the yeast first? And if so, with what other ingredients (water and sugar?). I see that this recipe doesn’t call for sugar....
Laura says
Hi! No need to activate the yeast first as it has such a long resting/rising time that it does what it needs to do over this time!
Effie says
My first attempt was very successful. Only question was after sitting overnight it had quite a firm top which was hard to knead back in. I put a tea towel on the top.
Laura says
Hi Effie, try using a damp tea towel, that should help! Laura
Fiona says
Hi Laura
Not sure if you're still running this site as last messages in 2018 but will give it a whirl anyway. I've just made this bread successfully this morning and really pleased with how easy it was. Only problem is it disappeared by lunchtime. I'd like to double the recipe and my Dutch oven is large enough to take it. Just wondered what you'd suggest I adjust the 30min/15m cooking times to and if you'd keep the temp at 220?
Thanks a mil.
Fiona
Laura says
Hi Fiona! I've never doubled the recipe myself but to start with I would stick with the 30 minutes at the beginning and then go from there - it may need another 30 minutes uncovered but just keep an eye on it! Would love to hear how you get on! Laura
Fiona Halliwell says
Hi again Laura
So here we are again all making bread in lockdown - working from home has its advantages 🙂 I did try the double recipe a couple of times but it just doesn't make as good a loaf at all - less taste and less rise - I'm sure there's a method to fix those but I'm not overly concerned, I'm just making two at the same time and cook one after the other. My question today though is about a wholemeal version - I've tried it twice now with the same quantities, extended the lid-on cooking time by 10mins, but not getting the same consistency or rise. Would you put slightly less water and perhaps a little more yeast? So tasty though! 🙂
Thanks
Fiona
Laura says
Hi Fiona, sorry, I totally missed this comment! It has taken me SO much trial and error to get the wholemeal version right. I find the best I can get is using half white flour, half wholemeal flour, and adding slightly more water. Once I've perfected it, I will post my recipe! Laura
Ruth says
Hi Laura! I've made this bread a few times now and it's great, has worked perfectly so thanks 🙂 Just wondering if you've tried to make this recipe in more of a loaf tin (more sandwich friendly lol)? I'm going to try it and see how it works out, but do you think I'd need to adjust cook times at all? Thanks, Ruth
Laura says
Hi Ruth! That's great, I'm so happy you love the bread! Great question - I haven't tried this! It may need an extra 15 minutes or so as I imagine the loaf tin will have a smaller surface area than the casserole dish, so it will be a more compact loaf. I would check it after 45 minutes, but if it looks like it needs longer, probably an hour (total) would be plenty. I'm interested to try this now too, I might actually do it overnight tonight and let you know how I get on!
patricia says
I left the dough overnight in quite a warm kitchen and now it's so liquid that I can't shape it - any ideas what I can do?
Laura says
Hi Patricia. That's so strange, I haven't had that happen before! Check that your yeast isn't expired - that's always the first thing to do when having bread troubles! Other than that, I would try stirring some extra flour through it (juts enough so that you can pull it together into a loaf) and try baking it anyway and then next time use an extra 1/2 cup of flour and see if that helps. Sorry it didn't work out for you! Laura
Lorraine Beatson says
I made this yesterday and am about to cook it but it appears very sticky and floppy and not like yours. Should I throw it out and start again or will it be okay to cook. Kind regards Lorraine
Laura says
Hi Lorraine, I would still cook it and see how it goes...keep me posted and if it didn't work we will try to figure out what might have gone wrong!
Jess says
Hi! Just wanted to say we have been looooving this bread, thanks so much! It is making a weekly (at least haha) appearance in our kitchen! I have successfully made a very savory version, with added herbs, or olives! AND a sweet loaf with added sugar, spices and sultanas! Wasn't sure the sugar one would work but it seemed to with a little less rising time and was soooo delicious with a slab of butter 😋 Thanks Laura!