Growing plants from seed isn't scary or hard and is a great way to have more control over your growing season and to grow a bigger variety of plants. Here is my step by step guide to show you how to start seeds indoors!
When I first started gardening I assumed that starting plants from seed was for people who knew how to garden and had been doing it for years. Wrong!! With a bit of knowledge and by taking the time to take good care of your seeds and give them the best start, anyone can grow seeds!
I tried planting from seed a few years ago but I hadn't done my research and I ended up just putting the seeds in pots, leaving them outside exposed to the spring weather conditions (which in the Waikato in New Zealand can be all over the place!) and hoping for the best. I had some success - my zucchini and cucumber plants did really well, but nothing else really grew. Now I know that seeds need a bit more TLC than what I was giving them!
This year, I was determined to grow my own seedlings. With a couple more years gardening experience under my belt, knowing our area and what does well and having a garden plan written up, I was ready! And as a result of being prepared, my seeds are doing extremely well so far!
I want you to see that you don't need to be a pro gardener, or have a professional set up to grow your own seeds. I started mine in old pots, on my kitchen table and move them to sunny windowsills each morning! Here is what I have used, how I have done it and answers to a few common questions that you may have about how to start seeds indoors.
Growing containers
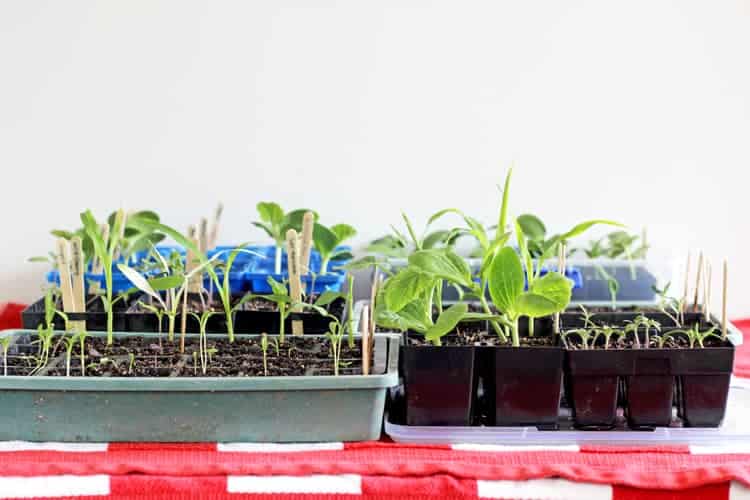
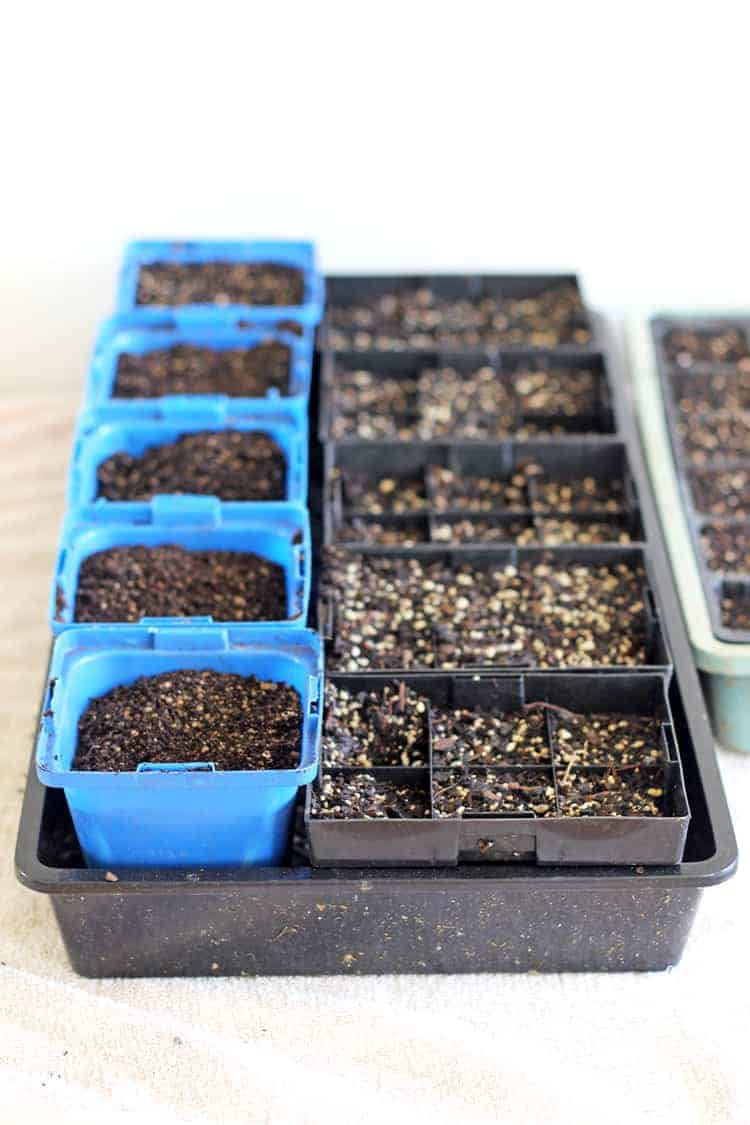
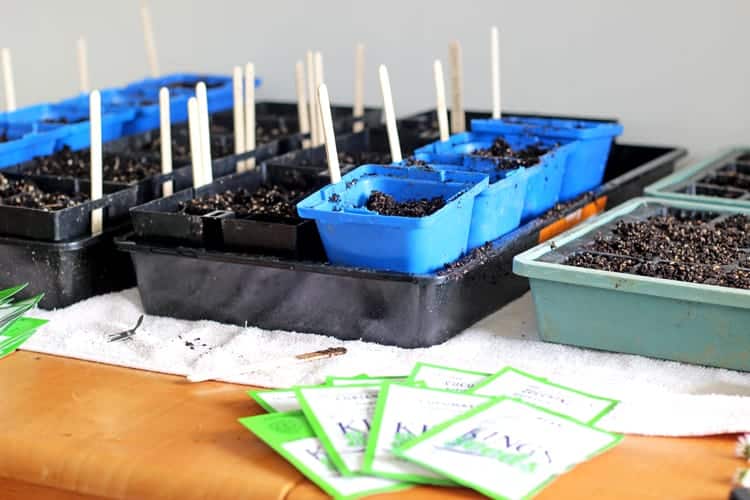
There are so many different types of growing containers you can use. The best growing containers in my opinion are the plastic cells that you buy seedlings in from the garden centre. They can be used year after year, have excellent drainage holes in the bottom (very important) and you are bound to know someone who already has some that you can have. If not, you can actually buy them empty from a garden centre.
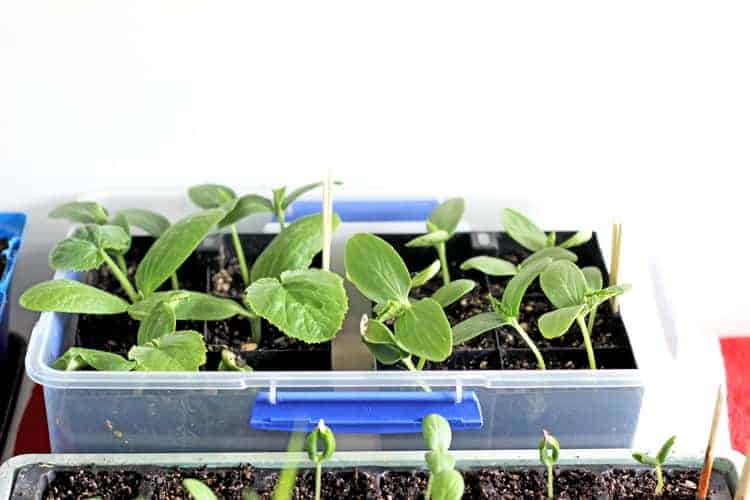
I started most of my smaller seeds (tomatoes, peppers and herbs) in the smaller 6 cell punnets and have since transferred them to bigger pots as they are still not ready to go outside yet but they have grown really quickly. This wasn't too much of an issue but I think next year I would probably go straight to the bigger 10cm pots for most plants as most of my seeds germinated and that saves a job. I started my pumpkins, melons, zucchini and cucumbers in the bigger pots which was a great idea as they get big very quickly and don't particularly like being transplanted too much.
I also used a couple of these mini greenhouses that I picked up from the garden centre for about $8 - they are really useful for if you are growing seeds outside as you can keep them covered.
If you don't have plastic pots, some people use jiffy pots, egg cartons or even old toilet roll holders as they can be planted directly into the ground but I find them more difficult to handle as they tend to get soggy, especially if you are moving them around your house to the windowsill. This year, I also watered my seeds from the bottom (I will explain that further down) which would be difficult using these methods.
Seed starting mix

It is important to use a seed starting mix in your seed trays as it is specially formulated to give those tiny seeds the best start in life! This year I used Tui Garden Seed Raising Mix and I am extremely happy with it. It's a light, free draining mix with gypsum to ensure strong, healthy root growth and Acadian seaweed, which improves root development and overall plant health.
I filled the punnets with the seed starter mix and gave them a good water so that the seed mix was nice and damp and I then left them for a few hours to give the water a chance to drain out before planting the seeds. The soil needs to be damp, but not wet.
Choosing your seeds
I touched on this in my garden plan post, but make sure you choose seeds that 1. grow well in your area and 2. that you will actually eat! No point in planting 4 zucchini plants if no one in your house likes it! I bought my seeds from Kings Seeds as they have an amazing variety of seeds and I know they are really great quality and really reasonably priced. They also have an amazing catalogue with all of their seeds which I love looking through over winter as I dream of my summer garden!
Planting your seeds
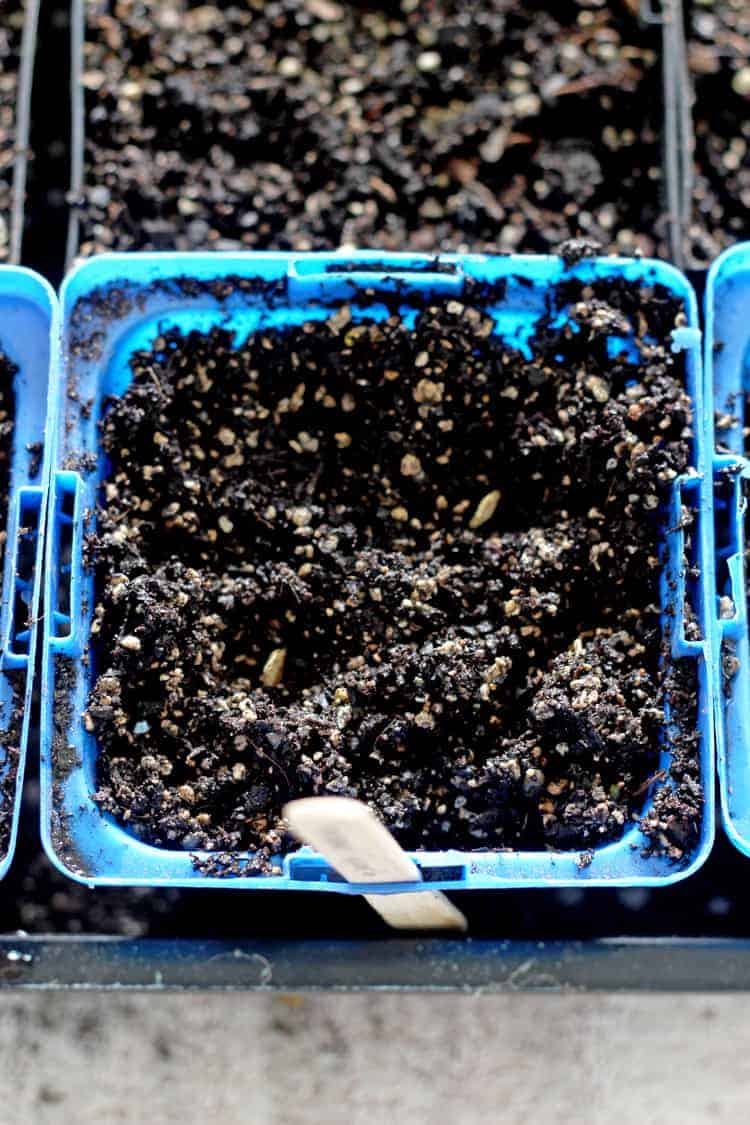
The seed packets will tell you how deep to plant the seeds but a general rule of thumb is to put the seed in a hole no more than twice the size of the seed. Small seeds like lettuces, peppers and tomatoes only need a light covering of seed mix over them. You don't want the seeds to have to work too hard to come through! The other important thing to do as you plant your seeds is to label them.
Labels
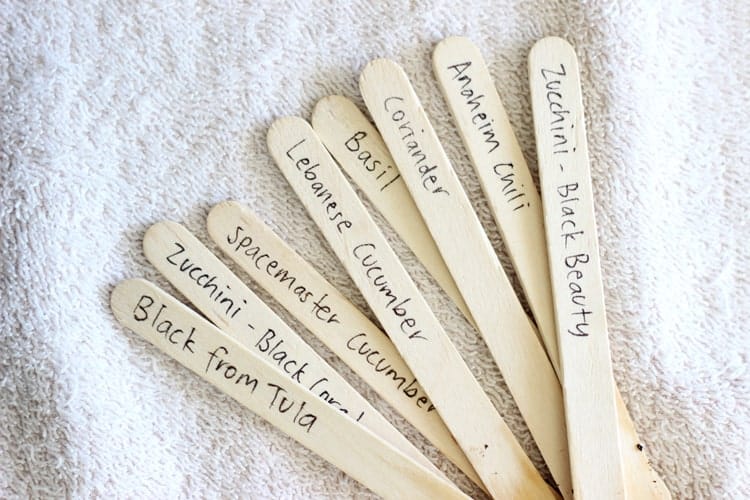
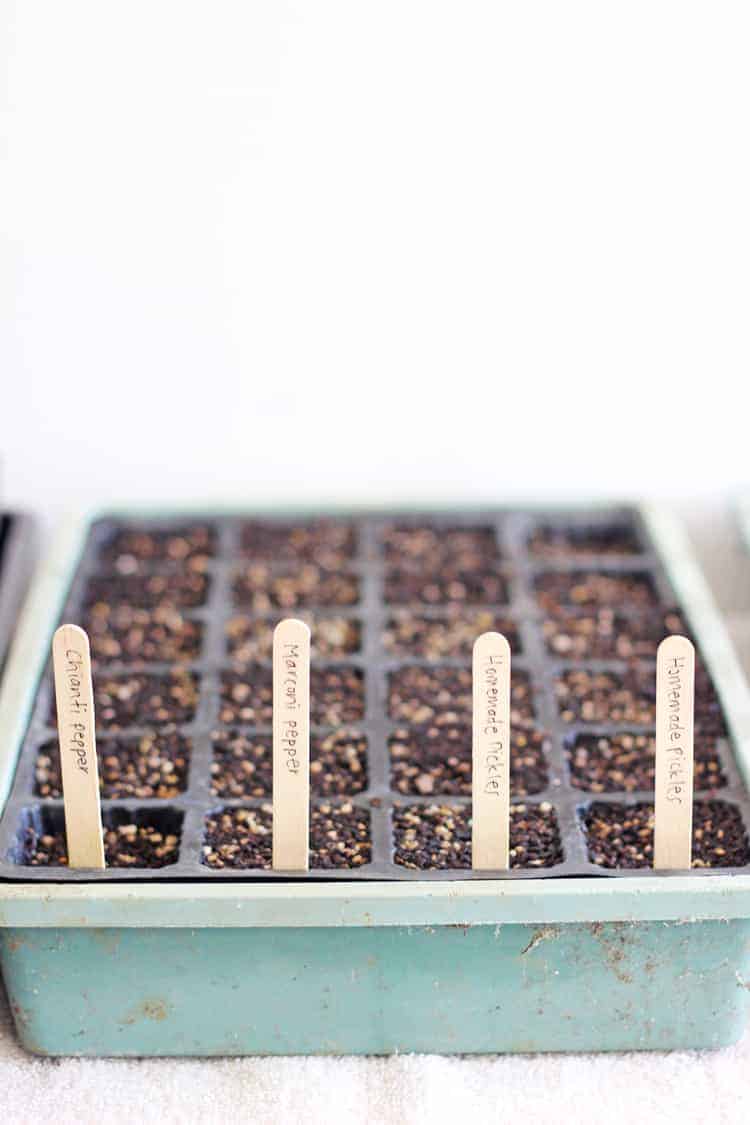
If there is one thing I've learnt, it is how important it is to label your seeds!! Unless you are only growing one of everything, you will never remember what each punnet contains. Especially if, like me you are growing 6 varieties of tomatoes - they all look exactly the same! You can buy special plant labels but I find that buying a bag of 100 popsicle sticks from the $2 shop and writing on them with a sharpie or pen works perfectly. And make sure you write the type of plant too e.g. beefsteak tomato, not just tomato! They don't need to be pretty, their sole purpose is to tell you what they are.
I found that writing the labels first was a good idea and then as soon as I planted the seeds I would stick the label in the pot.
Growing conditions
This has been the key to my seedling success this year. We live in such a mild climate that it had never really crossed my mind to grow my seeds inside but things like tomatoes and peppers need really warm soil (21-27°C for tomatoes and as warm as 25-30°C for peppers!) and the soil will never be that warm outside until well into summer!
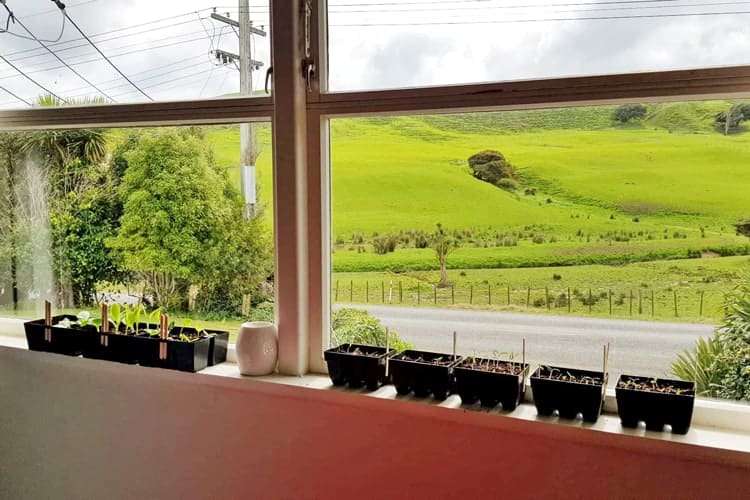
I kept the seed trays sitting on my dining room table while they were germinating. Initially I covered them with a big sheet of plastic to act as a small greenhouse but I found that it didn't really achieve much and I wouldn't bother with this next time. Because the seed mix had been given a really good water before I planted the seeds, the mix stayed nice and damp for about 1 week.
Once the seeds start to germinate, they need sunlight. This doesn't need to be direct, but putting them next to a sunny window is important. You can use artificial lights, but this isn't something I have ever tried as we have plenty of sunny windowsills in our house, so I just moved them to the windowsills each morning and back to the table at night for a water! If you are interested in reading more about using artificial lights, my friend Alli over at Longbourn Farm explains her artificial lighting and heat pad set up in this post.
Once they started being exposed to the sun, I found that the seed mix started drying out much more quickly. Originally I thought I would use a spray bottle to keep the soil damp, but I found this to be really ineffective. A friend of mine suggested to me that watering from the bottom was a much better way to do it as it encourages root growth and this is of course how they find water when they are in the ground.
I got a few old plastic containers and roasting dishes (doesn't need to be fancy!) and sat the seed trays in them overnight with about 2cm of water in the bottom overnight. This has also eliminated the problem of over watering as they only take the water that they need. It is also much more efficient that using a spray bottle as that would take forever with the number of seeds I have! This has worked extremely well.
Other FAQ's
When should I start seeds?
This is totally dependent on the type of seed, the time of year and where you live.Most seeds will say on the packet the time of year that you can sow each particular seed, depending on what area of the country you live in. For example, some seeds like lettuces you can sow all year round (keeping in mind that in winter they will take a lot longer to germinate outside, so you may want to plant them inside). Summer plants like tomatoes, peppers, chilis and pumpkins you will start from seed from early spring when the weather is starting to warm up. Another great resource is the Tui Planting Poster - it tells you which plants can be planted when, in all different areas of New Zealand.
It is helpful to work out when you will plant them in the ground - for a lot of New Zealand it is Labour Weekend but where we live it is usually mid November - then work out how long the seeds take to germinate and go backwards from there. I have allowed 8 weeks for my seeds which will be perfect for tomatoes, peppers, pumpkins and melons but things like zucchini and cucumbers probably only need 4 weeks as mine are almost big enough to be planted out already!
How long does it take a seed to germinate?
This depends on the type of seed. Some seeds like lettuces germinate really quickly - in around 5 days, whereas some like peppers and chilis can take up to 28 days to germinate! The seed packet will give you an estimate, so you will be able to work out when you will need to plant the seeds.
Can you start seeds in potting soil?
There is nothing to say you can't use potting mix but using special seed starter mix is definitely my prefered way of growing them. The soil is much finer, allowing the seed to easily come up through it and it is free draining, meaning the seed is less likely to get waterlogged if you accidentally over water them.
How many seeds should I start?
I have found it really helpful to initially draw up a garden plan so that I know exactly how many of each plant I will need for the season. You can see our 2018 Summer Garden Plan here. Once I know how many plants I need, I work out how many seeds to plant. I usually plant twice as many seeds as I need, just as insurance in case they don't all germinate. This year I have had a really great germination rate which means I have way more seedlings than I need, but that gives me the option to either thin out and get rid of the weaker looking seedlings, or to re-pot them all and give some away! Or just find room in the garden to plant them all!
The next step for my seedlings will be hardening them off - this is slowly getting them used to being outside before planting them in the garden, and I will write a post on that in a couple of weeks!
I hope you feel prepared to start your own seeds indoors this year now! If you have any questions, leave a comment below!
[mc4wp_form]

Deirdre says
Loved reading this-you explain everything so simply-it’s easy to follow.
Will definitely give this a try!
Linn says
Thanks for this info. Just wondering about leggy lettuce seedlings, do they
come right when planted into bigger pots or should I start again?
Laura says
Hi Linn, lettuces can go leggy very quickly! Get them nice and close to a light source (a north facing window if you are in the Southern Hemisphere is ideal) and make sure you are bottom watering them and a lot of the time they will actually come right! I don't bother repotting them as they are so quick to grow that I'd just start again if I didn't have any luck with them sorting themselves out!
Fran says
Great article. I have a potting shed with big window which allows sun from late morning to late afternoon. I planted my seeds and they germinated! As they grew I would turn container around to ensure all got sunlight however they almost all grew tall and spindly. How do you stop this?
Laura says
Hi Fran! Leggy seedlings are often due to the seeds not being close enough to the light source or it not being strong enough - I definitely have more trouble with leggy seedlings in autumn/winter when the sun isn't quite so strong and I find brassicas are particularly bad for this too. Just keep doing what you are doing - you could have a play with artificial lights or a heat pad underneath as well if you wanted to. Make sure they are getting consistent water too and that they are not covered up once they have germinated.
Donna says
Hi Laura just found you online today while searching for info on bottling plums - really love and appreciate your website! Thank you so much for your honest, practical and down to earth approach. We've had a small vegie garden for a few years now but I feel very inspired to ramp things up! Would really like to have a go at growing from seed (although might wait till next season now). Had a good look at the Kings website and see they have lots of heirloom/heritage seeds. Just wondered how you find the heirloom seeds and if they make much difference? Also wondered about the approx shelf life and if you have any good tips for storing them? Cheers Donna
Laura says
Hi Donna! I have a mixture of heirloom and hybrid seeds and I love them both. The hybrid ones tend to be more disease resistant but the heirloom varieties are super interesting and fun to grow! Honestly, I just pick my seeds based on what I want to grow and don't worry too much about what kind of seeds they are! Shelf life of the seeds is written on the packets (usually around 2-3 years once opened) but I store mine in a plastic photo box from Kmart actually and in a cool dark place and they are usually good for several years!
Maria Avery says
Hi , loved your article. I'm in an apartment and will start my lettuce during the next few days.
The other will be parsley and dill.
I am so looking forward to eating my own lettuce.
Thanks again for the article.