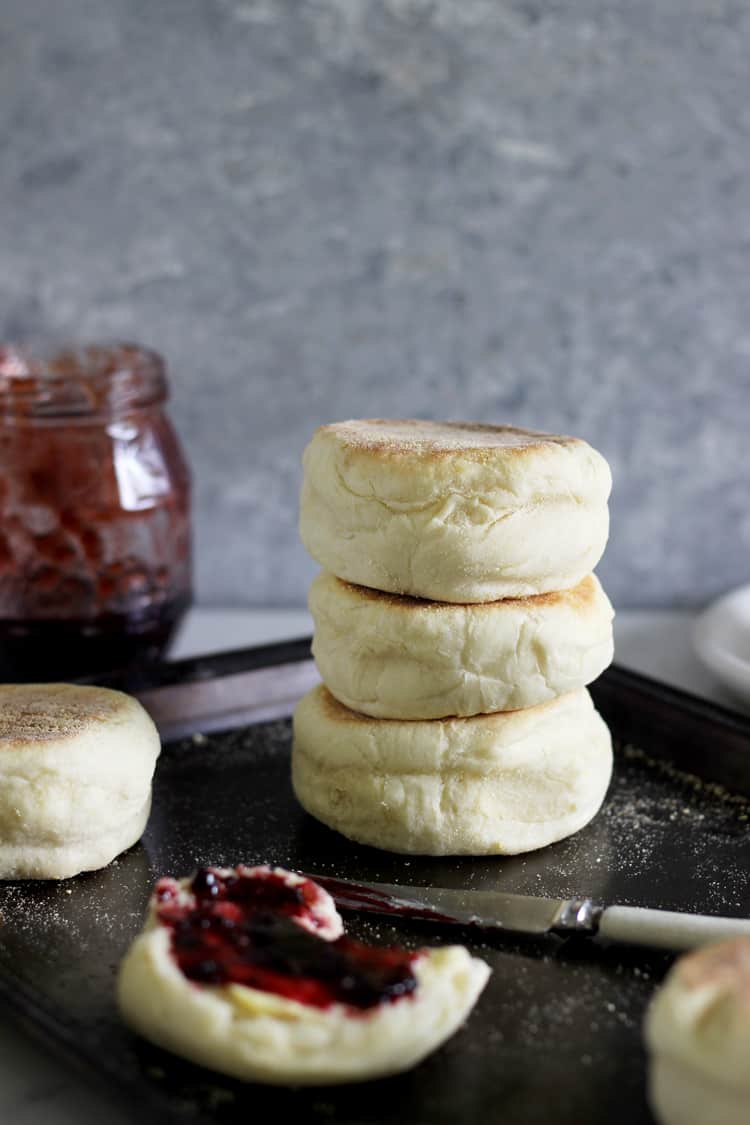
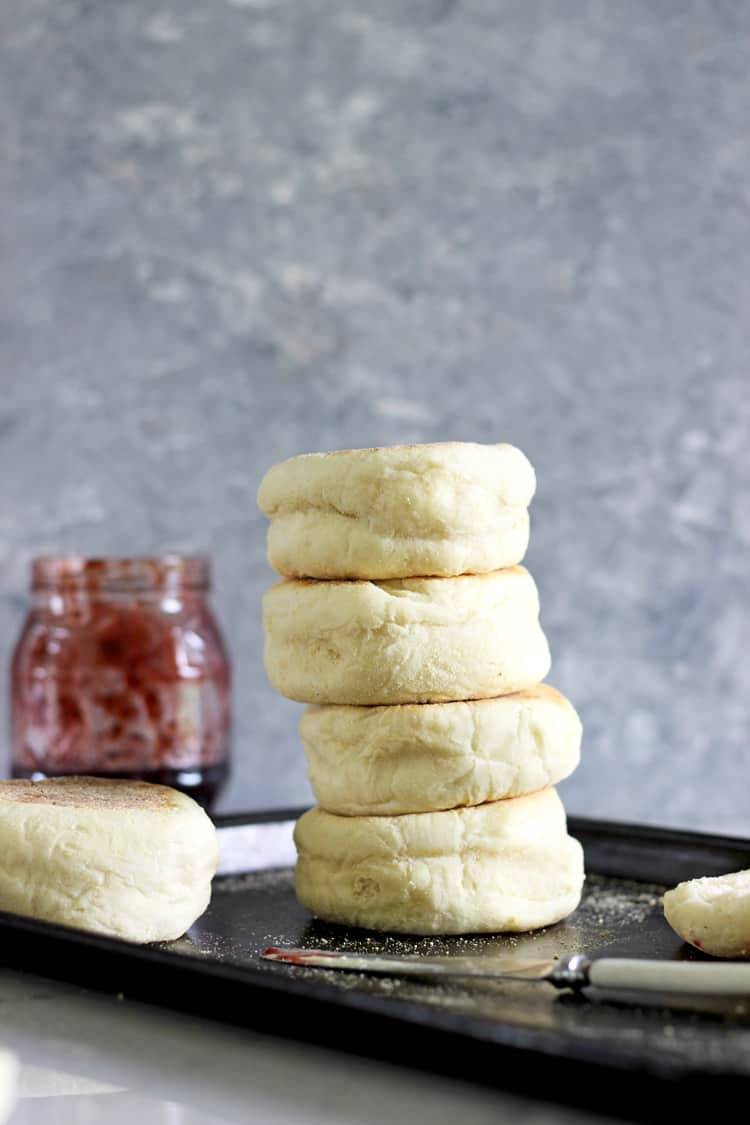
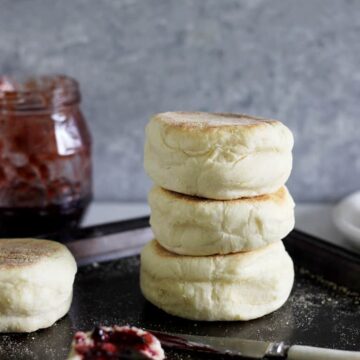
You will love this quick recipe for homemade English muffins! They have all the nooks and crannies that the store bought ones do, but they're made from scratch and taste SO much better!
Welcome to month 2 of the homemade Bread Baking Challenge! How did you like the No-Knead Bread from last month? So many of you made it!
Let's get into this month's challenge! English Muffins or Muffin Splits are something we eat a lot of. They make epic breakfast muffins for the weekend and are a really easy snack. Sadie loves them too!
I thought they might be a bit tricky to make, but they are actually really simple! They are a nice follow on from the no-knead bread we made last month as they only require a quick 2 minute knead in the bowl before letting the dough rise.
As always, there are step by step photos in the post and a video at the bottom showing you exactly how to make them.
Click here to pin this post to your bread recipes board on Pinterest to save it for later
Let's break down the steps:
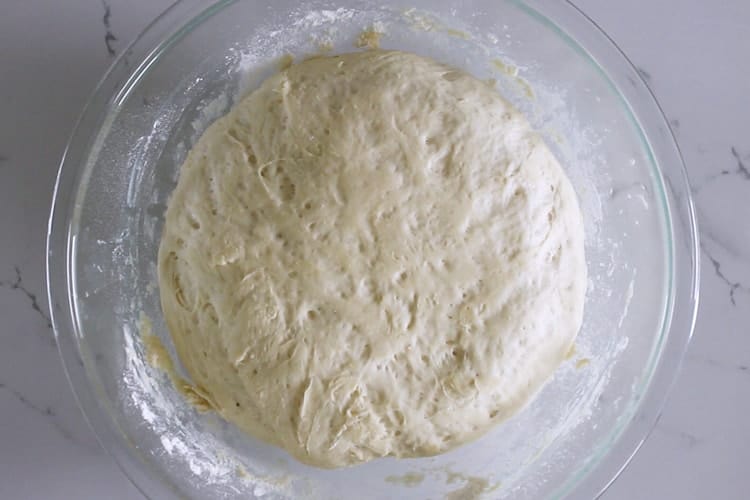
Step 1: Make the dough and first rise
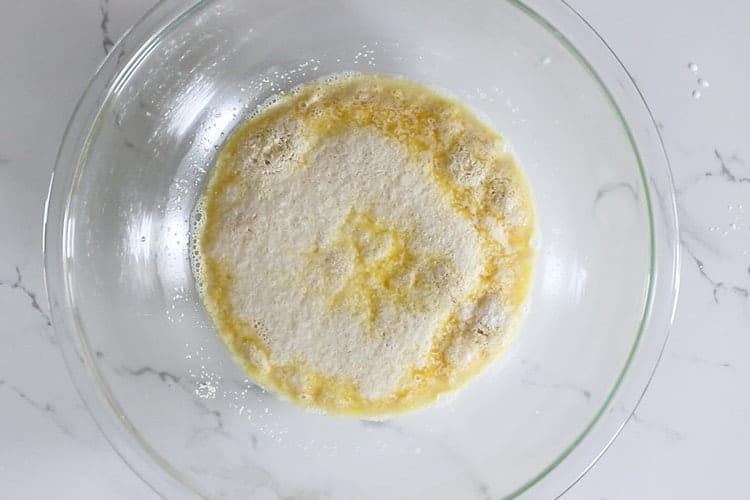
The dough is simple - add butter to a bowl, pour over boiling water, add milk, yeast and sugar and leave it for 5 minutes for the yeast to activate. I love this step as you know for sure that the bread will rise if your mixture gets all bubbly and foamy! If this doesn't happen, your yeast may be old or expired, so you will need to ditch it and start over. It's great that you can figure this out at the start, rather than going through the whole bread making process to be disappointed!
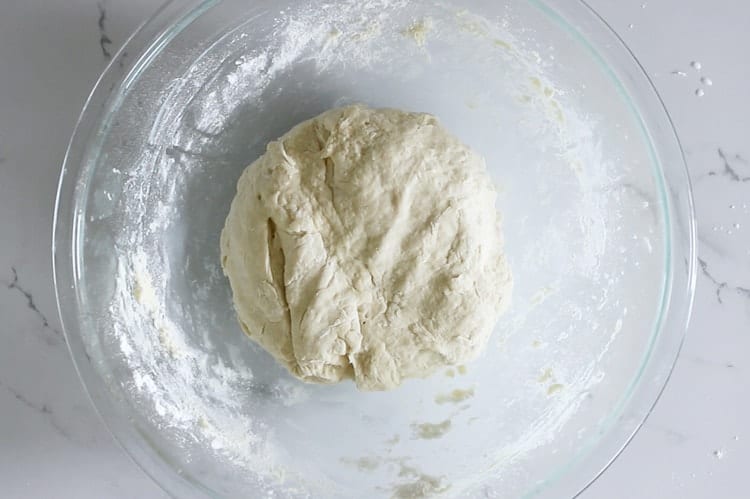
Once the mixture is bubbly, add the flour and salt and mix together until a dough forms. Start with 3 cups of flour and add just enough extra to make a dough that is easy to knead and doesn't stick to your hands. I add about another ⅓ of a cup. Knead it in the bowl for a couple of minutes until the dough is soft and then cover with a clean tea towel and leave somewhere warm to rise until doubled in size. This usually only takes about 30 minutes.
Step 2: Shape & second rise
Once the dough has doubled in size, tip it onto a lightly floured surface and split the dough into 8 even pieces. If you want to be really particular about making them the same size you can weigh them - each dough ball should be around 95 grams.
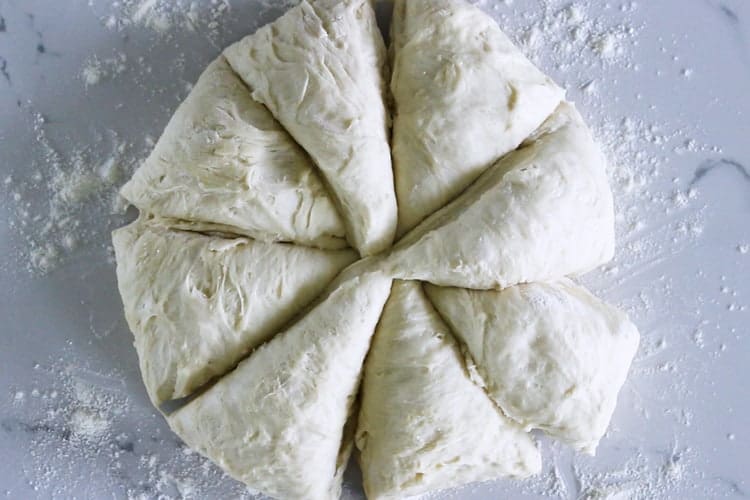
Using lightly floured hands, roll the dough into balls and coat in cornmeal and place on a baking tray. Just a note here, cornmeal is NOT cornflour/cornstarch! You can buy it from Bin Inn and it is called cornmeal or Masa flour.
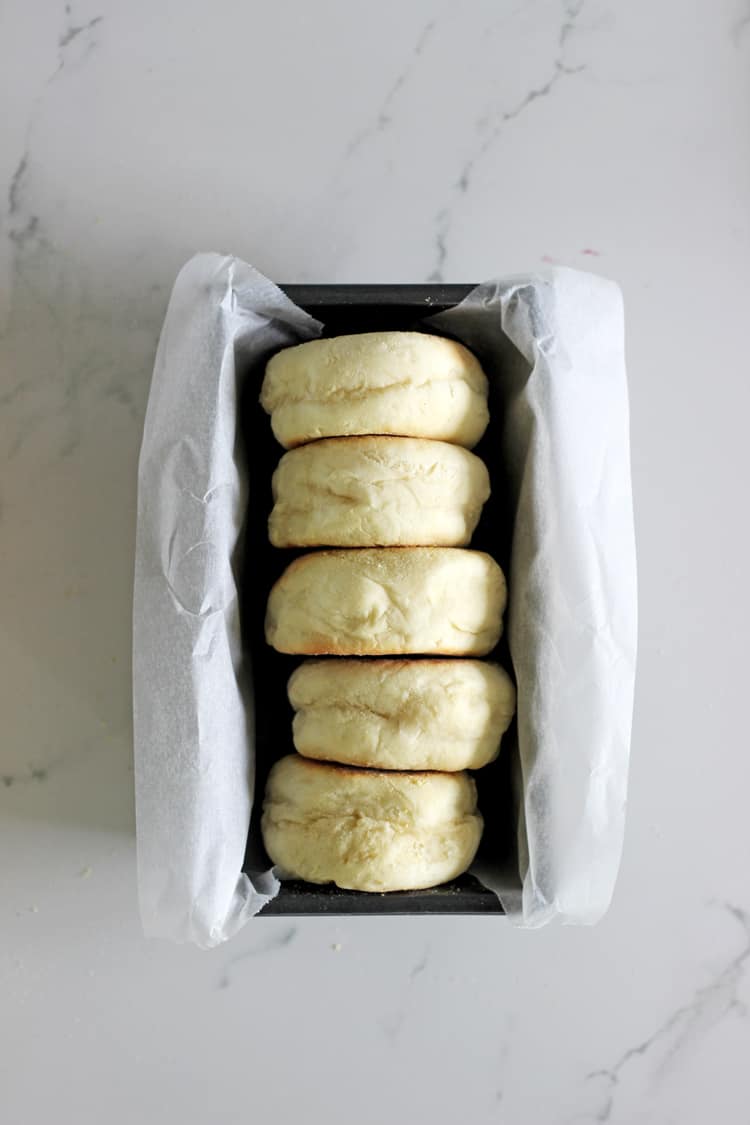
Leave the dough uncovered and put back in a warm place to rise for another 20 minutes - the muffins will start to puff up.
Step 3: Cooking
In the recipe card below I've given you a couple of options for cooking, depending on what sort of frying pan you have.
Method 1: Cook for a few minutes each side in a hot frying pan, either cast iron or regular non-stick frying pan, transfer to a baking sheet and finish in the oven for 8 minutes.
Method 2: Cook just in the frying pan. Cook for 2 minutes on one side, flip and cook for 5 minutes on the other side, then flip again and cook for 4-5 minutes on the first side and then flip one more time for 2 minutes. This method works best if you have a cast iron frying pan or electric frying pan. I found that it is easier to maintain the heat in these pans, whereas my non-stick frying pan got too hot and started burning the muffins on the outside before they were cooked on the inside. This is why I would recommend method 1 if you only have a regular frying pan.
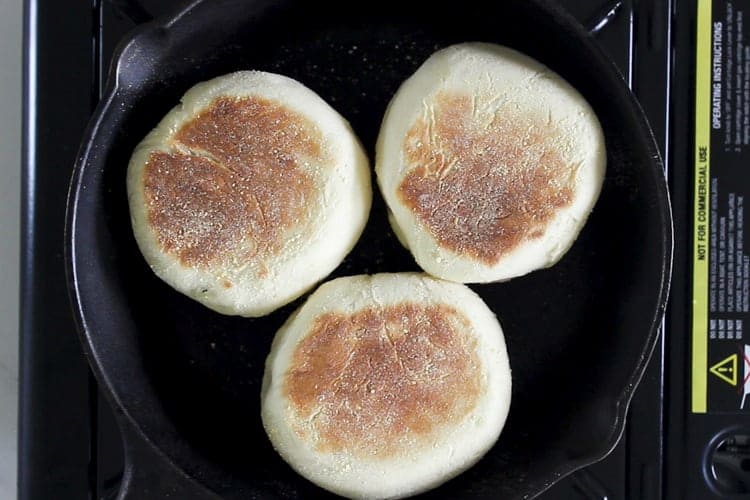
My prefered method is a few minutes each side in a hot cast iron frying pan, followed by 8 minutes in the oven. There wasn't much difference between the 2, but I found this method to produce more consistent muffins.
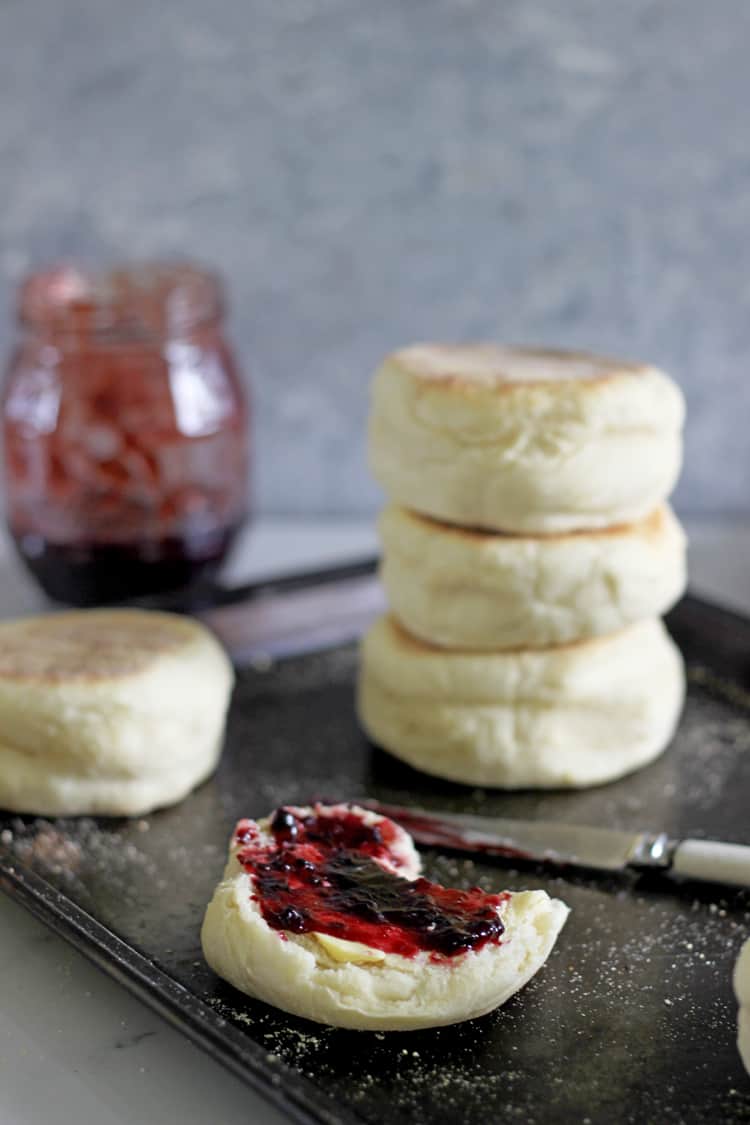
Step 4: Eat them!
That's it! Now all that's left to do is split them, toast them and enjoy your made from scratch English Muffins! The best way to split them so that all the nooks and crannies stay intact is to prise them open using 2 forks. By frying them on both sides, they form almost a bit of a line through the middle that makes them easy to pull apart. Then either put the in the toaster or under the grill for a few minutes!
Can I freeze English Muffins?
Yes definitely! I split them apart first and then put them in a snaplock bag in the freezer. They are then easy to pull apart before toasting and I put them in the toaster frozen.
Other bread recipes to try:
Made this? Tag me on Instagram @thekiwicountrygirl and hashtag it #thekiwicountrygirl.
Homemade English Muffins
Ingredients
- 25 grams butter
- ¾ cup boiling water
- ½ cup milk
- 1 Tablespoon active dried yeast
- 1 Tablespoon sugar
- 3 cups plain flour (plus about ⅓ cup more if needed)
- 1 ¼ teaspoons salt
- ¼ cup cornmeal (see recipe note 1)
Instructions
Make the dough
- Add the butter to the bowl of a stand mixer (or large mixing bowl) and pour over the boiling water, milk, yeast and sugar and stir to combine. Leave to sit for 5-10 minutes until the yeast starts to bubble.
- Add the flour and salt and mix together either using a wooden spoon or the dough hook on your stand mixer. Knead in the bowl for 2 minutes - if you need to, add about ⅓ cup more flour. The dough will be sort of sticky but will still form a ball without sticking to your hands. Cover the bowl and put in a warm place to rise for about 30 minutes, until doubled in size.
Shape & rise
- Turn the mixture out onto a lightly floured surface, split into 8 even sized pieces and roll each piece into a ball. Roll each ball in the cornmeal and place on a baking tray (giving them about 2cm of space between them) and leave them uncovered, in a warm place to rise for 20 minutes until they are puffy.
Cooking Method 1: Using a frying pan and the oven (My preferred method)
- While the muffins are rising, heat a frying pan/skillet over a low-medium heat - let it heat for about 10 minutes before you cook the muffins. Pre-heat the oven to 180°C/350°F.
- Working a few at a time, carefully place each muffin into the frying pan. Cook for 3-4 minutes on each side and then remove from the pan and transfer to a baking tray. Once all the muffins have been fried, bake them in the oven for 8 minutes and then transfer to a cooling rack.
Cooking Method 2: Using only a cast iron or electric frying pan
- While the muffins are rising, heat a cast iron frying pan/skillet over a low-medium heat, Let it heat for about 10 minutes before you cook the muffins.
- Working a few at a time, carefully place each muffin into the frying pan. Cook for 2 minutes on 1 side, then carefully flip over and cook for 5 minutes on the other side. Flip again and cook for 5 more minutes on the first side, and then if they need it, flip one more time and cook for a further 2 minutes. During this process, keep an eye on them so that they don't burn. If they look to be browning too quickly, turn the heat on the frying pan down and flip them more frequently.
- Once they are nice and brown on both sides, remove them from the frying pan and place on a cooling rack.
Serving and storing
- To make sure you get all the great nooks and crannies that you want, use 2 forks to prise the muffins open before serving. Toast under the grill or in the toaster and spread with butter and jam!
- English muffins store best in the fridge for 3-4 days. They also freeze really well. Split them open and place back together before placing into a snaplock bag and freezing. This makes it easier to pull them apart when they are frozen and put them straight in the toaster.
[mc4wp_form]
If you tried and loved this recipe, please leave a comment and a rating below!

Anna says
I recently rediscovered my love of english muffins so on a cozy rainy day thought I'd try making them myself. These are so delicious and easy, they turned out way better (lighter) than expected. More substance than the supermarket ones, gorgeous texture and flavour. I will be making these again. Thank your for sharing your recipe!
Harry says
Used this for my first attempt and they came out great, rather large, so next time I hope to make them a bit smaller. Is that yeast ingredient "1 Tablespoon active dried yeast" right, most others 2 teaspoons or 1 packet/sachet?
Laura says
Hi there, yes that is the correct amount of yeast that I use. And you can certainly make them smaller if you prefer!
Amanda says
Just made these for the first time for a camping trip! Made another batch straight away lol. They're oddly satisfying and so easy to make! Definitely going to be a staple in our house from now on 😊
Tamsin Wilkins says
Hi can you make these the night before to cook in the morning?
Laura says
I haven't tested making them this way but if I was going to, I would either shape them and then let them do their second rise in the fridge before frying and baking the next morning, or making them as far as frying them in the frying pan and then letting them cool and sit overnight before finishing baking them in the morning.
Mel Munro says
Absolute hit in our household. Need to start making double/ triple batches so there is enough left to actually freeze. Going to try spiced/ fruit ones next.