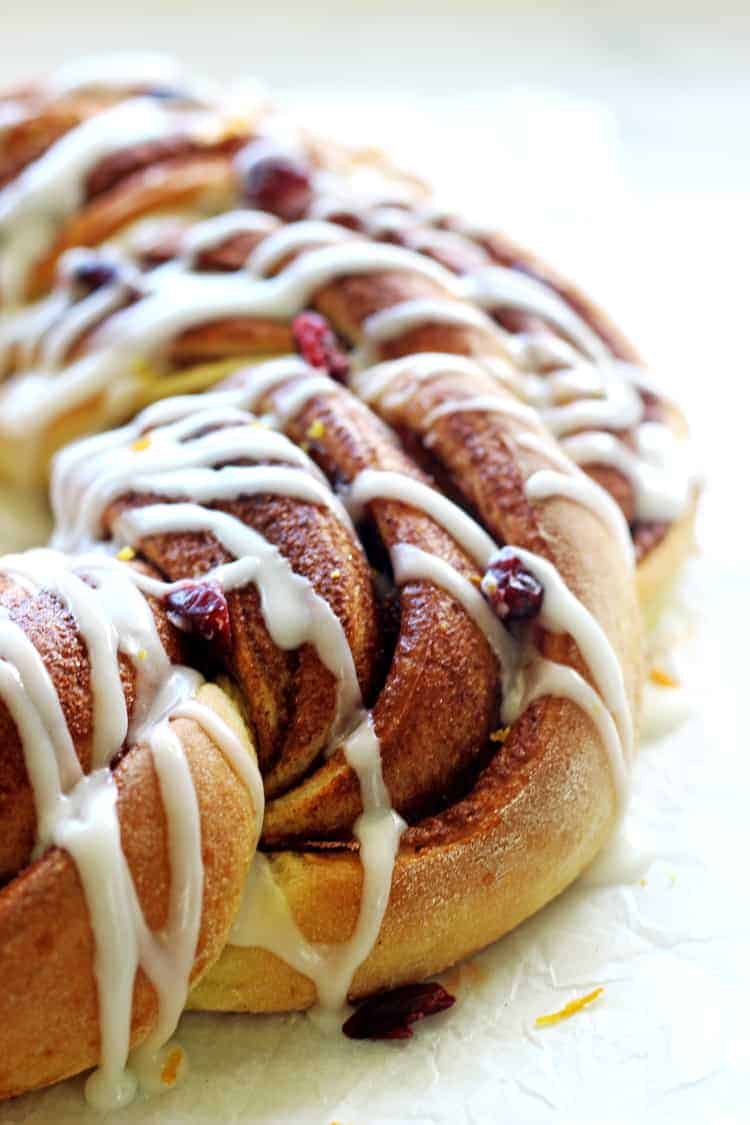
A festive twist on a classic recipe - this cinnamon roll wreath will be the star of your holiday table! It's simple to make but looks so impressive.

Ohhhhh YES...it's DECEMBER!!! That means the ban has been lifted and I am officially allowed to embrace all things Christmas! It seems tough, no Christmas in November (I know!!) but to be fair, Josh's birthday is the 19th of December so I count myself pretty lucky that I don't have to wait until after that.
So of course, the bread baking challenge recipe for this month has a festive twist. It's almost the exact recipe I use for my cinnamon rolls but instead of individual rolls, you split the roll in half and twist it into a wreath - simple, effective and totally worthy of being the centrepiece of your Christmas morning breakfast table.
Because it's Christmas, I've ramped up the spices in the filling - more cinnamon plus allspice and nutmeg. I also tested it out using brown sugar and white sugar in the filling and both were good. The white sugar held together a little better but the brown sugar added an extra caramel kind of flavour and stickiness - definitely not something I was sad about!
Click here to pin this post to your bread recipes board on Pinterest to save it for later
The process of making cinnamon roll dough is exactly the same as almost all of my other bread recipes. Mix the yeast, sugar and water together and let it bubble up. Then add the flour and salt and in this case, melted butter, milk and an egg. The addition of extra sugar, dairy and fats makes this an enriched dough and it's what gives the bread it's super soft interior with a tender crumb.
Let the dough rise until doubled in size before rolling it out into a rectangle shape. I find I often need to use my hands to shape it back into a rectangle as I go along - it's pretty important to have a perfect rectangle shape, as this means the roll is even the whole way down.
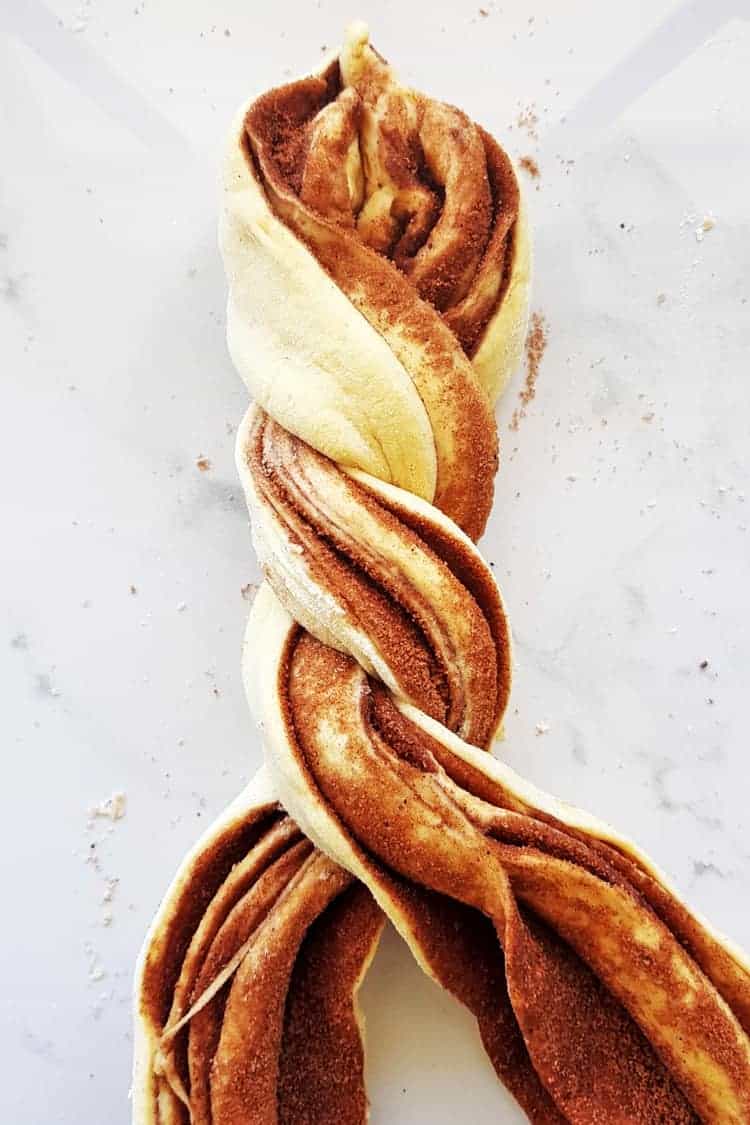
The most challenging part about forming the wreath is making sure the layers don't fall apart. Once you have rolled out the dough and spread it with butter and sugar and spices, roll it up into a tight roll. At this point if you were making regular cinnamon rolls, you would slice 2cm thick pieces and lay them out on a tray, but for this wreath we are going to slice the roll lengthwise and then twist the two pieces around each other, making a sort of braid. While you are doing this, try to keep the open sides of the roll (with all the layers) facing up and out - this is what makes it look so pretty!
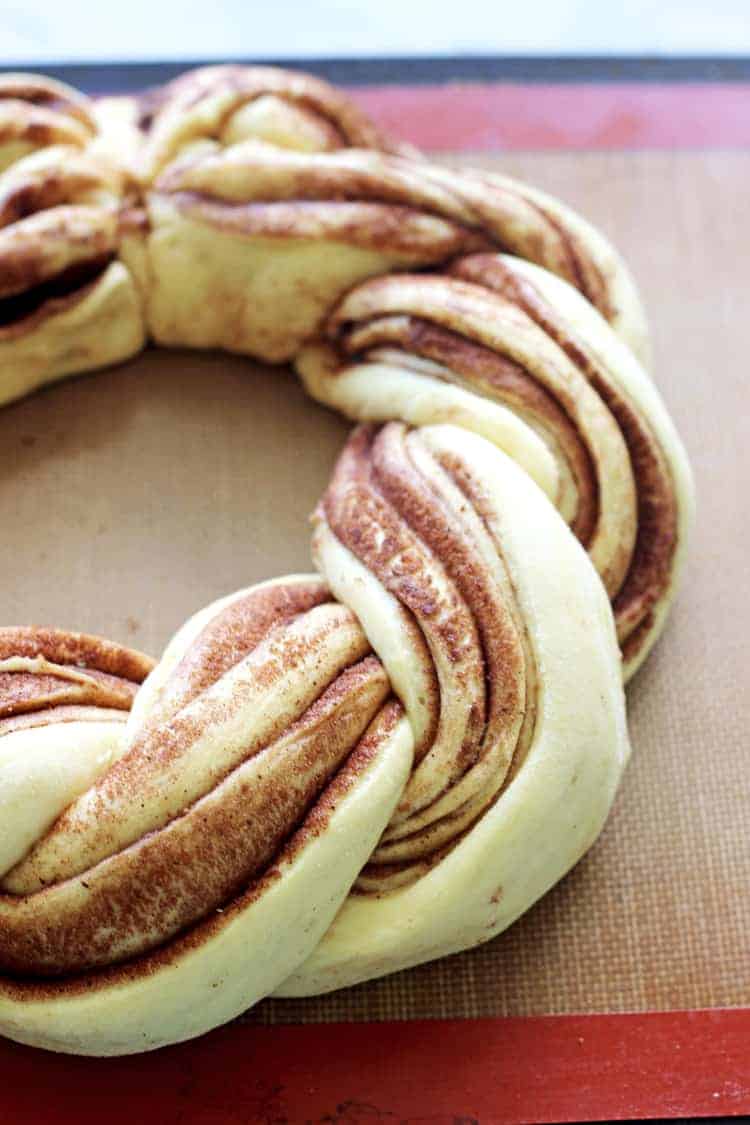
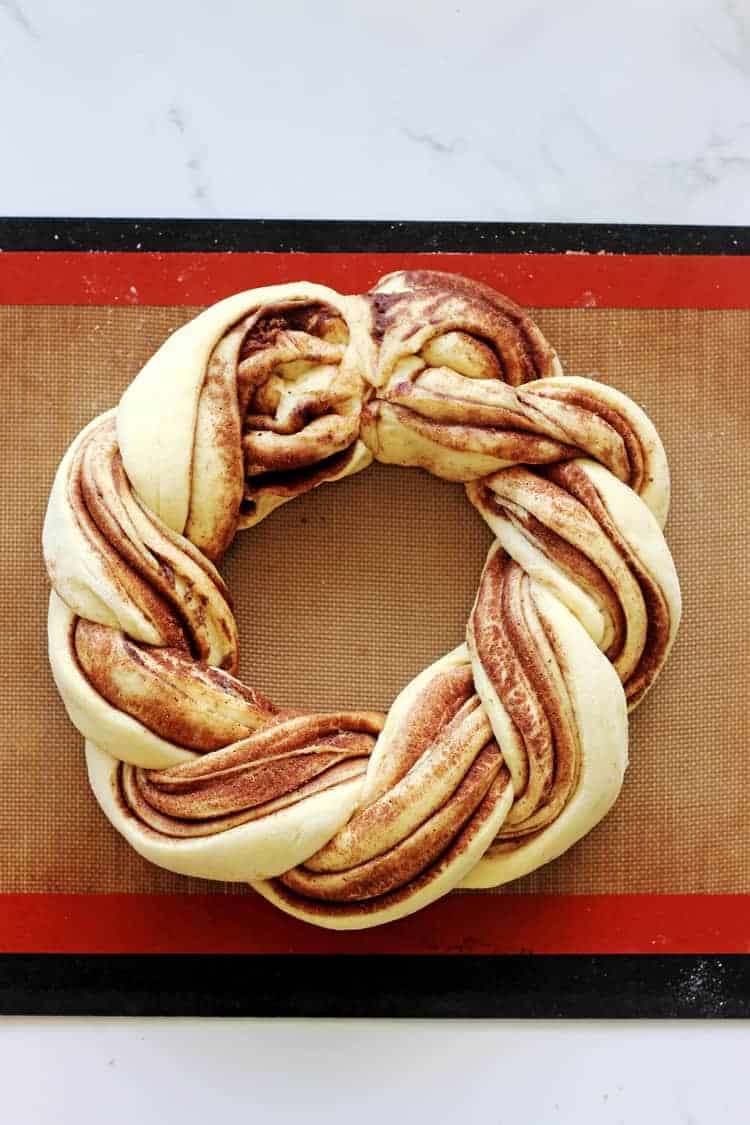
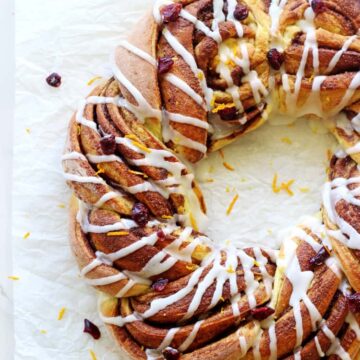
Once you've twisted the whole wreath, join it together into a circle by pinching the dough together with your fingers. Transfer it onto a baking tray (it may be easier to form the wreath on the tray) and let it rise again for 45 minutes or until puffy. Bake for about 15 minutes until it is golden brown and then once it's cooled slightly, drizzle with a simple vanilla glaze and decorate with dried cranberries and orange zest!
It's the perfect tree decorating snack, Christmas morning breakfast or a fun "take a plate" option as it can be sliced or torn apart.
Other bread baking challenge recipes:
Made this? Tag me on Instagram @thekiwicountrygirl and hashtag it #thekiwicountrygirl.

Some of the links in this post are affiliate links, which pay me a small commission for my referral at no extra cost to you! Thank you for supporting The Kiwi Country Girl.
SHOP THE RECIPE
Here are some items I used to make this recipe:
New Zealand
Candy thermometer | Stand mixer | Silicone baking mat | Pyrex Mixing Bowls | Baking sheet
Amazon
Candy thermometer | Stand mixer | Silpat Baking Liner | Pyrex Mixing Bowls | Baking sheet
Cinnamon Roll Wreath
Ingredients
Dough
- 2 teaspoon (8g) instant dry yeast (1 package of Edmond's instant dry yeast)
- 1 Tablespoon sugar
- ¼ cup warm water (40-45°C/104-113°F - see note 1)
- 2 ½ cups (350g) high grade/bread flour
- ½ teaspoon salt
- ½ cup warm milk (warm to the touch)
- 25 grams butter (melted)
- 1 egg
Topping
- 50 grams butter (softened)
- ⅓ cup brown sugar
- 1 Tablespoon cinnamon
- 1 teaspoon allspice
- 1 teaspoon nutmeg
Vanilla Glaze
- 1 cup icing sugar
- 2 Tablespoons milk
- 1 teaspoon vanilla extract
Instructions
- In a large bowl (the bowl for your stand mixer if using) add the yeast, sugar and warm water and whisk gently to combine. Allow to sit for 10 minutes until the mixture is foamy.
- Add the remaining dough ingredients and knead using a stand mixer with the dough hook on low speed for 5 minutes, or by hand for 7 minutes, or until the dough forms a soft ball that springs back when lightly pressed. You should be able to handle the dough without it being too sticky, so add slightly more flour if you need.
- Transfer into a large clean bowl and cover in glad wrap or a clean tea towel and put in a warm place to rise for 40-50 minutes or until almost doubled in size (see note 2)
- Tip the dough out of the bowl onto a lightly floured surface and gently roll out into a rectangle that is approximately 45cm x 25cm (17.5" x 10").
- Combine the brown sugar and spices in a small bowl. Spread the softened butter evenly over the dough and sprinkle the sugar and spice mixture evenly over top of the butter.
- With the longest edge close to you, tightly roll the dough up into a roll, pinching the end slightly to seal the roll.
Shaping the wreath
- It may be easier to shape the wreath on the tray you're baking it on so that you don't have to move the shaped roll too far.
- Prepare the oven tray you will be using by lining it with baking paper or a silicone baking mat. Using a sharp knife, slice the roll in half lengthways, right down the centre. Gently rotate each half of the roll so that the open side is facing upwards.
- Pinch together the two pieces at the top and carefully twist the two pieces together, trying to keep the open side facing up as much as possible. When you get to the end, pinch the ends together and carefully form the twist into a circle, again pinching the ends together.
- Cover the roll with the same tea towel and leave in a warm place to rise again for 45 minutes or until almost doubled in size.
- While the wreath is rising, heat the oven to 180°C and then bake for 15 minutes or until the wreath is just starting to go brown on top. Remove from the oven and allow to cool slightly before glazing.
Vanilla Glaze
- Mix all ingredients together and pour over the rolls immediately before serving.
- If you are not eating the bread immediately, skip the glaze step, cover and store at room temperature overnight or in the fridge for a couple of days until you are ready to serve. Warm the wreath in the oven when you are ready to eat and then glaze it. You can also freeze the wreath on the day of baking in a large snaplock bag. Thaw overnight in the fridge and then heat in the oven (180°C/350°F for around 10 minutes or until warmed all the way through) before glazing and serving.
Notes
[mc4wp_form]
If you tried and loved this recipe, please leave a comment and a rating below!

Elena says
Delicious!! Made right after your pretzel recipe. This is so good!!
Leighann says
Love the look of this! Do you think it would be possible to prepare the night before Christmas and bake in the morning?
Laura says
Hi Leighann - yes definitely! Shape the wreath and then do the second rise in the fridge overnight. Remove it from the fridge about 1 hour before baking to give it time to warm up before baking!
Fiona says
Such an awesome simple recipe and looks really effective.
Laura says
Thanks so much Fiona! I'm so happy you love this recipe 🙂