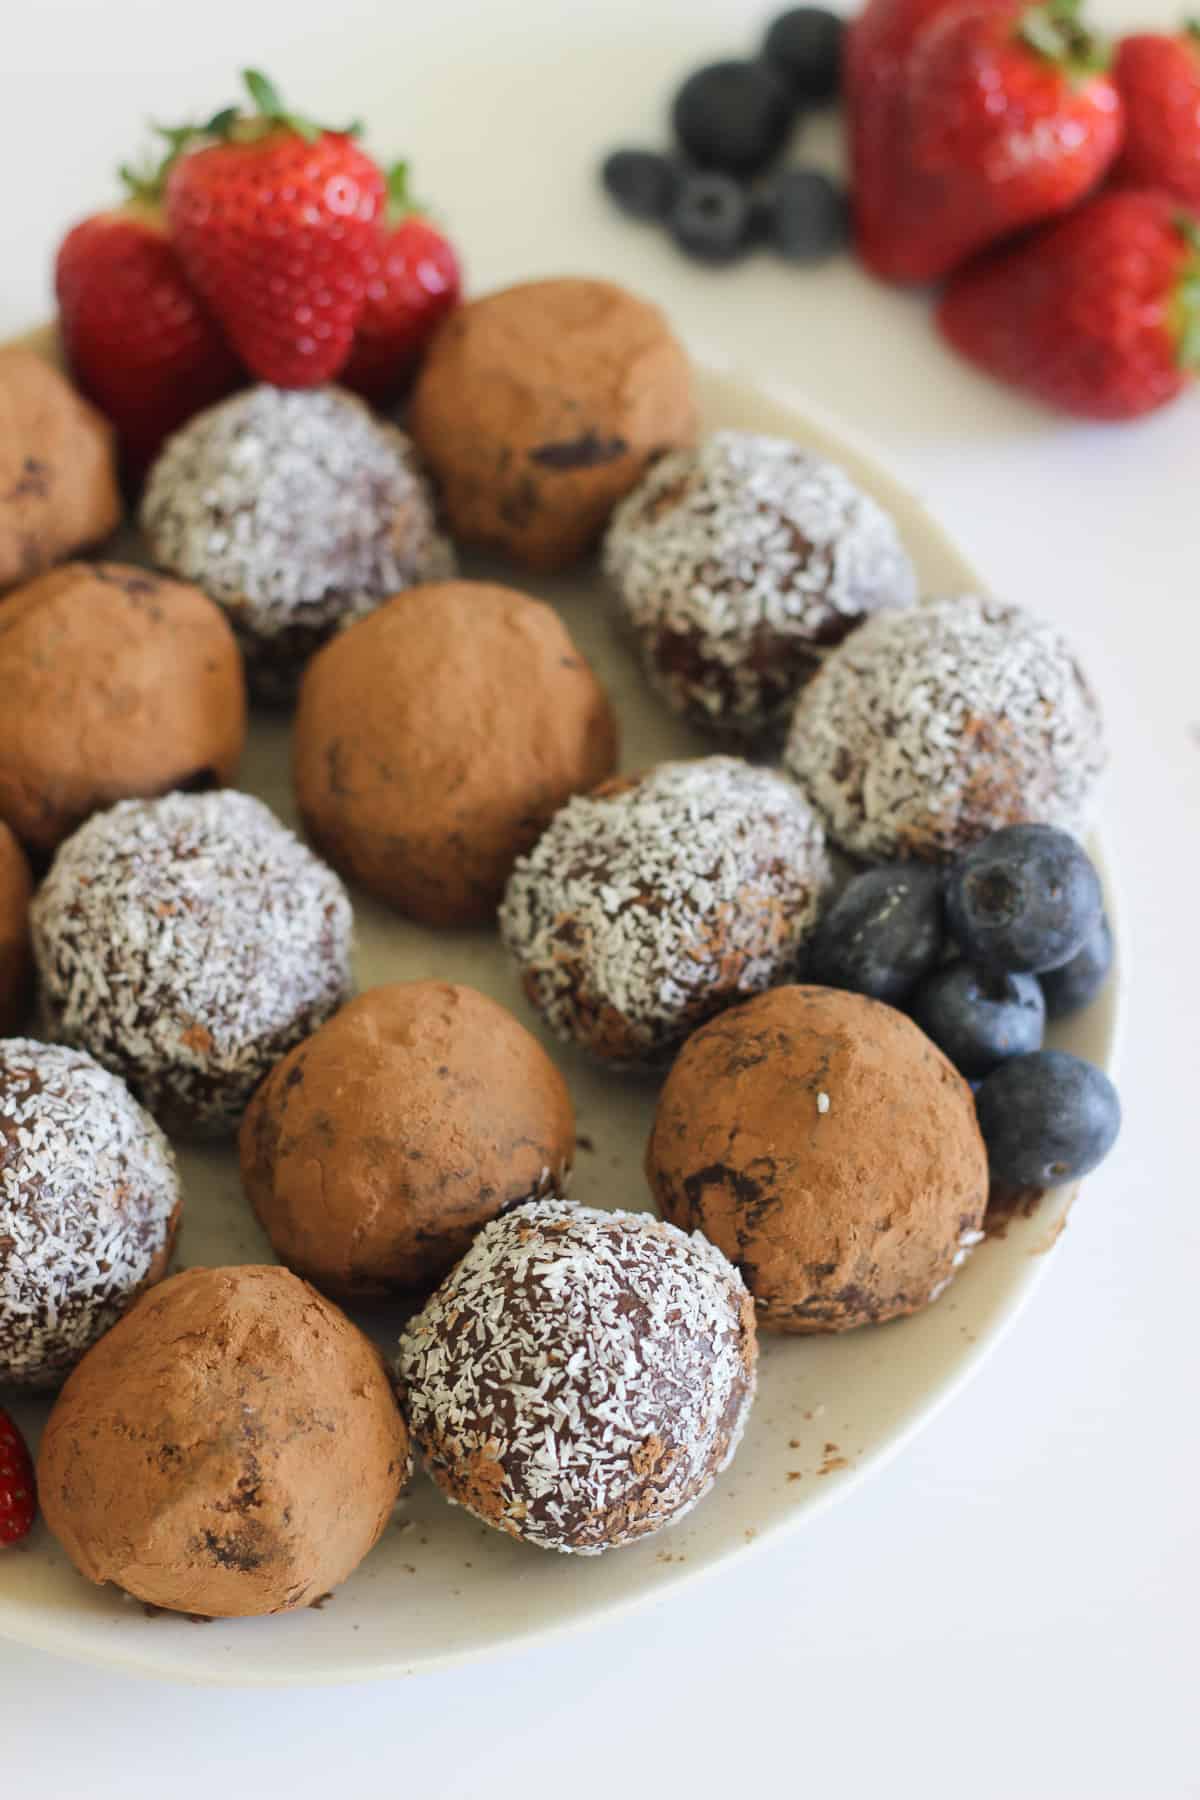
Simple to make, this easy recipe for decadent chocolate truffles will be your new go to when you need to take a plate. Made using pantry staples with only 30 minutes hands on time, they can even be made ahead of time and frozen! They are the perfect no bake dessert.

When you think back to your childhood, is there a particular recipe that just stands out? For me, it is definitely my Mum's famous chocolate truffles. No family event was ever without a huge plate of them for good reason - they are an absolute treat, popular with adults and kids alike and are just SO darn good!
Why we love this recipe
- It uses basic pantry ingredients that you likely already have on hand
- It comes together quickly - mix up the truffles, let them chill for 30 minutes and then shape
- They can be made ahead of time! These truffles keep well in the fridge for up to 2 weeks and can be frozen for 3 months.
- They are just. SO. DARN. DELICIOUS!
Recipe ingredients
The list of ingredients for these truffles is simple

- Plain biscuits - you can use any plain biscuits as the base for these truffles - my Mum always used Girl Guide biscuits when making them but as they are only available at certain times of year, anything will do - wine biscuits, Marie biscuits or even graham crackers if you are not in NZ
- Caramel filled chocolate - you can certainly make these truffles without the chocolate centre but WHY would you?! This is what makes them special! My favourite to use is the Whittakers Creamy Caramel block.
How to make this recipe
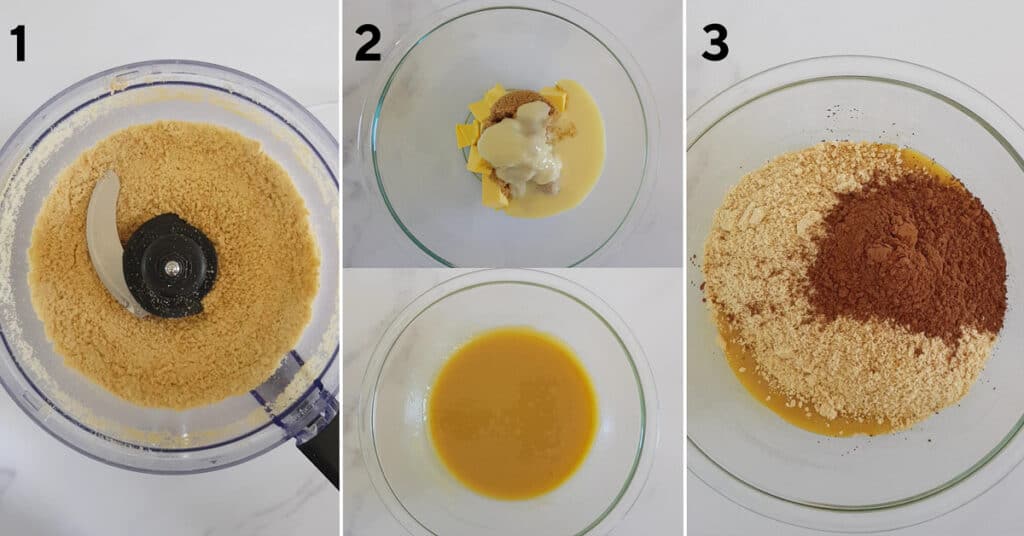
Step 1: Use a food processor to crush up the biscuits into fine crumbs. If you don't have a food processor to crush the biscuits, you can place them in a snaplock bag and smash up with a rolling pin or alternatively, you can buy pre crushed biscuits from bulk food stores such as Bin Inn - perfect for if you don't have a food processor!
Step 2: Melt together the butter, brown sugar and condensed milk either in the microwave or in a small pot on the stove over a medium heat.
Step 3: Pour the crushed biscuit crumbs and the cocoa powder into the melted butter mixture.
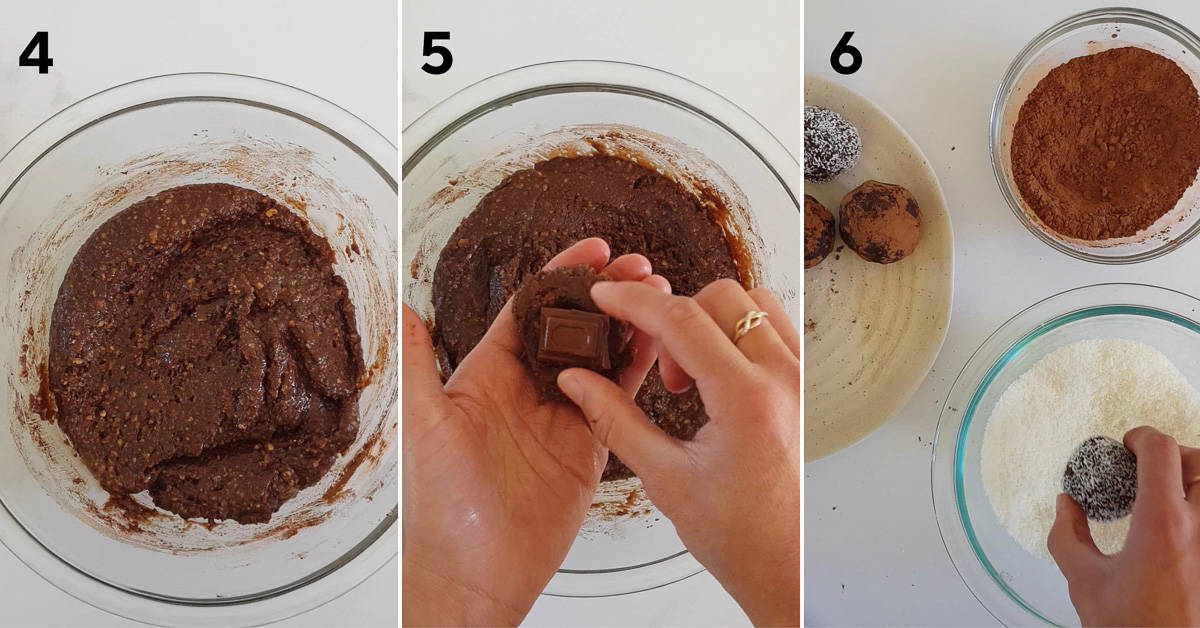
Step 4: Mix all ingredients together and place in the fridge to chill for 30 minutes.
Step 5: Roll the truffles using about 1 ½ Tablespoons of mix per truffle and place a square of chocolate in the centre.
Step 6: Coat the truffles in desiccated coconut or cocoa powder, or leave plain.
Tips & tricks for success
- Use slightly wet hands to shape the truffles - this will make it much easier!
- If the mixture is too soft to form truffles, chill for 5 more minutes, and if it's too hard, allow to sit on the bench for 5 minutes before trying again.
FAQ's
You can store truffles for about 2 weeks in the fridge in an airtight container.
Yes! Store chocolate truffles in an airtight container and freeze for up to 3 months. Allow to thaw in the fridge overnight.
Yes! You can use marshmallows, dried fruit, a soft lolly or just leave it out all together.
No, you can coat them in cocoa powder, freeze dried raspberry powder or just leave them plain.
Recipe video
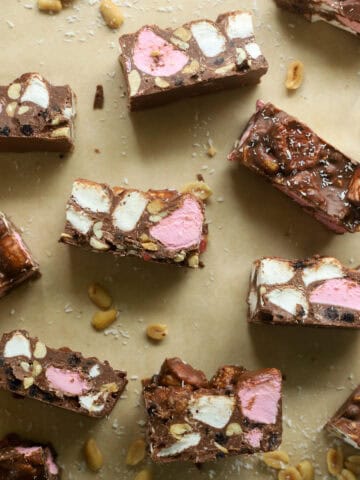
More sweet treats


If you want more simple + delicious made from scratch recipes, subscribe to my newsletter and follow along on Facebook, Pinterest and Instagram

Mum's Chocolate Truffles
Ingredients
- 1 x 250 gram packet plain biscuits (wine biscuits, Girl Guide biscuits or similar)
- 115 grams butter
- ½ cup brown sugar
- 200 grams sweetened condensed milk (½ a tin)
- ¼ cup cocoa powder
- 20 squares caramel filled chocolate
To roll
- ¼ cup dessicated coconut
- ¼ cup cocoa powder
Instructions
- Using a food processor, crush the biscuits until they are fine crumbs.
- Melt the butter, brown sugar and condensed milk together either in a small saucepan over a medium heat on the stove or microwave safe bowl, microwaving for 30 seconds at a time until melted.
- Add the biscuit crumbs and cocoa powder to the condensed milk mixture and mix well. Place the bowl in the fridge and chill for 30 minutes.
- Take approximately 1 ½ Tablespoons of mixture in your hand and roll into balls, placing a square of chocolate in the centre of each truffle (see video for visual)
- Roll the truffles in coconut or cocoa powder or leave plain.
- Store in an airtight container in the fridge for 2 weeks or freeze for up to 3 months.
Notes
- You can use any type of plain biscuit including wine biscuits, Girl Guide biscuits or Marie biscuits.
- If you don't have a food processor to crush the biscuits, you can place them in a snaplock bag and smash up with a rolling pin or buy pre crushed biscuit crumbs from a bulk food store such as Bin Inn
- Use slightly wet hands to shape the truffles - this will make it much easier!
- If the mixture is too soft to form truffles, chill for 5 more minutes, and if it's too hard, allow to sit on the bench for 5 minutes before trying again.
- These truffles are perfect for making ahead of time. Store in an airtight container and freeze for up to 3 months. Allow to thaw in the fridge overnight.
If you tried and loved this recipe, please leave a comment and a rating below!

Stephanie says
I love your recipe it reminds me of my old canteens truffles when I was a kid
Karen says
How many calories are there per truffle?
Laura says
I couldn't tell you sorry! Might need to plug the recipe into an app that can work that out for you
Emma says
These look yum as. It says 248 calories per serving. How many truffles are a serving?
Laura says
The nutritional information is calculated based one one truffle being one serving
sio says
where is the caramel filled chocolates in the recipe
Laura says
I use a large Whittaker's creamy caramel block broken into pieces