• Skip to primary navigation
  • Skip to main content
  • Skip to primary sidebar
  • Skip to footer

The Kiwi Country Girl logo

  • Start Here
    • Our story
    • Family
    • Travel
  • Recipe Index
  • Farm & Garden
    • Farm
    • In the garden
  • DIY & Crafts
  • Shop
  • Free Downloads
    • Freezer Meal Storage Guide
    • Free 1 Week Meal Plan
    • Bread Baking Ebook
  • Join The Kiwi Country Homestead
  • Nav Social Menu

    • Facebook
    • Instagram
    • Pinterest
menu icon
go to homepage
  • Recipe Index
  • Farm & Garden
  • DIY
  • About us
  • Shop
  • Join The Kiwi Country Homestead
  • Free Downloads
    • Facebook
    • Instagram
    • Pinterest
  • subscribe
    search icon
    Homepage link
    • Recipe Index
    • Farm & Garden
    • DIY
    • About us
    • Shop
    • Join The Kiwi Country Homestead
    • Free Downloads
    • Facebook
    • Instagram
    • Pinterest
  • ×
    Home » In the kitchen » Baking » Triple Salted Caramel Cupcakes

    Triple Salted Caramel Cupcakes

    Published: Jul 25, 2015 · Modified: Jul 7, 2021 by Laura · This post may contain affiliate links.

    Jump to Recipe Print Recipe

    Remember when I made this magical salted caramel sauce? Well it just got even more magical.

    SALTED CARAMEL CUPCAKES!!!

    Salted Caramel Cupcakes (5)


    It's 2 of my all time favourite things coming together. Like Taylor Swift & Calvin Harris. Except vanilla cupcakes & salted caramel sauce.

    And then they got married and had beautiful salted caramel cupcake babies!!

    Salted Caramel Cupcakes (3)

    I get a little excited about things like this, can you tell?? I think it's because I'm taking these cupcakes to a girl's movie night tonight that is going to involve pizza, mulled cider and way too much giggling!

    Aaaanyway, back to the cupcakes.

    Salted Caramel Cupcakes (2)

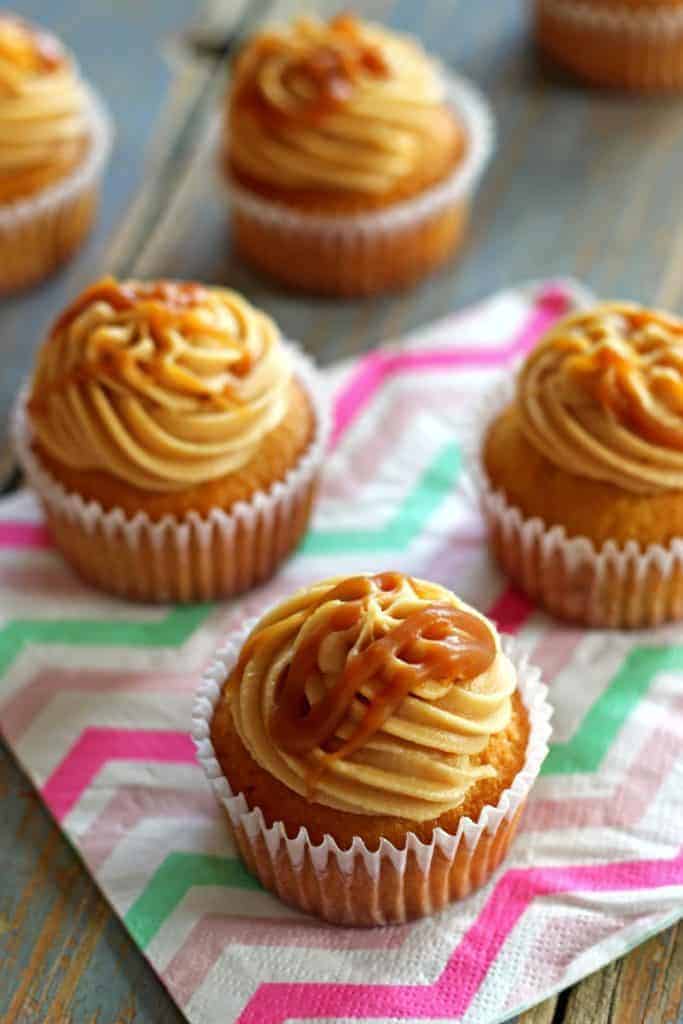
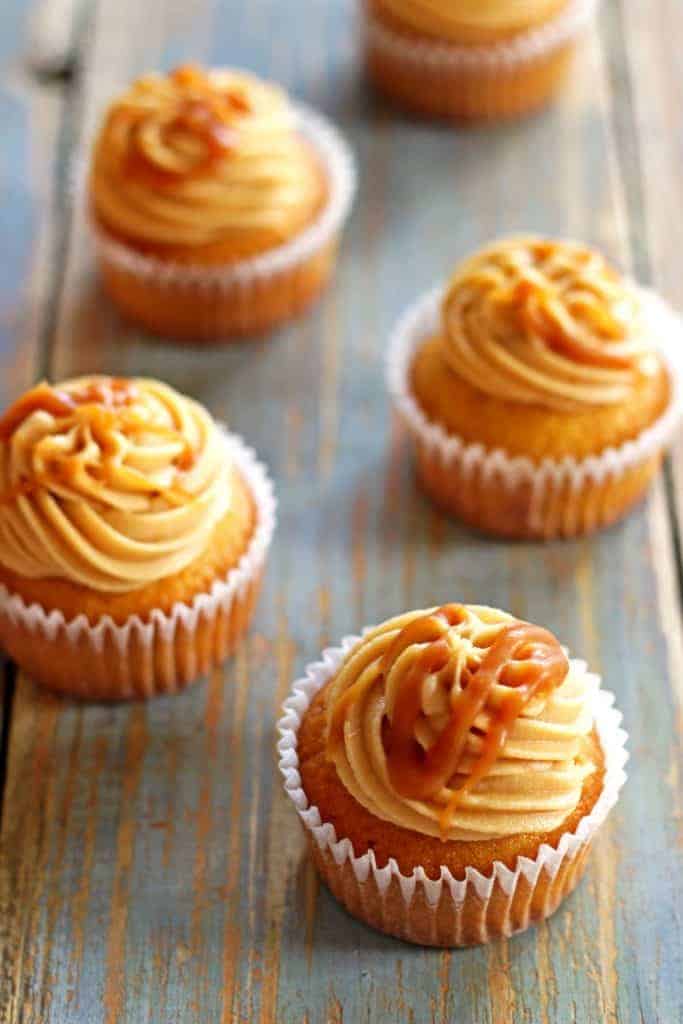
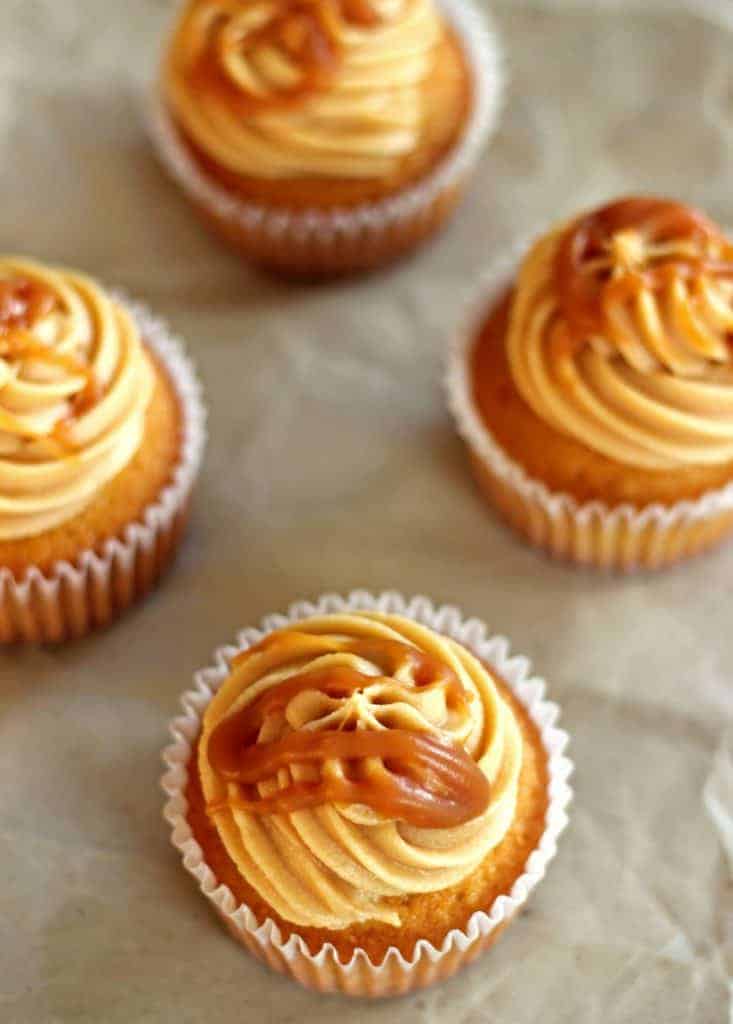
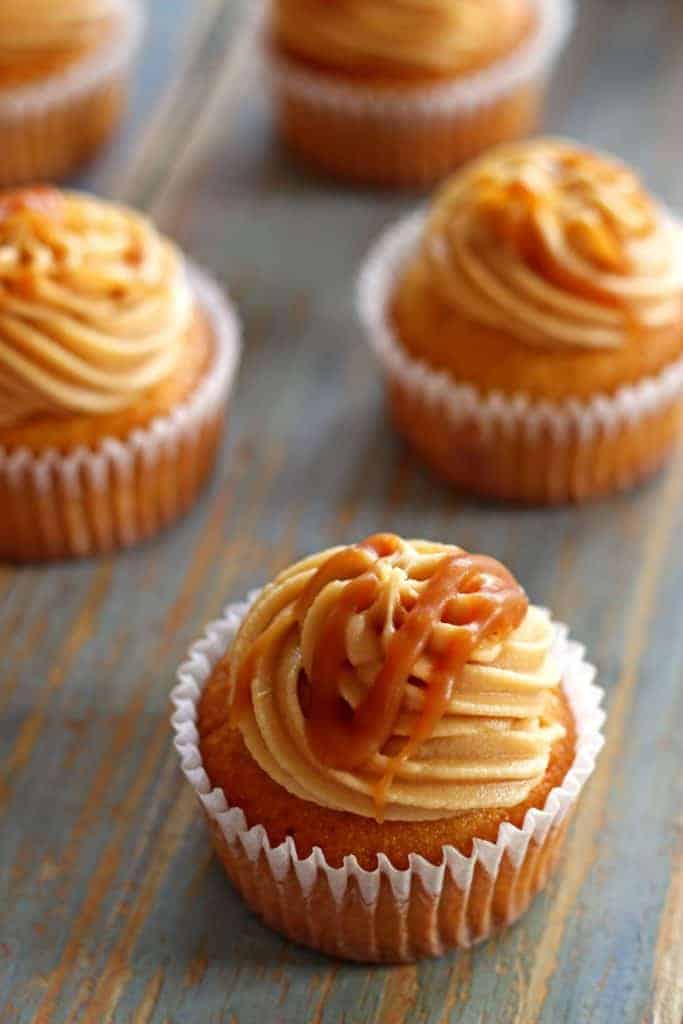
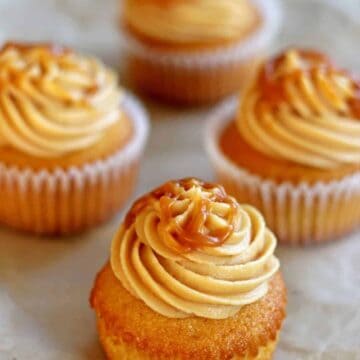
    You might think that with salted caramel sauce in the cupcake and in the frosting it may be too sweet but it works. I think it's the salt. So because they weren't too sweet I took it one step further and drizzled more sauce on top. Two reasons:

    1. More salted caramel is better
    2. More salted caramel is better

    Wait, I already said that? Ok...

    2. It's pretty.

    And pretty always tastes better.

    Salted Caramel Cupcakes (4)

    The cupcakes themselves are an adaption of my favourite vanilla cupcake recipe (which I can't believe I don't have on here yet!) with a little butter removed and salted caramel added in.

    The frosting is the easiest it gets. Add icing sugar, salted caramel sauce and a little milk and beat it until it is the perfect fluffy consistency of cupcake frosting.

    These cupcakes are the perfect treat for any get together, a birthday or just because you can.

    I think I've found my new favourite cupcake!

    Salted Caramel Cupcakes (1)


    Triple Salted Caramel Cupcakes

    5 from 2 votes
    Print Pin Rate
    Prep Time: 20 minutes minutes
    Cook Time: 20 minutes minutes
    Servings: 16 cupcakes
    Author: Laura

    Ingredients

    For the cupcakes

    • 90 grams butter , softened
    • ¾ cup sugar
    • 1 teaspoon vanilla extract
    • 2 eggs
    • 1 ½ cups flour
    • 1 ½ teaspoon baking powder
    • ½ cup milk
    • ⅓ cup salted caramel sauce (bought or homemade)

    For the frosting

    • 2 cups icing sugar
    • ½ cup salted caramel sauce
    • 2 tablespoon milk

    Instructions

    For the cupcakes

    • Using a stand or hand held mixer beat together butter and sugar until pale and creamy (3-5 minutes).
    • Add vanilla and 1 egg at a time, beating for 1 minute after each.
    • Sift flour and baking powder into the bowl and add milk. On low speed mix until flour & milk are just incorporated.
    • Add the salted caramel and beat again on high speed for about 30 seconds until the caramel is mixed in and the batter is fluffy.
    • Scoop the batter into muffin tins lined with paper cases filling them about ⅔ full.
    • Bake at 180 degrees C for 13-16 minutes or until the tops are lightly golden and a toothpick inserted comes out clean.
    • Allow cupcakes to cool completely before frosting.

    For the frosting

    • Sift icing sugar into the bowl of a stand mixer. Add salted caramel sauce and milk, and beat on high speed for 3-4 minutes until all ingredients are incorporated and the frosting is light & fluffy.
    • Spoon into a piping bag and pipe onto the cooled cupcakes. Alternatively, you can use a knife to spread the frosting on the cupcakes.
    • Drizzle the top with more salted caramel sauce.
    • Store cupcakes in an airtight container for 5 days.
    Tried this Recipe? Tag me Today!Tag @thekiwicountrygirl or tag #thekiwicountrygirl!
    « Tropical Fruit Smoothie
    Homemade Vanilla Extract »

    Reader Interactions

    Comments

    1. Jacqui says

      August 30, 2020 at 6:43 pm

      I cannot find the recipe on this page. Am I going blind?

      Reply
      • Laura says

        September 14, 2020 at 8:51 pm

        Hi Jacqui, not sure what happened but it's definitely there now! Laura

        Reply
    2. MissusSel says

      November 15, 2016 at 7:22 pm

      Aaaghhh. This is another recipe I can never make again unless it's for someone else. Way too easy and way too delicious to trust myself around!!

      Reply
      • Laura says

        November 22, 2016 at 6:50 am

        Haha I would have to agree with you on this one! 🙂

        Reply
    3. Vicki says

      February 23, 2016 at 6:45 am

      YUM!!! I believe I could make this work dairy-free 😉 Your rules make perfect Sense. MORE salted caramel IS better!

      Reply
      • Laura says

        February 23, 2016 at 10:40 am

        I definitely think you could too! Salted caramel makes the world go round right? 🙂

        Reply
    4. Lisa @ Chocolate Meets Strawberry says

      November 06, 2015 at 10:02 pm

      I want these....NOW!!! 🙂

      Reply
      • Laura says

        November 08, 2015 at 7:39 pm

        They are my favourite cupcakes!!

        Reply
    5. Lucy @ Bake Play Smile says

      July 28, 2015 at 10:09 am

      OMG yum!!! Need these in my life!!!!

      Reply
      • Laura says

        July 30, 2015 at 6:26 am

        I've made and eaten way too many in the last 2 weeks...they are SO good!!

        Reply
    5 from 2 votes (2 ratings without comment)

    Leave a Reply Cancel reply

    Your email address will not be published. Required fields are marked *

    Recipe Rating


    This site uses Akismet to reduce spam. Learn how your comment data is processed.

    Primary Sidebar

    Hi, I'm Laura, a country girl from rural New Zealand sharing all things food, garden and living the simple life!

    More about me →

    Popular Recipes

    • Homemade beef burger with fries in the background
      Homemade Burger Patties (Josh's secret recipe)
    • Close up of scoop of cheesy mince pasta with herbs on top
      Cheesy One Pan Mince Pasta
    • Homemade Burrito Spice Mix (or taco seasoning) - the perfect blend of spices to make your favourite Mexican meal in minutes! Perfect for beef burritos, nachos, chicken strips for tacos, refried beans or anything Mexican! | thekiwicountrygirl.com
      Homemade Burrito Spice Mix (with free printable labels)
    • Overhead of bowl with potato salad, chives and tea towel in background
      Easy Potato Salad Recipe

    Winter Warmers

    • Pan of devilled sausages with mashed potato
      Devilled Sausages
    • Bowl of bacon bone and vegetable soup on table with slice of buttered bread
      Bacon Hock and Vegetable Soup (slow cooker and instant pot)
    • Baked mince and cheese pie with tomato sauce and forks with a slice on a plate
      Mince and Cheese Pie
    • Chocolate self saucing pudding in white dish with bowl served up beside it
      Chocolate Self Saucing Pudding

    Footer

    [instagram-feed num=7 cols=7 showheader=false showbutton=false showfollow=false]
    • Recipe Index
    • Privacy Policy
    • Contact me

    Footer

    ↑ back to top

    About

    • Privacy Policy
    • Accessibility Policy

    Newsletter

    • Sign Up! for emails and updates

    Contact

    • Contact

    As a Mighty Ape Affiliate I earn from qualifying purchases.

    Copyright © 2022 Brunch Pro on the Brunch Pro Theme

    714 shares
    • Pinterest
    • 6Facebook
    • Email
    • Print
    714 shares
    • 6

    Rate This Recipe

    Your vote:


    A rating is required
    A name is required
    An email is required

    Recipe Ratings without Comment

    Something went wrong. Please try again.