How to make simple homemade strawberry jam from scratch! Only 2 ingredients and easy to follow step by step instructions to help you master homemade jam!
Welcome to the first monthly made from scratch challenge! At the start of each month I will post a new recipe (or project) that you can make from scratch along with me! The whole point of this challenge is for me to learn something new to make from scratch and share it with you and for you to hopefully be encouraged to try something new. You can find all the details in this post.
This delicious strawberry jam is enough to convince any jam hater - and even if you have never made jam before, the step by step instructions should make what can seem like a daunting process, very simple!
I've also created a quick video (see above the recipe) that walks you through the entire process.
A few jam FAQ's
What is pectin and why does this recipe NOT use it?
Pectin is what helps the jam set, and faster. A lot of strawberry jam recipes I found use pectin as strawberries are relatively low in pectin. I chose not to use it to make this recipe as simple as possible - it does take slightly longer to set but is one less ingredient to find. I found that the jam set beautifully without it! Another option is to use jam setting sugar - this is sugar that has added pectin so beware when using it that it may set faster.
Do I need to use that much sugar?
Short answer, yes! Sugar is what helps the jam to set. You can adjust it slightly (a traditional ratio is equal quantities fruit and sugar but I use a little less as I prefer my jam less sweet) but don't go too low, otherwise your jam won't set well.
How can I tell if my jam has set?
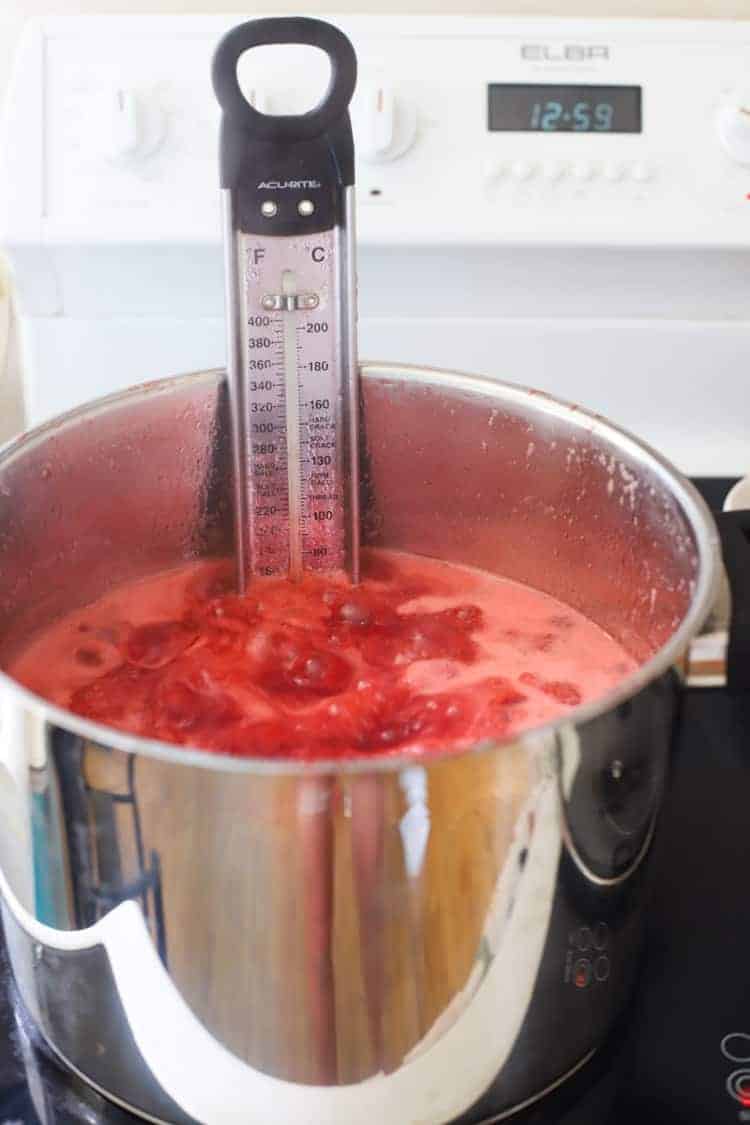
The easiest way I find is to clip a candy thermometer (affiliate link) to the side of the pot. Jam sets at 105°C/220°F so this takes the guesswork out of it. I have added notes to the recipe for a couple of other ways you can tell if you don't have a thermometer, otherwise this post explains it well.
What if my jam doesn't set properly?
No problem! You haven't ruined it, it will just be runny jam - still absolutely delicious and better than burning your jam!
How many jars will this make?
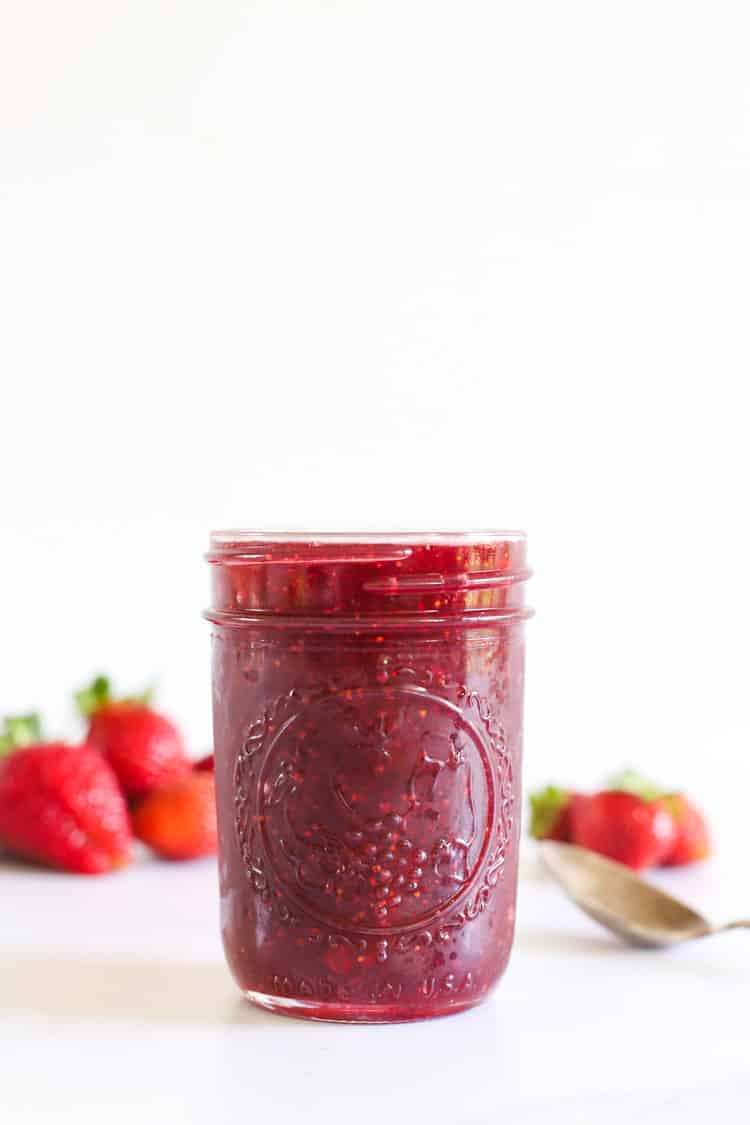
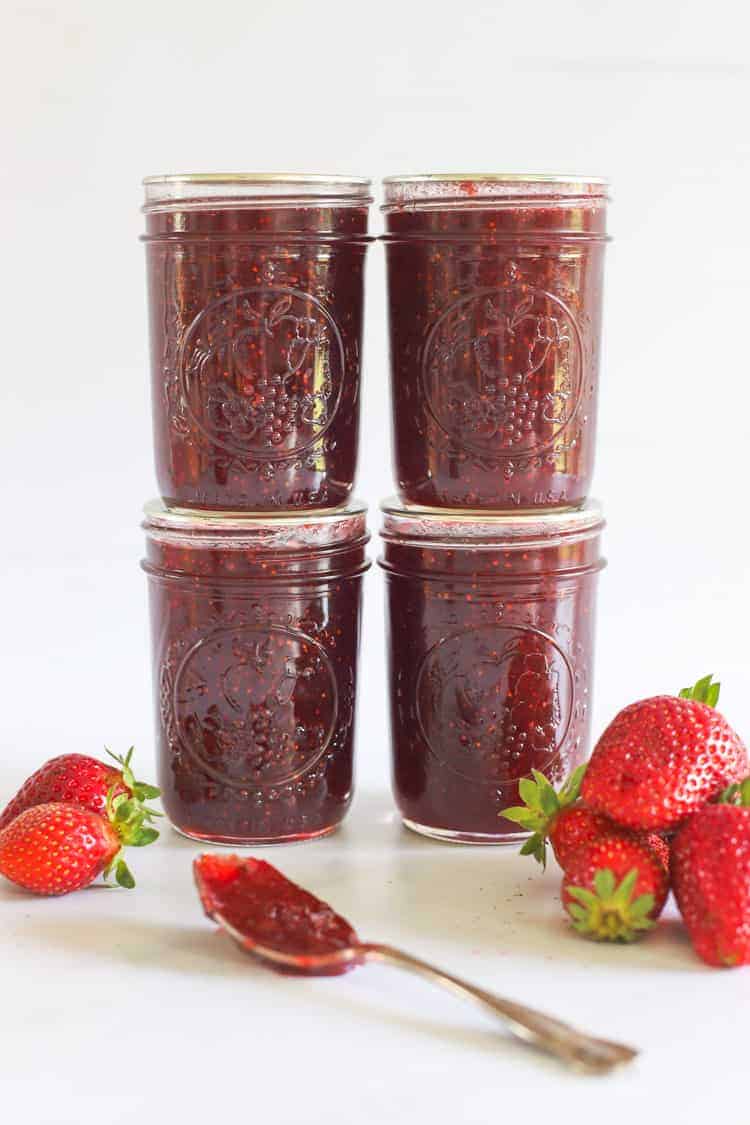
This recipe makes 8x 250ml (½ pint) jars. You can halve or double the recipe if you like, but remember that this will affect how long it takes to cook the jam.
Why do you need to process jam in a water bath?
I have made jam before and not bothered water bathing it, and it has kept for years. I now use the water bath method for everything as it is an extra layer of assurance that the food will be safe so I have included instructions for how to do this. It is up to you if you choose to process the jars or not!
Can I reuse old jam jars?
Again, this comes down to personal preference and what you want to do. You absolutely can reuse old jars if that's what you have. I prefer to use proper preserving jars, but that is just me!
So let's get into it - how to make simple homemade strawberry jam, completely from scratch!
Step 1:
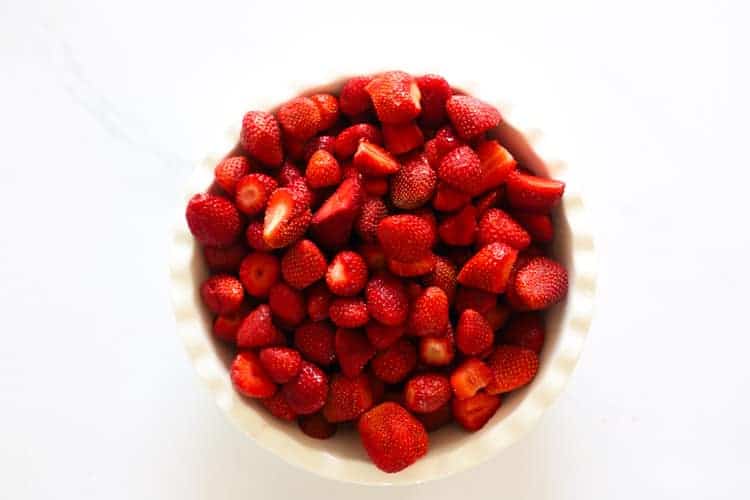
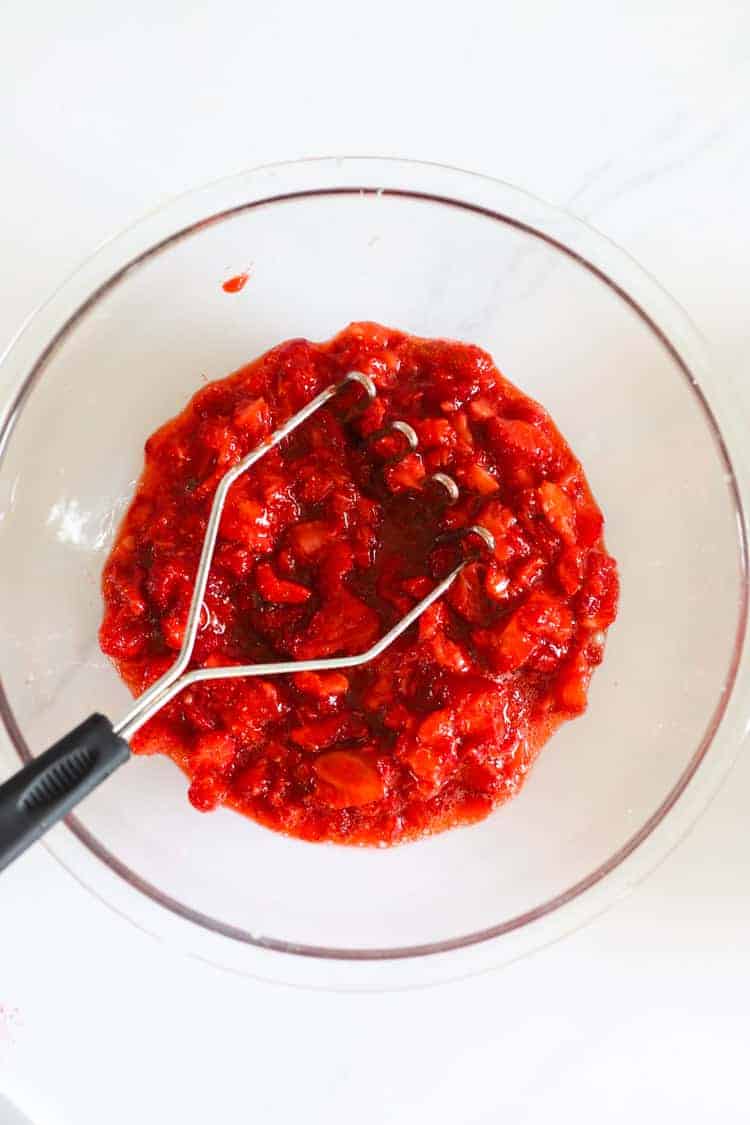
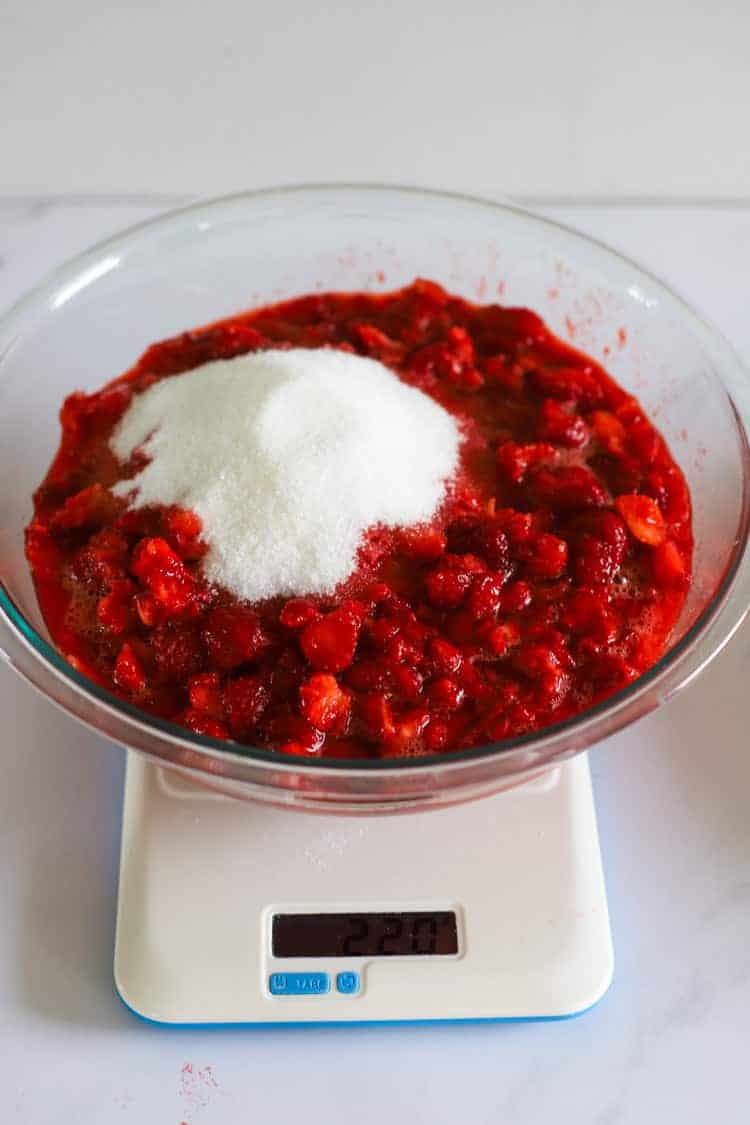
Wash and hull the strawberries and cut out any squishy or bruised bits. Use a potato masher to mash the berries slightly (they will cook down further). Add to a large non reactive pot, add the sugar and mix together.
Step 2:
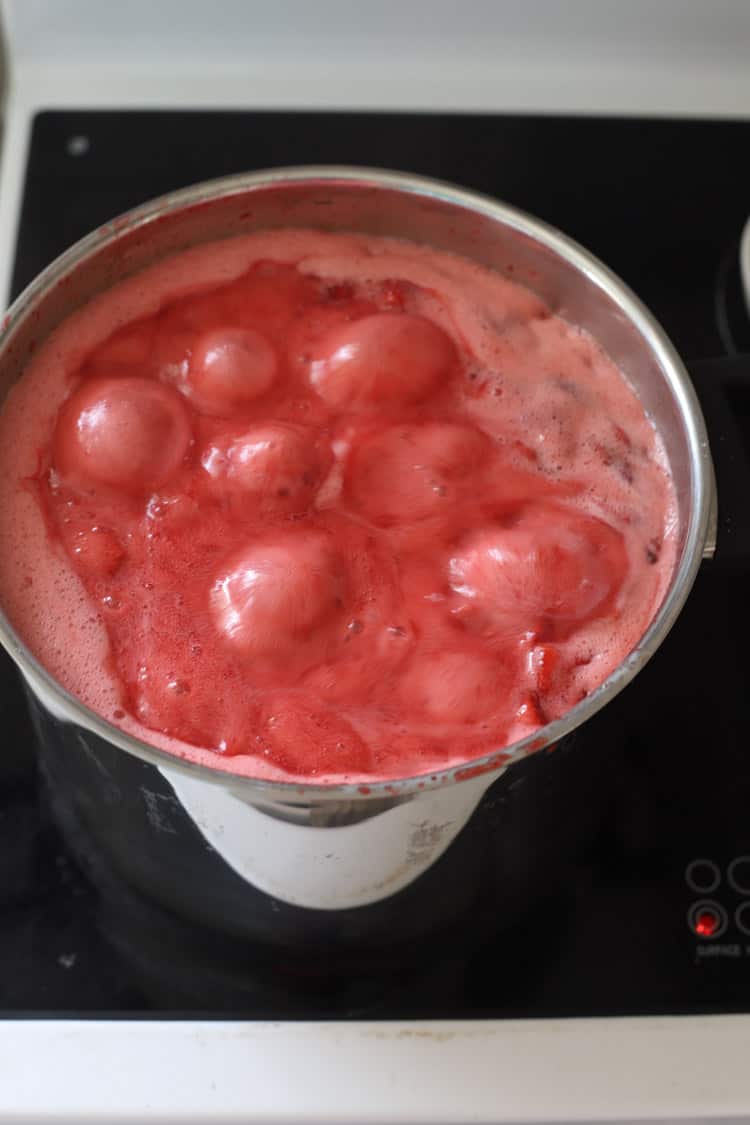
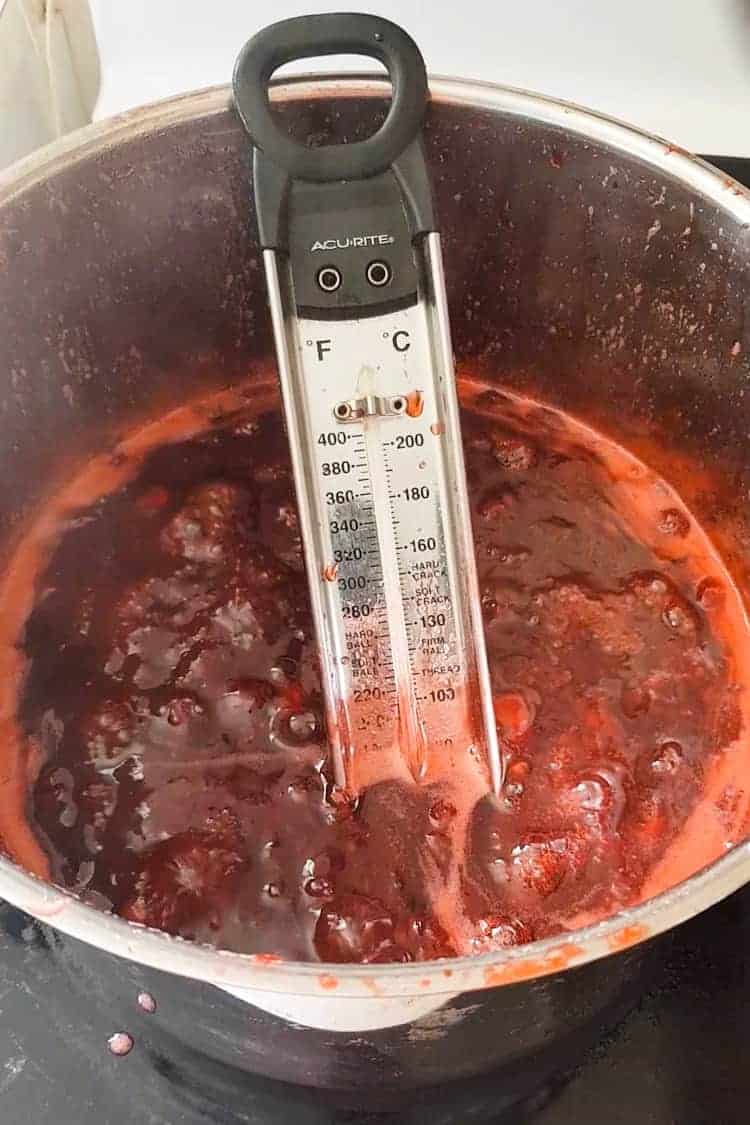
Bring to the boil over a medium/high heat, stirring occasionally. Once the jam has come to a rolling boil (mine took 14 minutes), clip a candy thermometer onto the side of the pot and continue to cook over a medium/high heat until the jam is thick, glossy and reaches setting point - 105°C/220°F - this took about 35 minutes for me (see recipe notes if you don't have a thermometer)
Step 3:
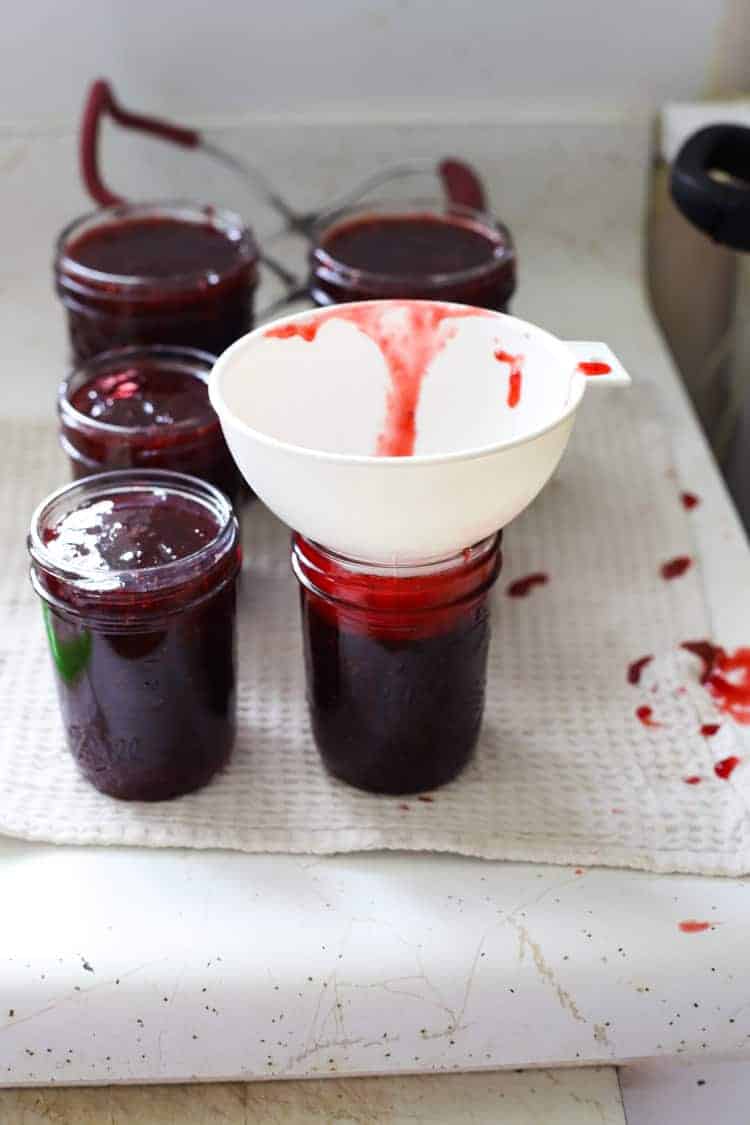
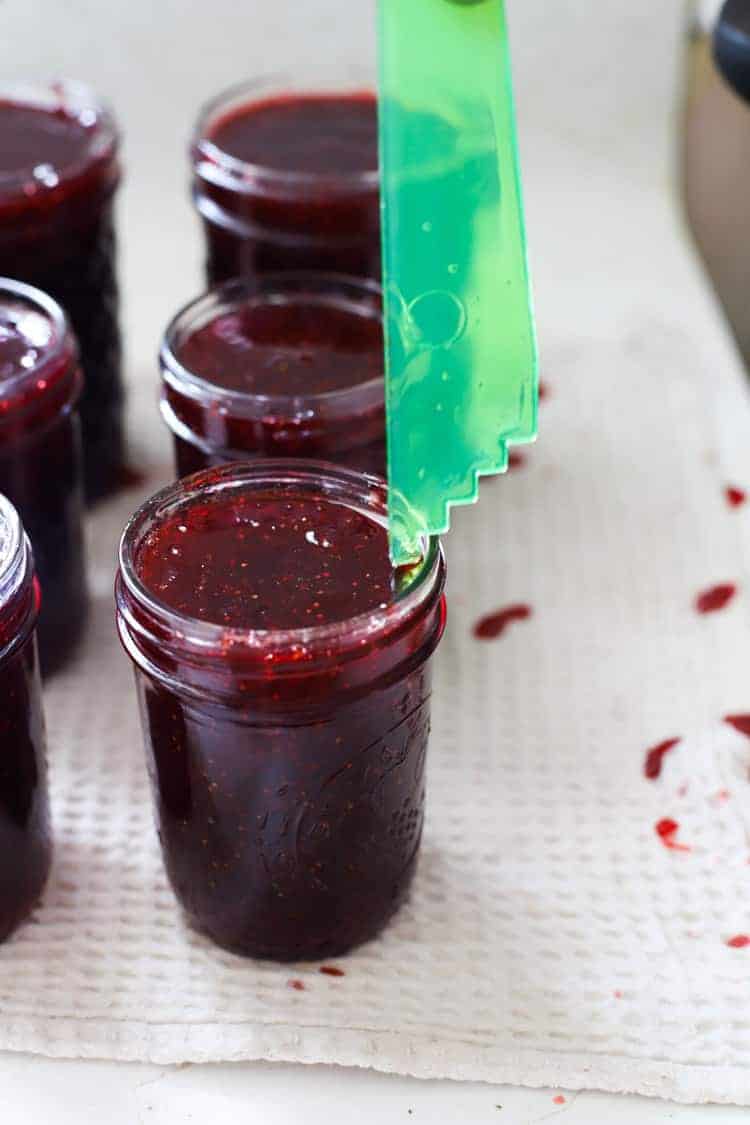
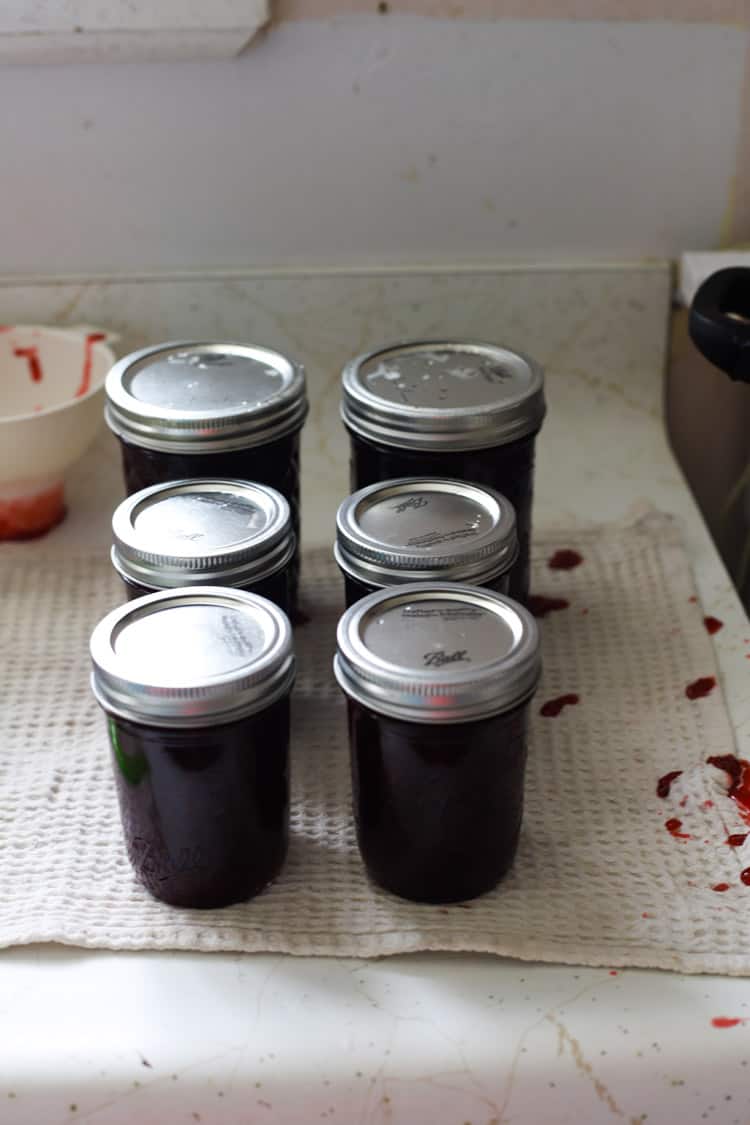
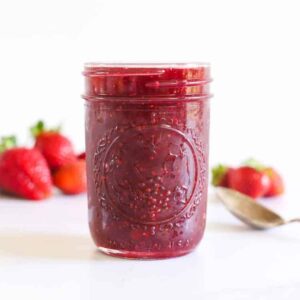
Using a jar funnel, ladle the jam into sterilised jars, leaving ½cm (¼ inch) gap at the top. Use a clean cloth to wipe the rim of the jar to ensure it is clean and place a lid/seal on the jar and screw a ring/band until fingertip tight.
Step 4:
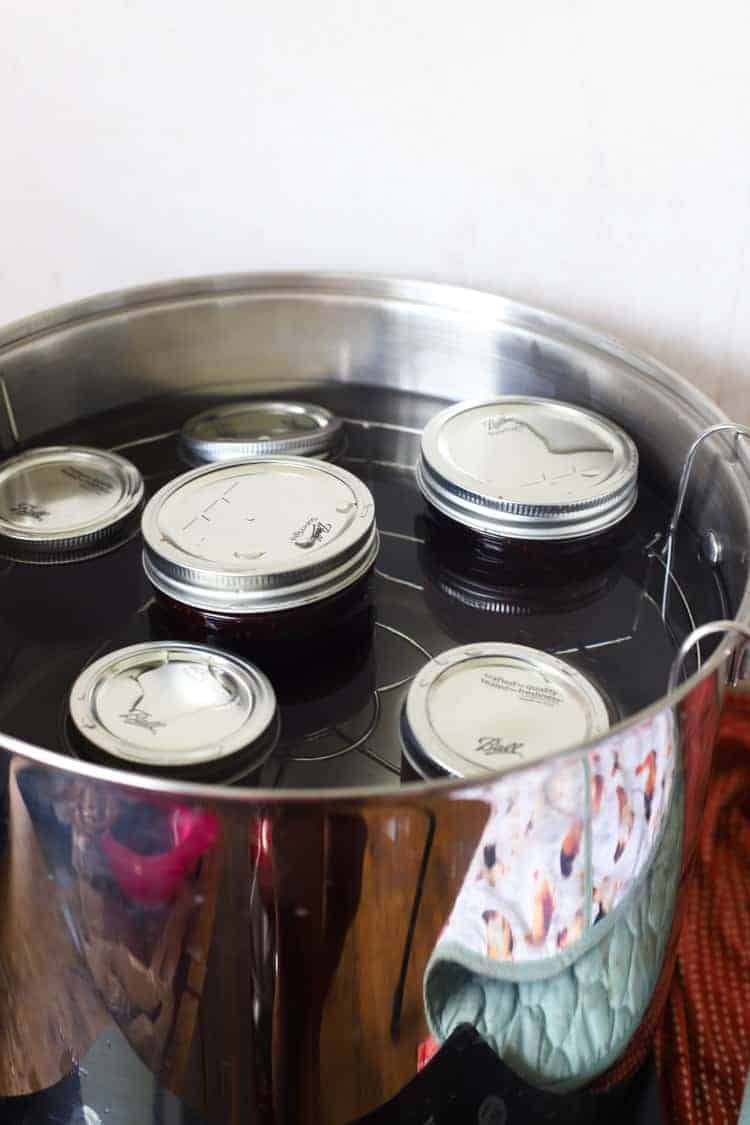
Process in a water bath for 10 minutes (see notes for details on water bath canning), remove from the water bath and leave on the bench overnight. In the morning, check the seals. Any that haven't sealed need to be stored in the fridge. Jars that have sealed can be stored at room temperature for several years.
That's it! You've just made homemade strawberry jam! Perfect for on toast, pikelets, in a sponge cake, as a filling in my homemade Shrewsbury biscuits or as the sweetest homemade gift!
Don't forget to send me your pictures so that I know you have taken part in the January Made From Scratch Challenge!
Simple Homemade Strawberry Jam
Ingredients
- 2 kilograms strawberries (hulled)
- 1.8 kilograms white sugar
Instructions
- Wash and hull the strawberries and remove any squishy or bruised pieces. Use a potato masher to mash the berries slightly (they will cook down further). Add to a large non reactive pot along with the sugar and mix together.
- Bring to the boil over a medium/high heat, stirring occasionally. Once the jam has come to a rolling boil, clip a candy thermometer onto the side of the pot and continue to cook over a medium/high heat until the jam is thick, glossy and reaches setting point - 105°C/220°F - this took about 35 minutes for me (see notes if you don't have a thermometer)
- Using a jar funnel, ladle the jam into sterilised jars, leaving ½cm (¼ inch) gap at the top. Use a clean cloth to wipe the rim of the jar to ensure it is clean and place a lid/seal on the jar and screw a ring/band until fingertip tight.
- Process in a water bath for 10 minutes (see notes for details on water bath canning), remove from the water bath and leave on the bench overnight. In the morning, check the seals. Any that haven't sealed need to be stored in the fridge. Jars that have sealed can be stored at room temperature for several years.
Notes
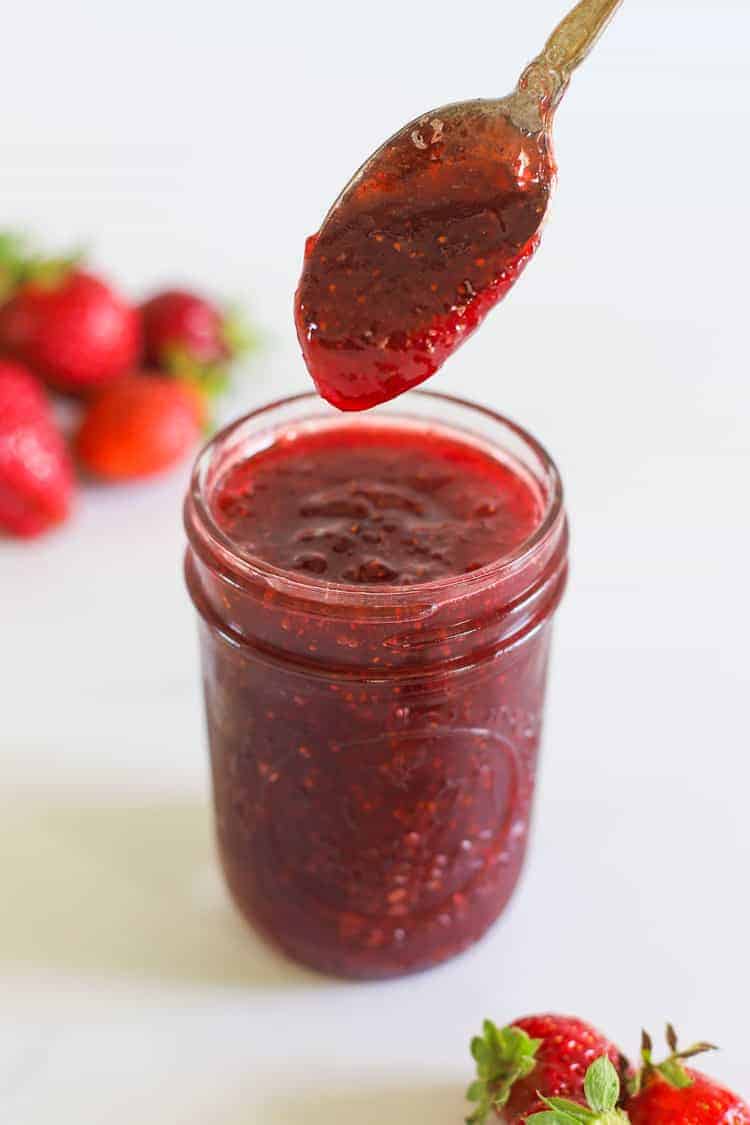
- Before you start cooking the jam, place a saucer in the freezer. When you think the jam has set, take the jam off the heat, place a spoonful of jam on the saucer and place back in the freezer for 3 minutes. When you push your finger through the jam, it should almost wrinkle and will feel set and that's when you know it is done.
- By the look of the jam - it will become thick, glossy and much darker in colour. When you pull a spoon out of the jam, it shouldn't drip off but form thicker droplets that don't immediately run off the spoon.

Molly says
Hiya!
Just want to see if frozen berries/strawberries could also be used in this recipe.
Laura says
Yes absolutely!!
L.Sole says
Delicious recipe! Didn’t take as long as last years recipe I had tried. Another great one from you, Laura! Thank you
Bonnie says
Hi! Is this recipe possible with less sugar? Or is the sugar the preserving/thickening agent? It will be my second year making this jam and it was a hit for our house! Cheers!
Laura says
Hi Bonnie! You can definitely try with less sugar, it may just not set quite as thick as traditional jam and also won't keep quite as long in the fridge once opened, but it will still be absolutely delicious! Play around until you find the ratio that suits you!
Clairybelle says
Hi there. DO NOT TRY THIS AT HOME. This is a joke. What a sticky gooey thick mess. A waste of jars, strawberries, sugar and time.
This recipe makes TOFFEE.
Nowhere in your recipe do you mention water, either in the text or in your video.
This needs to be deleted.
Laura says
Hi there. I am so sorry you didn't have success making jam! There is no mention of water as the recipe does not require water - jam doesn't typically use water. It sounds like you have cooked it down too far. I would suggest trying again using a thermometer (if you didn't last time) or just stopping before the jam gets too thick - in the recipe notes I do explain how to test that the jam is set before it goes too far. I would encourage you not to be disappointed by your first attempt at jam as it can be a tricky one to master - I've also made a very thick toffee type jam using another fruit before, purely because I cooked it too long! Sing out if you have any more questions!
Claire says
Hi there. I recently made raspberry jam and my mother in law told me that you can squeeze lemon juice into the jam as it contains pectin (not sure if there’s a specific time to do this but I did it while it was boiling). I squeezed half a lemon in my first batch (2kgs of raspberries) but found this was more than enough so I used just a quarter lemon in my next batch (also 2kgs). Just thought I’d share. Thanks, Claire