Making yoghurt at home is easier than you think and is so much cheaper than buying it. Here is my guide for how to make yoghurt at home using three simple methods!
Some of the links in this post are affiliate links, which pay me a small commission for my referral at no extra cost to you! Thank you for supporting The Kiwi Country Girl.
Jump to:
I've had a yoghurt maker for years and have always bought the packets of powder to make my own. It was easy, fun and definitely cheaper than buying ready made yoghurt. But then I learnt that you could make it entirely from scratch without even using the packets and I was intrigued. Just milk and yoghurt needed? Obviously I had to learn!
I looked up a few tutorials online and tried, but only had mediocre success. It was ok, but not like I thought it would be. So I asked my aunty (the one who is responsible for us having chickens, making vanilla extract and homemade granola) and she gave me her method. I was determined to make it work, and I did!
The best thing about making yoghurt at home is that once you've made it once, you can keep using the leftover yoghurt to start the next batch which means it is super cheap to make! I buy 2 litres of milk which costs around $3.50 meaning 1 litre of yoghurt costs me $1.75 to make. Not bad considering buying 1 litre of yoghurt (even plain and unsweetened) is around $5 or $6! We usually get through 1 litre of yoghurt per week, so even with my terrible maths, that means we are saving about $175 per year. I can think of plenty more things I could spend that on.
It's certainly not as simple as adding a packet to cold water, shaking and incubating but once you have the hang of it, it becomes second nature and fits into your routine easily. When I need to make more yoghurt I heat and cool the milk in the morning while we are having breakfast, then leave it incubating all day, put it in the fridge before I go to bed and it's ready to go the next morning.
Click here to pin this post to your made from scratch recipes board on Pinterest to save it for later
Let's break it down into simple steps so that you can make yoghurt at home!
Equipment needed:
- 1 litre milk
- ¼ cup fresh yoghurt (store bought plain unsweetened yoghurt with lots of live cultures or leftover yoghurt from the last batch you made)
- Small pot
- Thermometer that can be clipped to the side of the pot (this is the one I have and love)
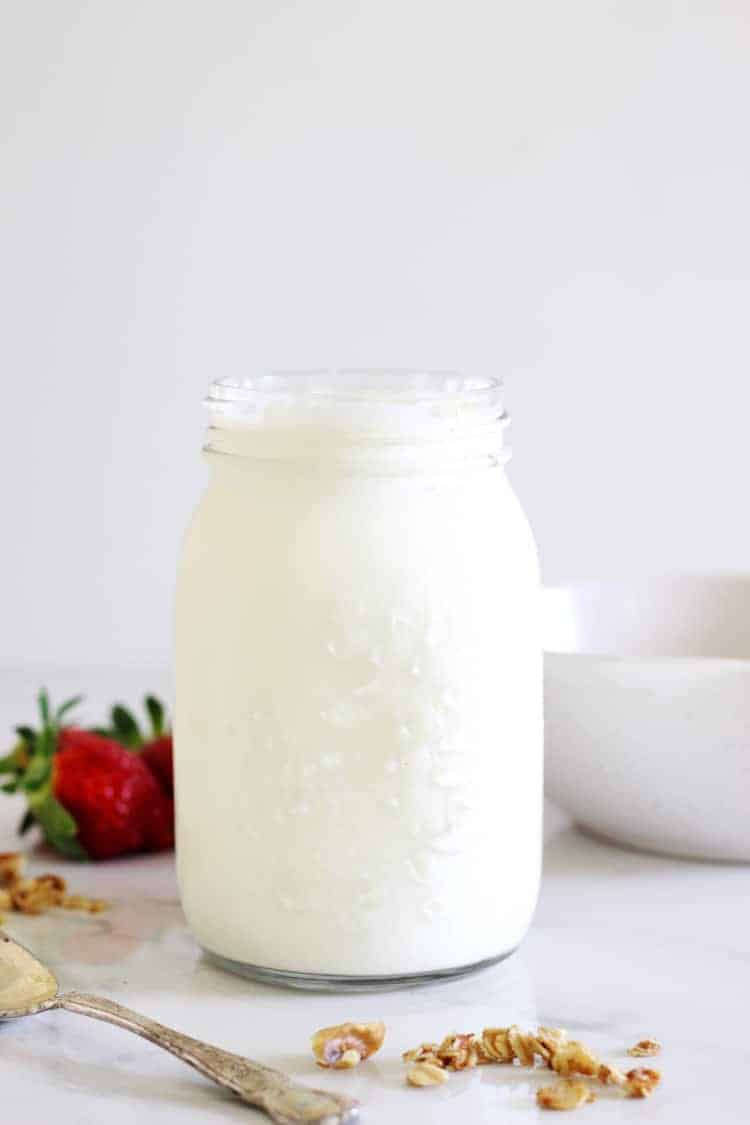
- 1L capacity glass jar with screw top lid (I use a 1L Agee preserving jar)
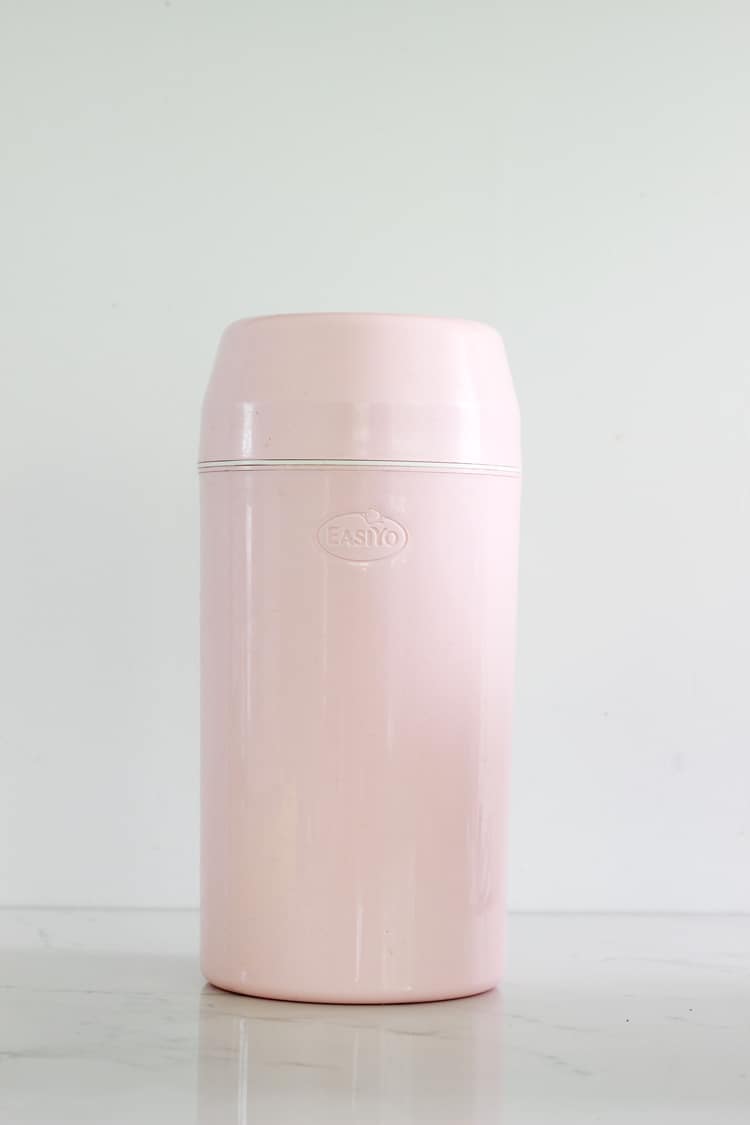
- Yoghurt maker OR oven OR slow cooker
How to make yoghurt
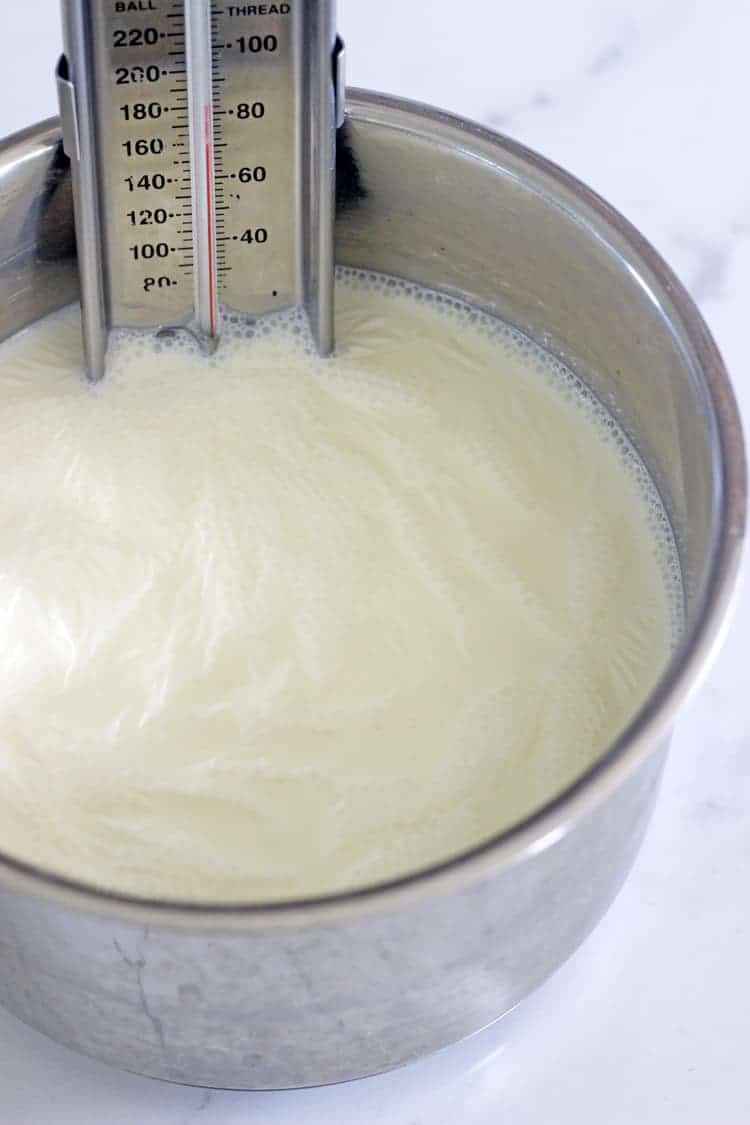
Step 1: Heat the milk
Pour the milk into a saucepan, clip the thermometer onto the side, turn the heat to medium and leave it for 20 minutes until it reaches 85°C/185°F. I like to set a timer so that I don't forget about it.
Step 2: Cool the milk
Take the pot off the element and leave it sitting for 45 minutes until it reaches 45°C/113°F. I also use my kitchen timer here.
Step 3: Mix in the yoghurt
Once the milk has cooled to the right temperature, add the yoghurt to the jar you will be using and pour in 1 cup of the milk. Stir it up and then add the remaining milk and stir again.
Step 4: Incubate
Now the yoghurt needs to be incubated so that it can turn into yoghurt! It usually takes around 4-5 hours to set but the longer you leave it, the thicker and tangier the yoghurt. I like leaving mine for around 8 hours, but you can play around with it! At this stage you have a few options depending on which method you want to use to incubate the yoghurt.
Method 1: Yoghurt maker - if you have a yoghurt maker, this is the easiest option. Pour boiling water into the bottom of the yoghurt maker (I pour in enough so that the water isn't touching the jar.) Leave on the bench for 6-10 hours.
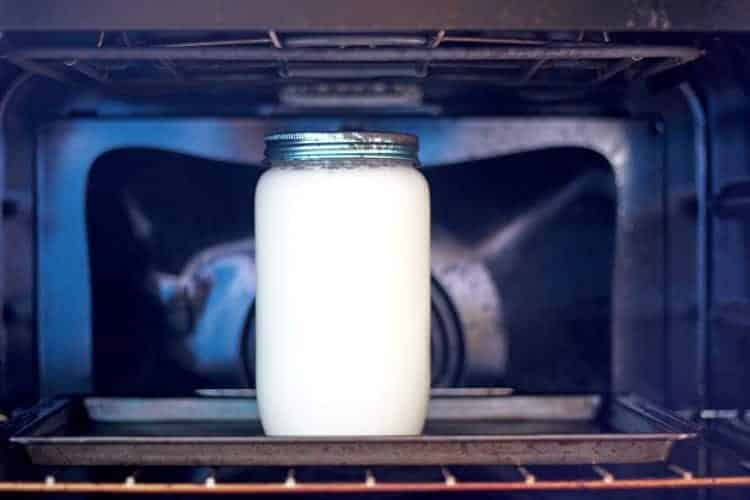
Method 2: The oven - heat the oven to the lowest temperature (it's 50°C/122°F on my oven) then turn off the oven but leave the oven light on and place the yoghurt jar in the oven. Leave for 6-10 hours.
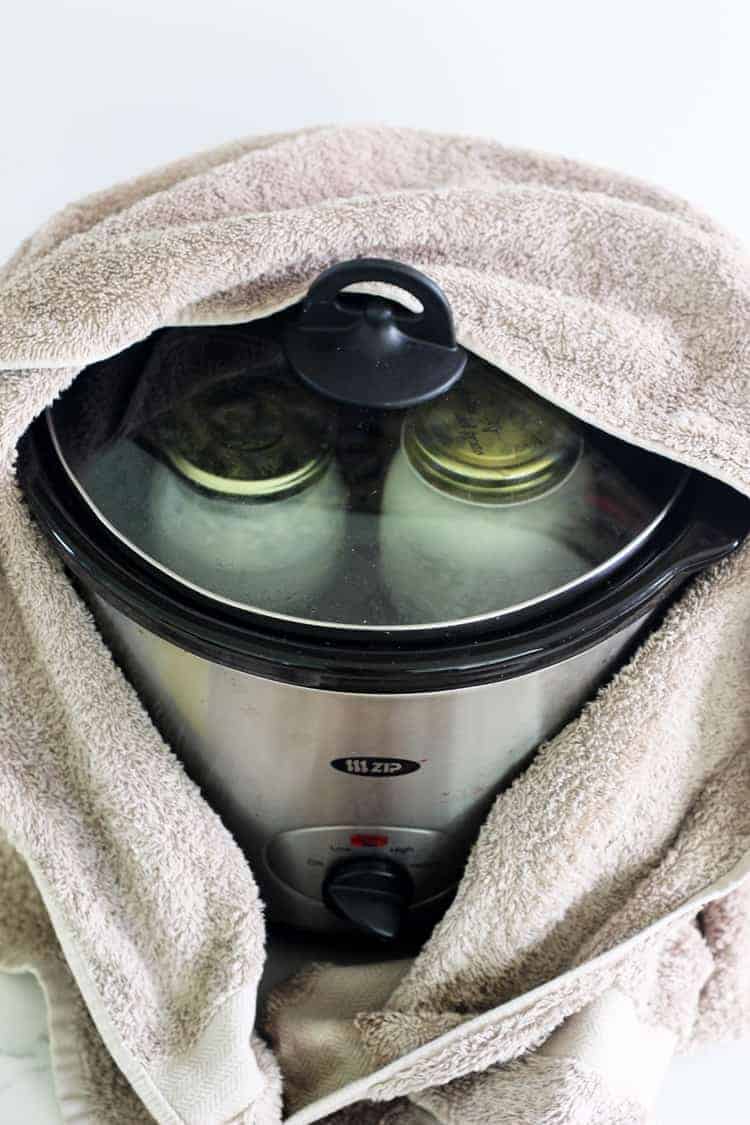
Method 3: Slow cooker - I've tried a couple of different ways with the slow cooker. The only thing to note with the slow cooker is that you may need to make your yoghurt in two smaller jars as you need to put the lid on the slow cooker. If I'm making it in the slow cooker I use 500ml Agee jars. You can half fill the slow cooker with hot tap water, place the yoghurt jar in it, wrap the whole slow cooker in a towel and leave for 6-10 hours. The other way I did it was pouring hot tap water into the slow cooker, turning it to warm and leaving the yoghurt in there for 6 hours. I didn't like this method as much as wrapping it in a towel and leaving it for longer as I felt the temperature may have got too hot.
Step 5: Refrigerate
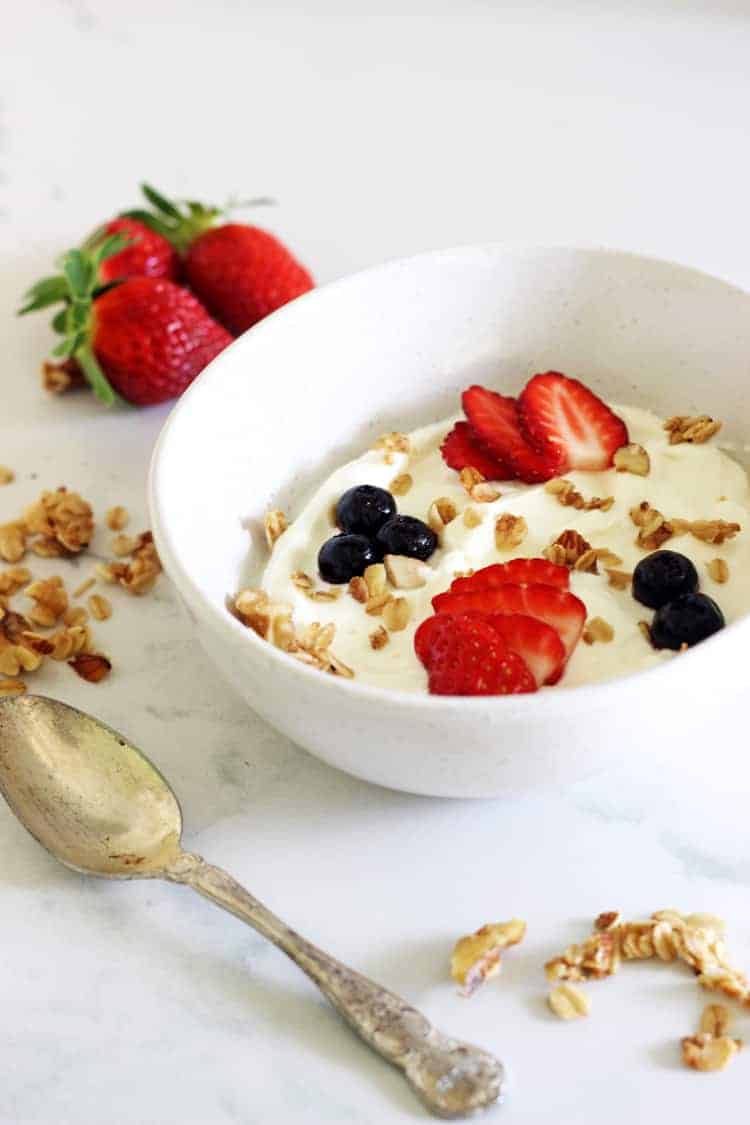
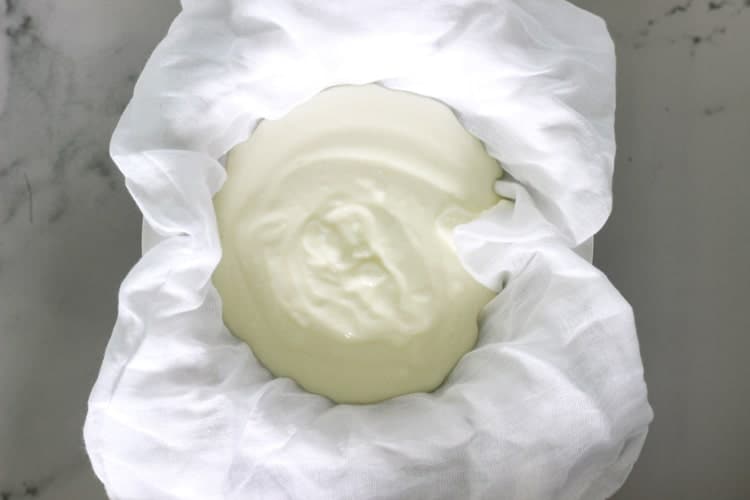
Once the yoghurt has set, it needs to be refrigerated. Place in the fridge overnight or until cooled completely. At this stage you can also stir in any flavours you like or strain it to make thicker Greek yoghurt.
To strain the yoghurt I place a sieve/strainer lined with a piece of muslin cloth over a large mixing bowl and pour the yoghurt into this. The whey will drip through into the bowl and you will be left with thick Greek yoghurt! This usually takes a couple of hours and I just leave it in the fridge. Note that when you make Greek yoghurt, you will end up with about half the quantity of yoghurt you started with, so 1 litre of normal yoghurt will give you about 500ml of Greek yoghurt.

Yoghurt will store in the fridge for up to 2 weeks and you can now use the last of this homemade yoghurt to make your next batch! I made my first batch of yoghurt in March and have been using my own yoghurt to make new batches ever since!
If I had to recommend a method to start with, if you have a yoghurt maker, this is the easiest. It's the job that it's designed for and it does the job perfectly. If you don't have a yoghurt maker and don't want to rush out and buy one, the oven is a very close second. The only disadvantage of using the oven is that your oven is then tied up for 8 hours or so but other than that, it maintains heat and makes perfect yoghurt too. Leaving it overnight is a great work around if you use your oven a lot. The slow cooker is still a good way of doing it but it is less reliable as it's a lot harder to maintain the correct temperature.

FAQ's/Troubleshooting
If the yoghurt hasn't set there are a few things to check.
- Was your yoghurt fresh? Did you use plain unsweetened yoghurt with lots of live cultures?
- Was the milk the correct temperature when you added the yoghurt? Too hot and it will kill the bacteria, too cold and it won't work either
- Did the temperature of the yoghurt stay constant while you were incubating it?
If all of these things were right, you may need to start over with fresh milk and yoghurt and try again.
It will! The great thing about making yoghurt is that it is actually pretty forgiving. I have lost count of the number of times I have been trapped under a baby or outside and not heard the timer go off and come back to milk that is boiling over. The good news is, let it cool to the right temperature and it will still be fine. Likewise, if you let it get too cold, I just turn the heat back on and let it get back to the cool temperature (45°C/113°F) and continue. When this happens I find that sometimes the end result can be a little grainer than usual, but just give it a good stir and it comes right. Also, the next batch of yoghurt won't be affected by this.
I use full fat (dark blue) milk. I have also made it using light blue milk successfully.
YES! As we live so far out of town, I buy milk in bulk (think 12L at a time!) and put it in the freezer. I thaw the milk on the bench overnight and it works perfectly to make yoghurt.
I have a whole lesson on making dairy free yoghurt in my membership, The Kiwi Country Homestead
Otherwise, Cassie at Wholefully has a great tutorial on making coconut yoghurt on her website that you should check out.
We usually eat ours within a week but I've definitely kept it for 2 weeks with no problems. You will be able to tell if it's no good - it will start to separate and will smell weird. If this is the case, throw it out, don't use it to make a new batch - start over.
Yes definitely! I haven't used these methods but here are some great posts that can help you.
Instant Pot/Multi Cooker
Heating Pad
No. You can buy yoghurt culture that you can use instead of fresh yoghurt. I've never tried it but imagine it would be a great place to start or a good option to have as backup in case you run out of yoghurt!
Now you are all set to make your own yoghurt at home! If you think of any other questions that I haven't answered, comment below or send me an email!
Made this? Tag me on Instagram @thekiwicountrygirl and hashtag it #thekiwicountrygirl.
How to Make Yoghurt
Ingredients
- 1 litre milk (I use dark blue - full fat)
- ¼ cup plain, unsweetened yoghurt (with lots of live cultures)
Instructions
- Step 1: Heat the milk. Pour the milk into a saucepan, clip the thermometer onto the side, turn the heat to medium and leave it for 20 minutes until it reaches 85°C/185°F. I like to set a timer so that I don't forget about it.
- Step 2: Cool the milk. Take the pot off the element and leave it sitting for 40 minutes until it reaches 45°C/113°F. I also use my kitchen timer here.
- Step 3: Mix in the yoghurt. Once the milk has cooled to the right temperature, add the yoghurt to the jar you will be using and pour in 1 cup of the milk. Stir it up and then add the remaining milk and stir again.
- Step 4: Incubate. Now the yoghurt needs to be incubated so that it can turn into yoghurt! It usually takes around 4-5 hours to set but the longer you leave it, the thicker and tangier the yoghurt. I like leaving mine for around 8 hours, but you can play around with it! At this stage you have a few options depending on which method you want to use to incubate the yoghurt.
Method 1: Yoghurt maker - if you have a yoghurt maker, this is the easiest option. Pour boiling water into the bottom of the yoghurt maker (I pour in enough so that the water isn't touching the jar.) Leave on the bench for 6-10 hours.
Method 2: The oven - heat the oven to the lowest temperature (it's 50°C/122°F on my oven) then turn off the oven but leave the oven light on and place the yoghurt jar in the oven. Leave for 6-10 hours.
Method 3: Slow cooker - I've tried a couple of different ways with the slow cooker. The only thing to note with the slow cooker is that you may need to make your yoghurt in two smaller jars. If I'm making it in the slow cooker I use 500ml Agee jars. You can half fill the slow cooker with warm water, place the yoghurt jar in it, wrap the whole slow cooker in a towel and leave for 6-10 hours. The other way I did it was pouring hot tap water into the slow cooker, turning it to warm and leaving the yoghurt in there for 6 hours. I didn't like this method as much as wrapping it in a towel and leaving it for longer.
- Step 5: Refrigerate. Once the yoghurt has set, it needs to be refrigerated. Place in the fridge overnight or until cooled completely. At this stage you can also stir in any flavours you like or strain it to make thicker Greek yoghurt.
- Yoghurt will store in the fridge for up to 2 weeks and you can now use the last of this homemade yoghurt to make your next batch! I made my first batch of yoghurt in March and have been using my own yoghurt to make new batches ever since!
If you tried and loved this recipe, please leave a comment and a rating below!

Karli says
I never review anything but this recipe worked so well for me, I had milk to use up and a little storebought yoghurt left that needed using too so I gave this a try and it worked perfectly. Nice thick yoghurt, thank you! I will try not to buy yoghurt again now, this was so easy
Michael says
You can save time and have very good results using milk powder or UHT milk; you can then skip the heating step because it's already processed. An alternative way to make thicker 'greek' style yoghurt is just to add more milk powder or add milk powder to regular milk making a rich thick yoghurt without any straining
Mal says
Very good and easy as it sounds
Di says
Works every time, even using blue "powdered" milk
Anna says
Has worked so well -
Really delicious when strained
Anna says
I’ve just started making my own yoghurt using shot bought probiotic Greek as a starter. Can I use the whey I strain off as a starter for a new batch? If so what’s the best quantity to use and should have be warmed up again? Thanks
Laura says
I have not tried this but I've read that you can do it but only for a few batches before you would need to use a commercial or yoghurt starter again. Again, I haven't tested this but it looks like anywhere from 1/4 - 1/2 cup whey per 1L of milk and follow the same process as in this recipe. You may just need a slightly longer incubation time too, but that would be something to try out a few times and see how it goes!
Adele says
I’ve made this twice and both times ended up with curd looking thin yoghurt. I can’t figure out what I’m doing wrong. I leave it for 10.5 hours and it looks like jelly but then I did stir it and it becomes runny and curdled looking. should I not stir it until I’ve refrigerated it?.
Laura says
I would definitely try refrigerating it before stirring it, I do find that it sets thicker when it cools. If this doesn't help, you could try straining some of the whey off which will thicken the yoghurt up too.
Aimee Cave says
Answered my own question by reading the above provided sorry! Postpartum brain has two brain cells today.
Aimee Cave says
Hi laura if I cooked the milk and then I’m cooling it down but it was 25 degrees not 45 is this a problem? Will it make the milk not incubate completely? Thank you 🙂
Luci says
Hi, I was wondering if anyone used a thermos to ferment the yoghurt. I saw this method on Hugh Fearnley-Wittingstalls River Cottage once.
Justine B says
So, so easy to make your own yogurt, that I’ll never buy it pre-made again! The instructions were spot on, thank you, The Kiwi Country Girl.
Leanne McLean says
Hello.
Can’t wait to try this in my Easy yo.
Is it possible to make a High protein yoghurt like Yopro by adding protein powder to milk powder this way ?
It’s getting very expensive in Australia to by high protein yoghurt.
Thanking you
Leanne
Laura says
You could definitely try but I would add it after the yoghurt is ready so that the protein powder doesn't mess with the fermentation process
Caren Kelly says
Hello, was wondering if I could freeze some of the yoghurt for making latter. Say about 60 grams worth, which is 3 tablespoons, to make 1.5 litres.