Easy to follow, step by step instructions to show you how to make marshmallows at home! Perfect for s'mores, hot chocolate or as a homemade gift idea.
Ok so I know it's not December yet, but am I please allowed to get excited about Christmas already??!! I'm really good at waiting until December (usually) but for some reason I decided that I needed to put Christmas music on while I was editing the photos for these amazing homemade marshmallows and there was something about the sprinkling of icing sugar on them that made me feel all warm and fuzzy inside and super excited about Christmas. Appropriately, it was White Christmas that was playing as I was writing this...even though we don't get white Christmases, it's been snowing this week in the South Island and has been freezing cold here too which is super weird for this time of year!
These marshmallows are part of the three part series getting you ready to make s'mores this summer - although summer is feeling like a long way away as I sit here in my slippers with the cold wind creeping under the door.

Click here to pin this post to your made from scratch recipes board on Pinterest to save it for later
Homemade marshmallows might seem like a scary thing to attempt, but in reality, they're pretty simple! You guys know me by now - simplicity is the name of the game and we don't do crazy difficult recipes around here. With a couple of tools to help you, homemade marshmallows are child's play.
The key tool is a candy thermometer (here is the one I use) This is what lets you know the sugar is at the correct temperature to be mixed in with the gelatin. The few times I've made marshmallows I have also timed the process and I think I could probably do it without a candy thermometer, but everyone uses different stoves and different pots so you would have to play around if you wanted to go without. But for $10 or $20, I think a candy thermometer is worth the money. I also use it for making yoghurt!
The first step is heating the sugar and water. You need to bring it to the boil without stirring and continue to cook until the temperature on the thermometer reaches 115°C/240°F. The temperature will get to 100°C/212°F quickly and will seem like it's taking forever to increase to 115°C, but it will! Just be patient! This whole process will take about 15 minutes. For me, it takes about 8 minutes for the sugar to come to the boil and 7 minutes from then to reach 115°C/240°F - this would be a good starting point if you wanted to try without a candy thermometer.
While this is heating, add the gelatin to more water and let it bloom. This step ensures the gelatin dissolves properly when you add the sugar and isn't grainy.
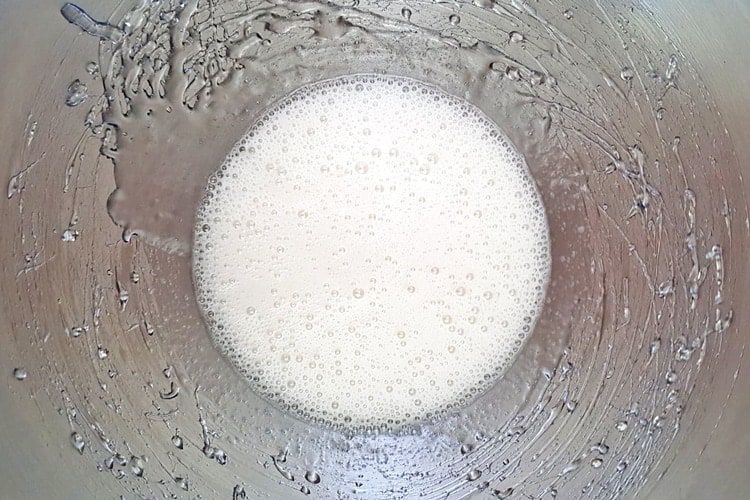
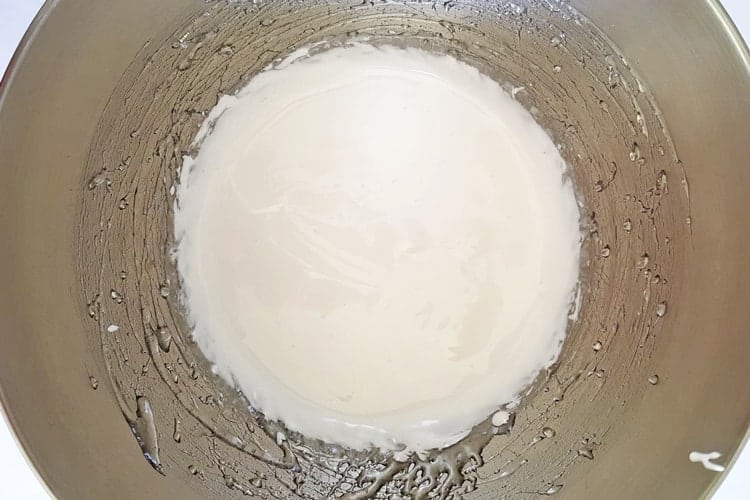
Once the sugar has reached temperature, allow it to cool for a couple of minutes before adding it to the gelatin mixture. Using a stand mixer running on low speed with the whisk attachment, slowly add the sugar mixture. Add the salt and vanilla (or any other flavour or colour if you are using it - see options below) and turn the mixer up to high speed and whisk for 3-5 minutes until the marshmallow has doubled in volume and is smooth and glossy.
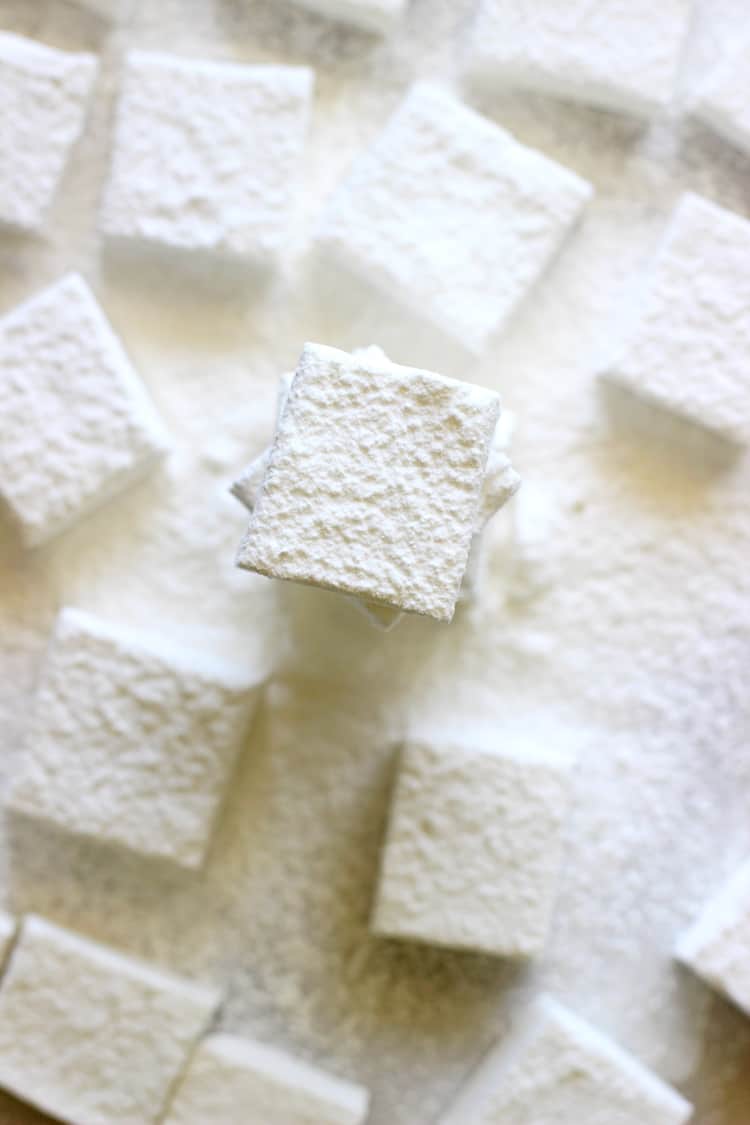
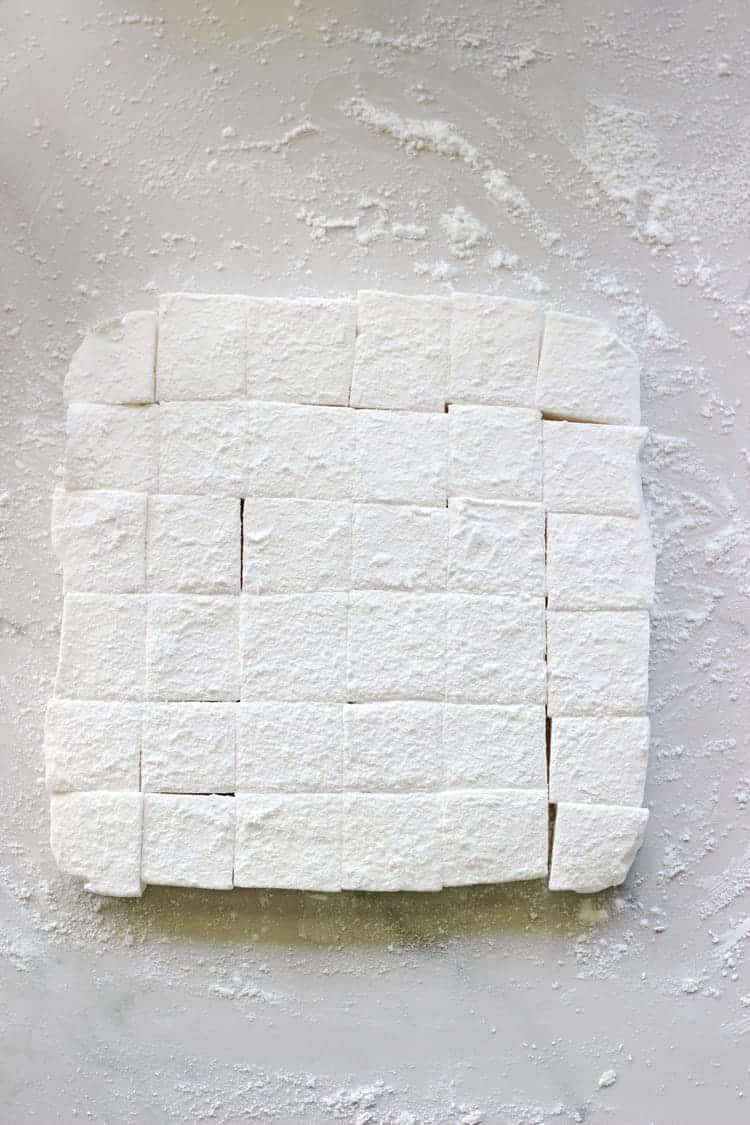
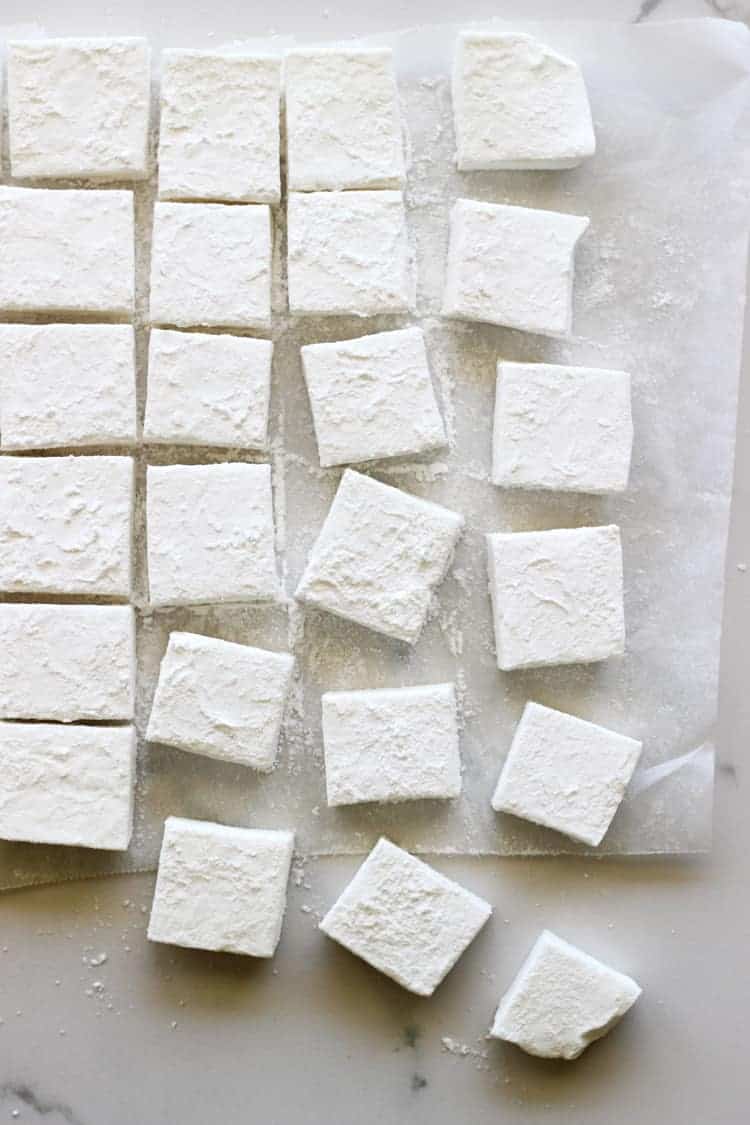
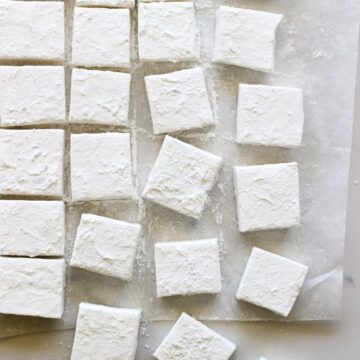
Spread the marshmallow evenly in a lined baking tin and let it set at room temperature for 4 hours. When it's set, dust a work surface and the top of the marshmallows with marshmallow dust (cornflour and icing sugar) and remove from the tin. Use a lightly oiled knife or kitchen scissors and cut the marshmallow into pieces. You could even use little cookie cutters to cut out cute shapes! Lightly coat each side in marshmallow dust and they're ready to eat!
I made mine in a 20cm x 20cm brownie tin as I wanted them to be thinner for making s'mores but if you wanted thicker marshmallows, use a loaf tin instead!
These homemade marshmallows are perfect for eating on their own, wrapping up as homemade Christmas presents, in hot chocolate or for making s'mores!
And if you wanted to make them extra special you could use peppermint extract instead of vanilla extract and even colour them red or green to make them Christmassy!
Made this? Tag me on Instagram @thekiwicountrygirl and hashtag it #thekiwicountrygirl.
Some of the links in this post are affiliate links, which pay me a small commission for my referral at no extra cost to you! Thank you for supporting The Kiwi Country Girl.
SHOP THE RECIPE
Here are some items I used to make this recipe:
New Zealand
Candy thermometer |Stand mixer | Baking tin
Amazon
Candy thermometer |Stand mixer | Baking tin
Homemade Marshmallows
Ingredients
- 1 cup sugar
- ¼ cup water
- 1 Tablespoon gelatin
- ¼ cup water
- 1 teaspoon vanilla extract
- ⅛ teaspoon salt
Marshmallow dust
- ½ cup icing sugar (sifted)
- ¼ cup cornflour
Instructions
- Heat the sugar: Add the sugar and first measure of water to a small saucepan and gently swirl the pot around until the sugar has mostly dissolved trying not to splash too much up on the side of the pot. Clip a candy thermometer to the side of the pot ensuring that it is not sitting on the base of the saucepan (see recipe note 1) Bring to the boil over a medium heat, without stirring and continue to cook until the temperature on the thermometer reaches 115°C/240°F. The temperature will get to 100°C/212°F quickly and will seem like it's taking forever to increase to 115°C, but it will! This whole process will take about 15 minutes. For me, it takes about 8 minutes for the sugar to come to the boil and 7 minutes from then to reach 115°C/240°F. See recipe note 2 for making this without a thermometer.
- Prepare the gelatin: While the sugar water is boiling, dissolve the gelatin in the second measure of water in the bowl of a stand mixer or large mixing bowl and allow to sit for 10 minutes.
- Whisk together: Once the sugar syrup has reached 115°C/240°F, remove it from the heat and let it sit for a couple of minutes. Using the whisk attachment on a stand mixer and with the mixer running on low/medium speed, slowly pour the sugar syrup into the gelatin mixture. If you don't have a stand mixer, carefully do this while using a hand mixer.Add the vanilla and the salt, increase the speed to high and whisk for 3-5 minutes until doubled in volume and is white, fluffy and smooth.
- Prepare the pan: While the marshmallow is whisking, spray a square or rectangle slice/brownie tin with non-stick cooking spray (see recipe note 3) You may line the tin with baking paper first to make it even easier to remove the marshmallow.
- Using a lightly oiled rubber spatula, scrape the marshmallow into the baking tin and spread it evenly. Sprinkle the top with marshmallow dust and allow to set at room temperature for 4 hours.
- Turn out the set marshmallow onto a work surface dusted with the marshmallow dust and cut the marshmallows into pieces using an oiled knife or a pair of scissors. Toss the marshmallow pieces in the marshmallow dust and store in an air-tight container.
Marshmallow Dust
- Mix together sifted icing sugar and cornflour in a small bowl and use as needed.
Notes
- My candy thermometer clips to the side of the saucepan but the amount of liquid in the pot isn't enough to cover the part that reads the thermometer. I use a timer and close to the time I would expect the temperature to be right, I tip the saucepan slightly so that the sugar syrup is deep enough for the thermometer to get a reading. I continue to check every minute or so until it's the right temperature.
- If you don't have a thermometer, once the sugar boils - the entire surface will be covered in bubbles and the syrup will be clear as the sugar will all be dissolved - start the timer. It will take 7 minutes over a medium heat to reach 115°C.
- To make thicker marshmallows, use a loaf tin instead of a 20cm x 20cm tin
[mc4wp_form]
If you tried and loved this recipe, please leave a comment and a rating below!

Angela Pigott says
Fantastic recipe
terraria apk says
I love how simple and fun this marshmallow recipe is! Can’t wait to try it out with some flavor variations. Thanks for sharing these step-by-step instructions—it makes it feel so doable!
truecaller says
I’m so excited to try making marshmallows at home! Your step-by-step instructions make it look so easy. I can’t wait to customize them with different flavors! Thanks for sharing this fun recipe! 🍬✨
big Win says
I never thought making marshmallows could be so easy! Your step-by-step instructions were so clear, and I loved the tips on flavoring them. Can’t wait to try this with my kids! Thank you for sharing!
Sarah says
This is such a fun recipe to make for the transformations the mixture goes through, from sugar in water to bubbling syrup to thick fluffy marshmallow! My favourite part is when you start whisking at high speed and steam pours out of the bowl. The whole family loves these marshmallows and they are always in demand when we get the fire pit/brazier out. Thank you!
Erin says
Great recipe, I've made it twice this week, the second time I added half a packet of aeroplane jelly(a brand I got cheap at pak n save) and left out the vanilla to make it raspberry flavored and pink 😋
Christine says
Fantastic
Was reading and suddenly remembered Mum making marshmallow for her kids.
I had to stop reading & go and make.
Thanks for great method.
Was on gas but all well.
Now feel slightly off - having sampled about a 1/4 of my make.
Rest in airtight to keep for later - much later
Rosheen Hiscox says
Super easy and tastes AMAZING thank you
Kerry says
Wow!! These are so yummy!
I made them with my 9 year old daughter today
And I don't really like marshmallow, but these are SOOO much better than store bought marshmallows
We will definitely be making these again Thanks Laura
Wannabe housewife, grateful for her full time job says
My husband stared into the empty packet of pascal marshmallows. I chose this moment to reminisce on how my Mum and I used to make marshmallow at home. This was a mistake. His eyes lit up as he looked at me. "Homemade marshmallow?!?!"
So like any good wannabe housewife, I went and bought a sugar thermometer and googled for a recipe. This one was rated highly and I've made some of your recipes before (they are fab!).
This recipe is fantastic! However, if you are blessed or in this case cursed with a gas stovetop be aware! The sugar cooks VERY quickly. Not 15 minutes, not 10 minutes, possibly only 5. Cue me spinning round to find my sugar burnt. I panic, state a few choice words and whip it off the gas. Instincts fail me and I pour it into the sink, where it instantly hardens all over the sponge and scrubbing brush. I realise this is going to clog up the drain so panic and pour boiling water from the kettle into the sink. To my horror it splashes back and sticky sugar water flicks all over the bench.
Panic over. I restart, keep a much closer eye on the thermometer and end up with beautiful, light and fluffy (pink! because pink makes everything better, especially when you still have sticky sugar residue in the drain pipes and on your husband's favourite pot) marshmallows.
10/10 would recommend! (Husband is pretty happy with them too)
TLDR: If you have a gas stovetop I highly recommend keeping a closer eye on the temperature of the sugar as it may cook faster xx
Laura says
Thank you so much for the tip on using a gas stove, much appreciated!!
Lauren says
As someone who's just made this recipe for the first time on her convection cooktop, and is 20 days away from moving to a new house with a gas stove- thank you for this heads up! Given that my children are obsessed with marshmallows (we have none in the cupboard, hence making them and finding this recipe) and how easy these were to make, it will become a weekly staple, and had I not been warned, I would've had a similar disaster to what you did in my new house, haha
Kat says
Hi Laura,
I've just made this and it turned out perfect! I did try with vegan (veg-gel) first and it didn't work. Any tips on how to make it using vegetarian gelatin?
Also how long will this keep for in an airtight container please?
Cheers!
Laura says
Hi Kat, I have not ever used vegetarian gelatin so I can't offer any advice sorry!! They will keep in an airtight container for several weeks
Sarah Wayne says
When making these marshmallows can you speed it up by putting it in the fridge to help it set?
Laura says
Hi Sarah, I wouldn't put them in the fridge as this can cause the marshmallows to harden. Laura
bob says
cool beans. i am bob
Erin Wilkinson says
Hi Laura, I made blackcurrant marshmallow yesterday using freeze dried fruit powder. I added it to the water before adding and boiling the sugar. It tastes soooo good. I loved your directions as the included a specific temperature, rather than just a time frame.