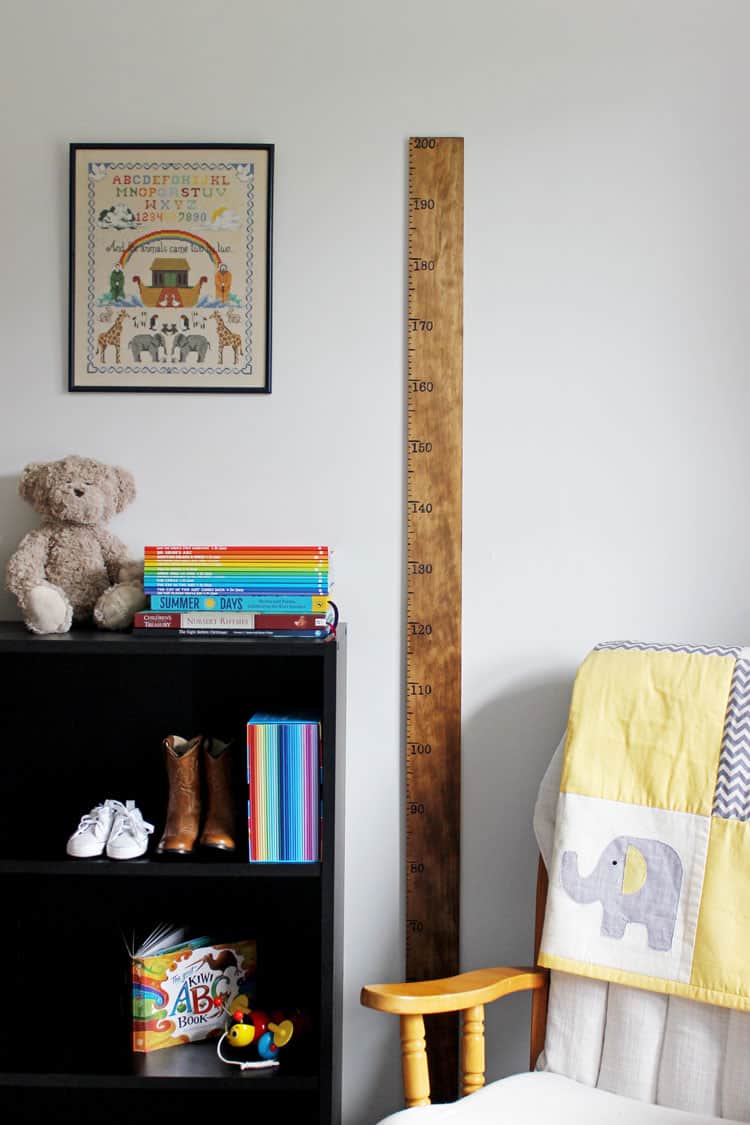
A step by step tutorial to show you how to make your own DIY Ruler Growth Chart, that can move with you from house to house! No more writing on the door frame!
Do you remember how exciting it was as a kid when it came time to see how much you had grown? As a lifelong shorty I would hang out to see where I was on the chart because any extra height I could get was a huge deal! Like most families, we marked our height on the door frame, and when my parents moved out of our childhood home, that was left behind. I'm definitely not sentimental about it but it did make me think that it would be nice to have a height chart for Sadie (and future kids) that can move with us when that happens.
There are plenty of options to buy some pretty amazing wooden growth charts but they can come with a hefty price tag, so rather than shell out close to $100 for one, I decided to spend around $30 and make one!
Let me show you how.
Materials needed:
- 1 x 1800mm x 90mm x 10mm (or wider if you would prefer) piece of pine (around $16 from Bunnings or Mitre 10, or your favourite home depot store)
- Wood stain and paint brush or old rag to apply the stain (the smallest pot of stain you can find, you hardly need any. Or use any you happen to have lying around!)
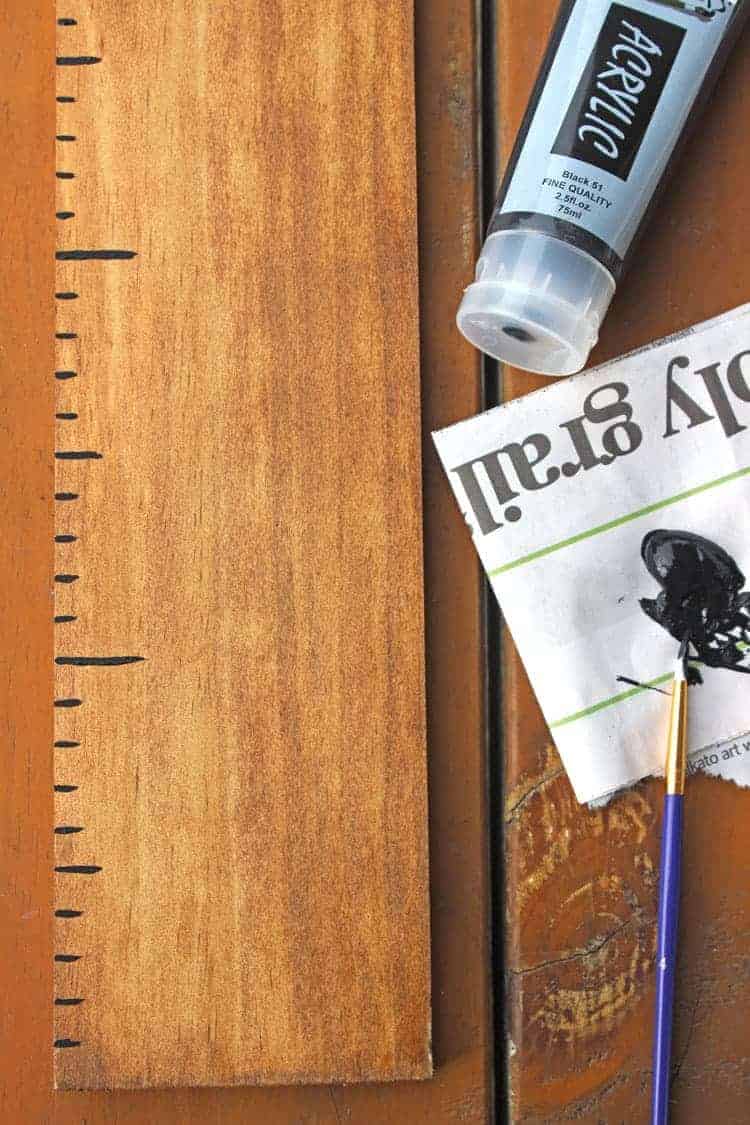
- Black acrylic paint and small paintbrush
- Fine tipped black sharpie
- Measuring tape
- Ruler
- Pencil
- Printer and paper or stencils for the numbers
- Mounting tape or screws to hang it on the wall
Instructions:
Step one:
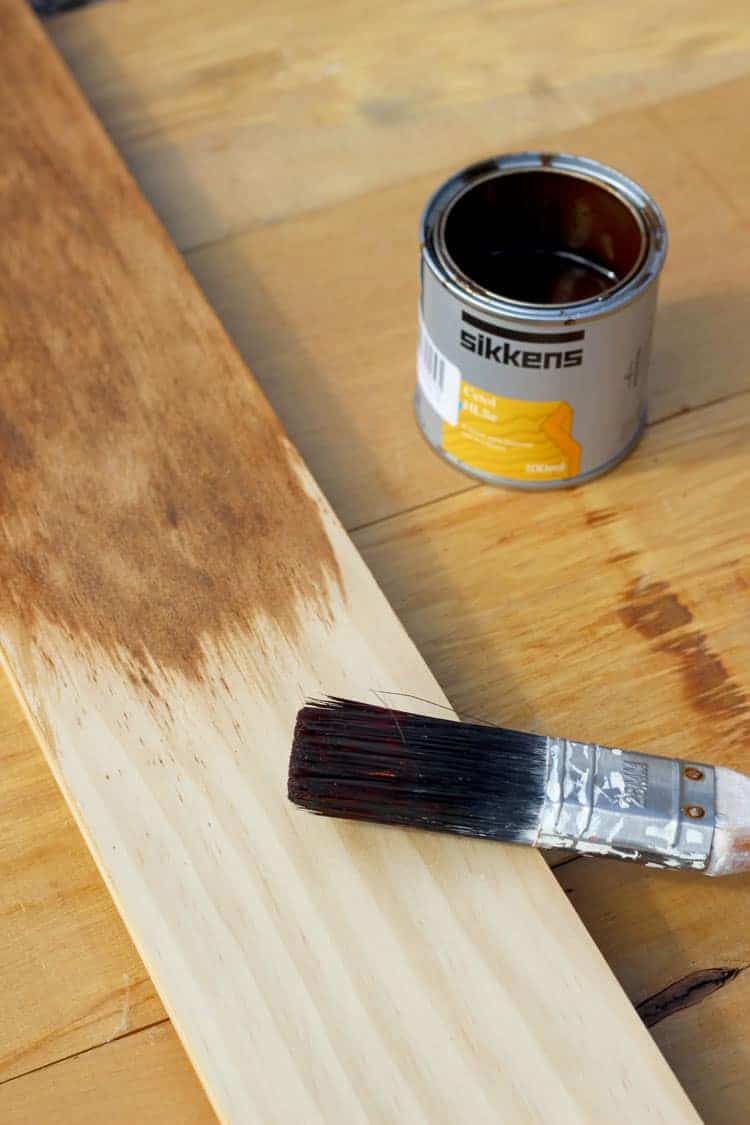
Stain the piece of wood using a paint brush or an old rag. I didn't bother sanding the wood before staining and it turned out perfectly.
Less is more with the wood stain and you will barely need any. I used a 100ml pot we already had and I could probably make another 5 growth charts with it! Start with a small amount on the brush or rag and add more as you need. I did one coat and decided it was the colour I wanted so stopped. You could do an extra coat once it has dried if you are going for a darker look. Let the wood dry completely before continuing - I left it overnight.
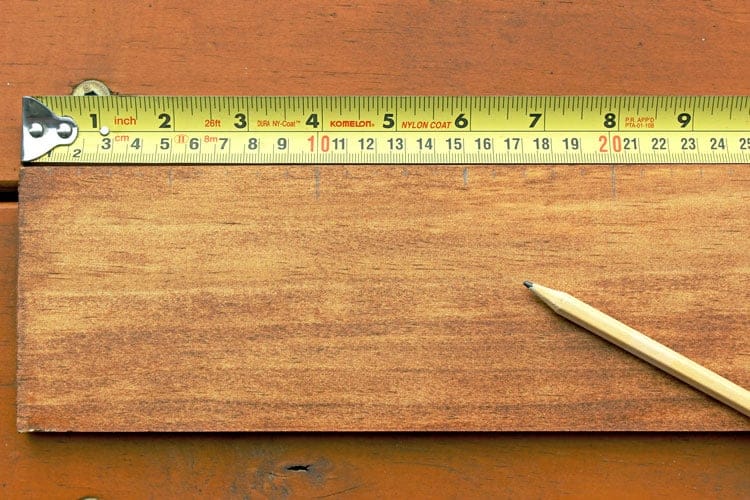
Step two:
Take your tape measure and mark 1cm measurements the whole way down the piece of wood on the side you want to paint the lines. I decided that I wanted the painted lines for every 1cm mark to be 1cm long, the 5cm marks to be 1.5cm long and the 10cm marks to be 2cm long so I went back along with a ruler and measured those marks with a pencil so that I knew where to paint. I also decided to hang the growth chart 20cm above the floor so I started measuring from 20cm.
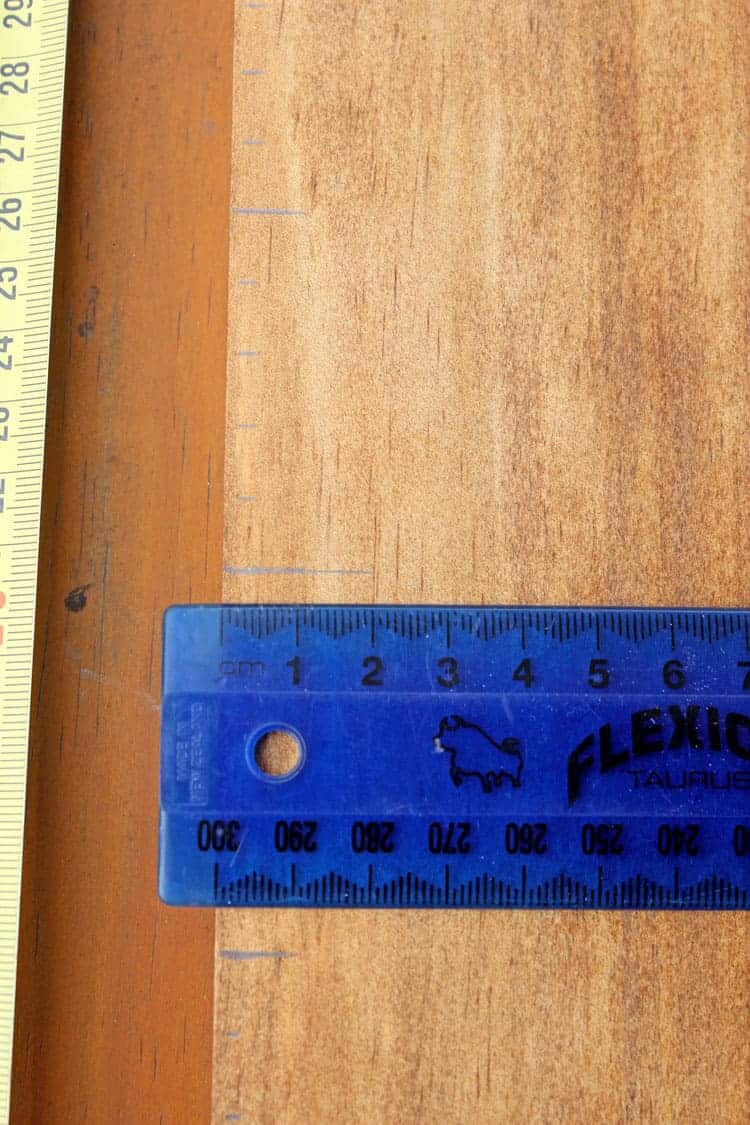
Step three:
Take a small paintbrush and with a steady hand, paint over the marks you have made. I knew I wasn't going for perfection so just went free hand over the pencil lines and it turned out really well - up close it looks a little wonky but from a distance they look perfect, and I think the imperfections add to the charm!
If you really want the lines to be straight, line a ruler up against the board and use that as a guide - just make sure to wipe it clean after each line so that you don't get paint marks everywhere.
Step four:
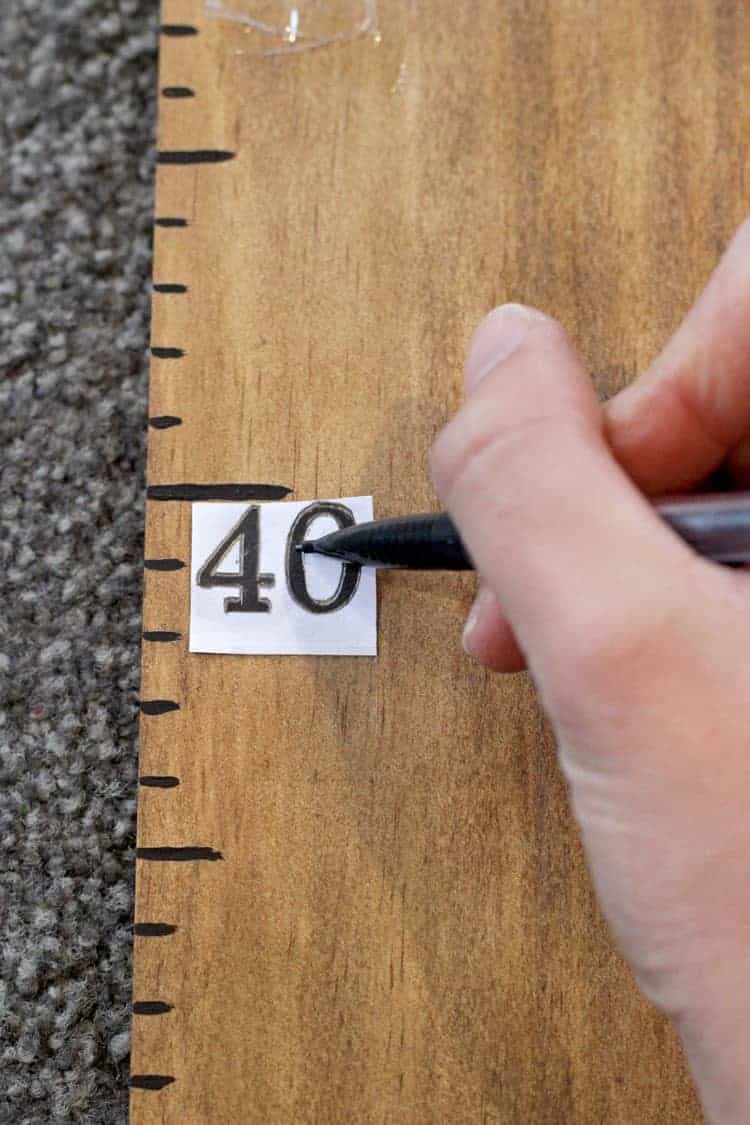
To make the numbers, either click here for the printable of the numbers I used, or head to your computer, type up the numbers and choose your font. I wanted to have numbers every 10cm so I printed numbers 30-200 in size 60 using Century Schoolbook font. Print them and make sure they are the size you want, then cut them out and tape them to the board right where you want them.
Take a pen or pencil and trace around the numbers, pressing hard enough to leave an indent on the wood. You can lift up the paper to check that it's working. Then take a pencil and trace around the marks on the wood. This makes it easier to see the numbers when it comes to colouring them in. This is by far the most tedious and time consuming part of the project! I started with a pencil but changed to a pen for tracing over the paper halfway through which I found much easier. I still used pencil on the actual board.
The other thing that would work really well would be if you had number stencils - you could just paint right over them...super easy!
Step five:
Either paint the numbers on, if your brush is small enough and you have a steady hand, or do what I did and use a fine tipped black sharpie (permanent marker) to colour in the numbers. I think paint would look better, but I knew that I would struggle as the numbers were quite small, so opted for the sharpie which I was really happy with.

Step six:
Hang it on the wall using either a sawtooth picture hanger, screws or mounting tape. Don't forget to measure 20cm up from the floor! Once it's hung, take a tape measure to double check that your measurements line up and you are good to go!
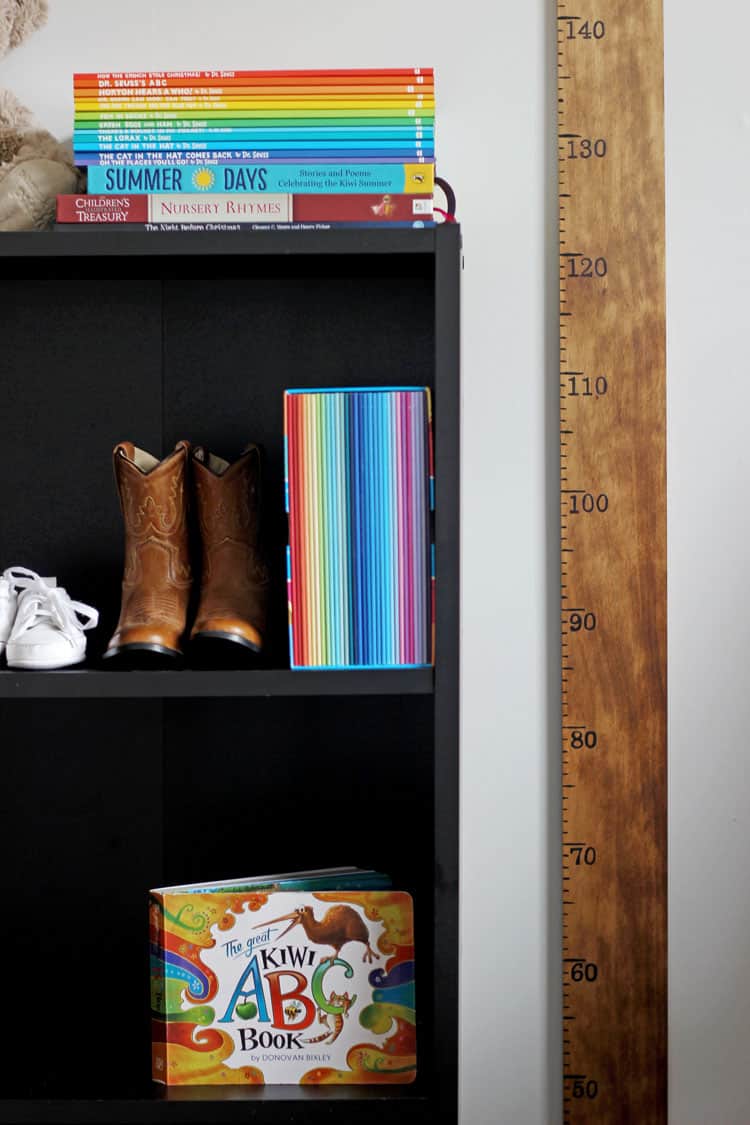
Get measuring! And don't forget to take it with you if you move house!
Inspired by Cassie from Wholefully

Esra says
That is exactly what i was looking for! Thanks for sharing. I hope mine turns out as good as yours 😊