A simple step by step tutorial for how to make a DIY Santa Sack. An affordable way to create cute personalised stockings for your kids!

One of the things I love the most about having kids is getting to experience things like Christmas through the eyes of a child all over again. It truly is one of the most magical things, especially now that Sadie is old enough to understand and be as excited about Christmas as I am!
When Sadie was first born I bought stockings and named them - these were perfect for the first couple of years but last year we really struggled to fit much at all in them! Not that our kids get over the top spoilt at Christmas but bigger items such as balls and books just didn't fit. So this year, I decided to make life easier and make pillowcase sized Santa sacks for the girls.
It was such a simple project to make so I thought I would share my method for DIY Santa Sacks. The great thing about this general pattern is that you could also make these smaller and use them as gift bags any time of year!
Here is the full video tutorial!
Materials needed to make 1 bag:
- 1x 108cm x 75cm (42″ x 30") piece of cotton Christmas fabric (it can be narrower but this is the standard width of most rolls of Christmas fabrics available in NZ from Spotlight)
- 2 x 1.5m (2 x 60") pieces of ribbon for the drawstring
- Sewing machine
- Pins
- Thread (same colour as the material)
- Safety pin
- Scissors
Instructions:
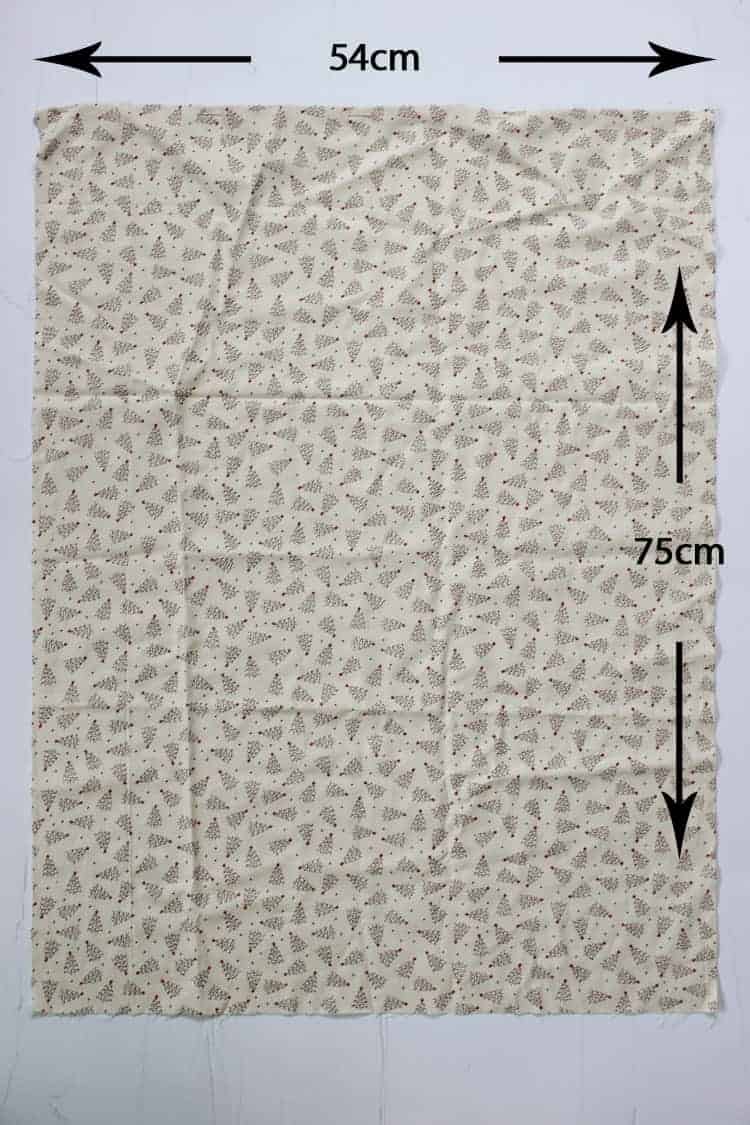
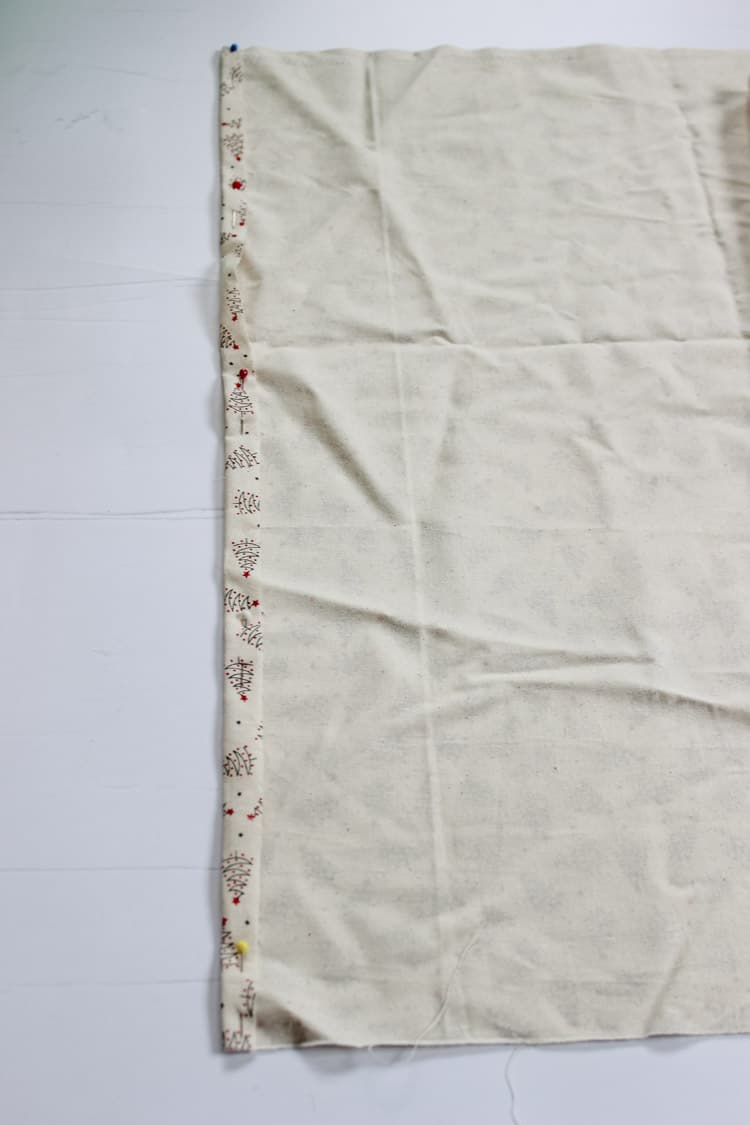
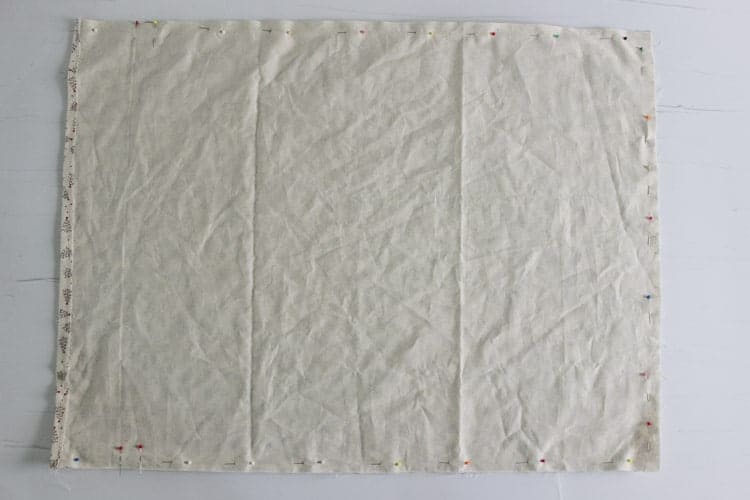
Cut out the fabric in half so that you have 2 x pieces that are 75cm long x 54cm wide (30" long x 21" wide). On both pieces of fabric, fold the 54cm side (top of the bag) over 1cm (folding the right side of the fabric onto the wrong side), press or pin, and sew the whole way along.
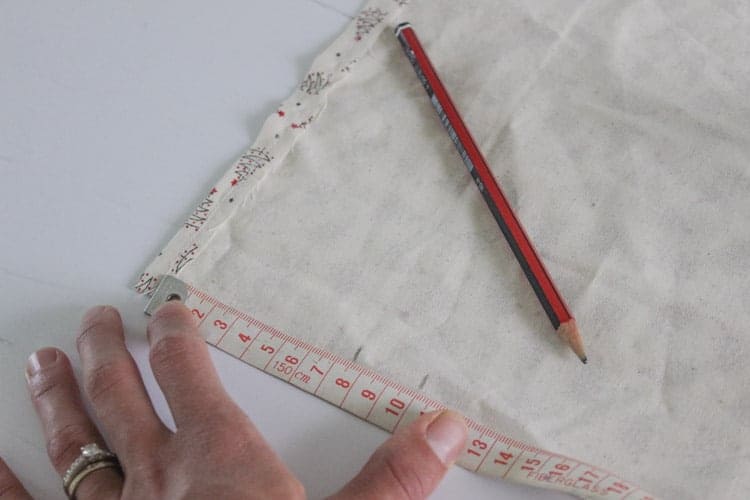
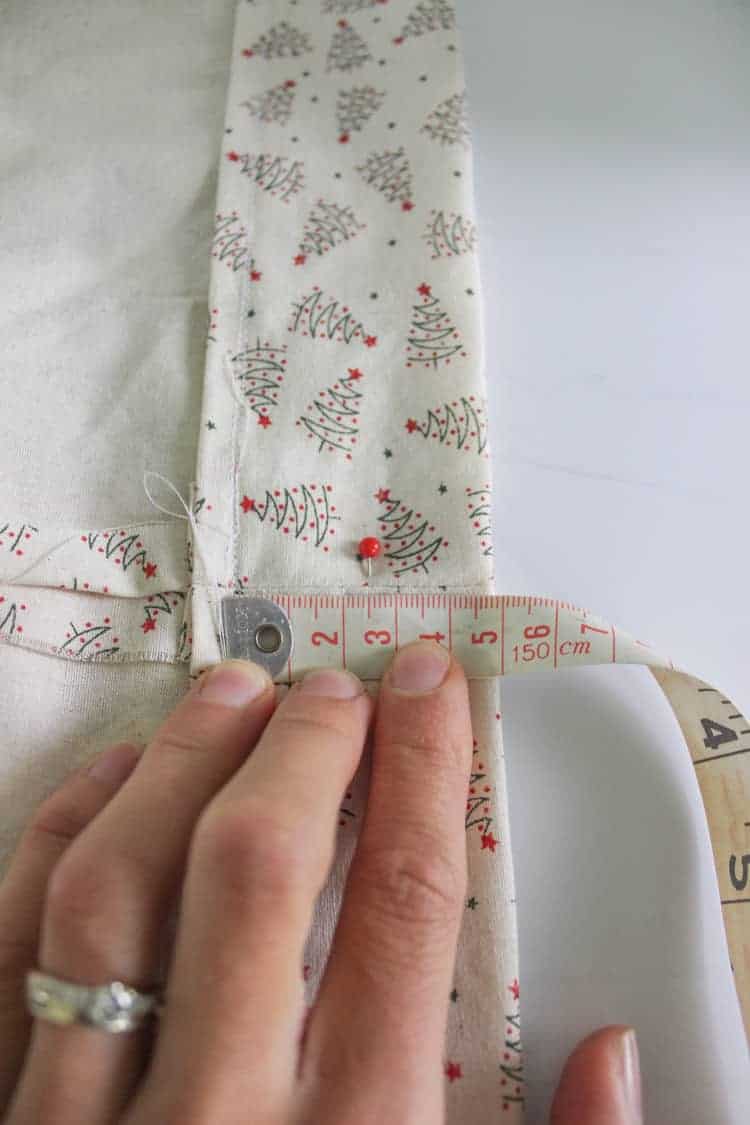
On the wrong side of the fabric, measure from the seam you just stitched and make a mark on the fabric at 7.5cm and at 10cm (on both sides). Repeat on the second piece of fabric. This is going to be the casing for the ribbon.
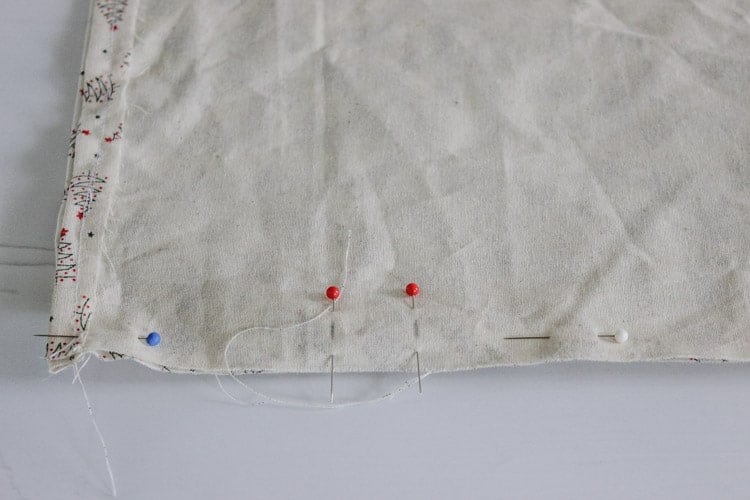
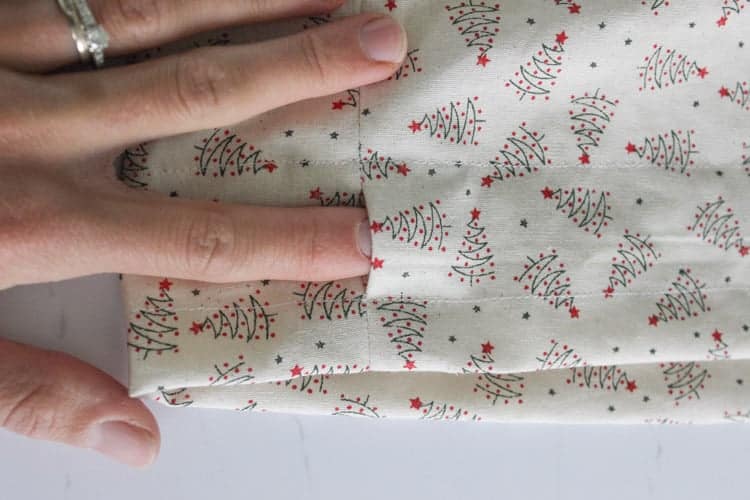
With right sides together, line up the 2 pieces of fabric and pin together on 3 sides (leaving the top open) You will NOT be stitching between the 2 marks you just made on the fabric, so use pins to mark out this area to remind you to stop sewing there. Using approximately a 1.5cm seam allowance (the distance between the edge of the material and the stitching) sew the whole way around leaving gaps where you marked them. Use a backstitch at the beginning and ends as well as on each side of the gaps.
Press the side seams open and fold the top of the bag over until the gap that you left open is covered by the fabric. You want to line up the sewn seam from the top of the bag so that it is sitting just underneath the gap you have left (align it with the mark you made on the fabric). You will sew along the same stitched line to close off the casing where the ribbon will go. The exact line you sew doesn't need to be perfect except at both ends where you want to make sure you are sewing clear of the gap so there is room for the ribbon to be threaded through.
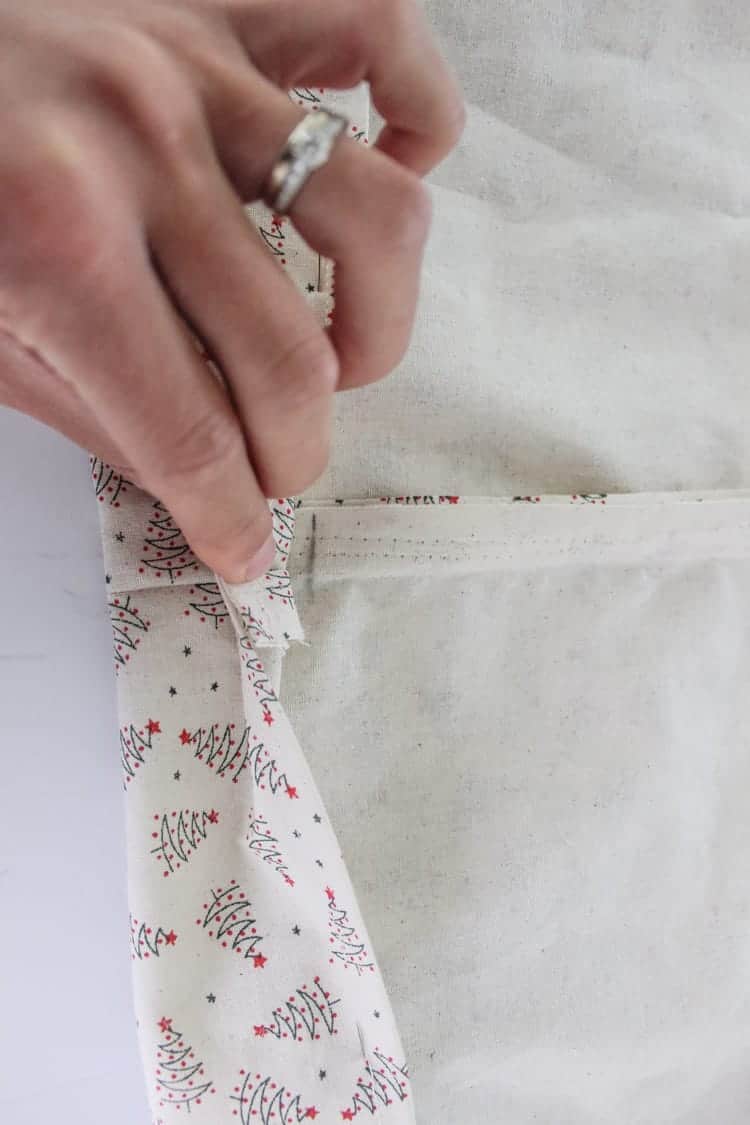
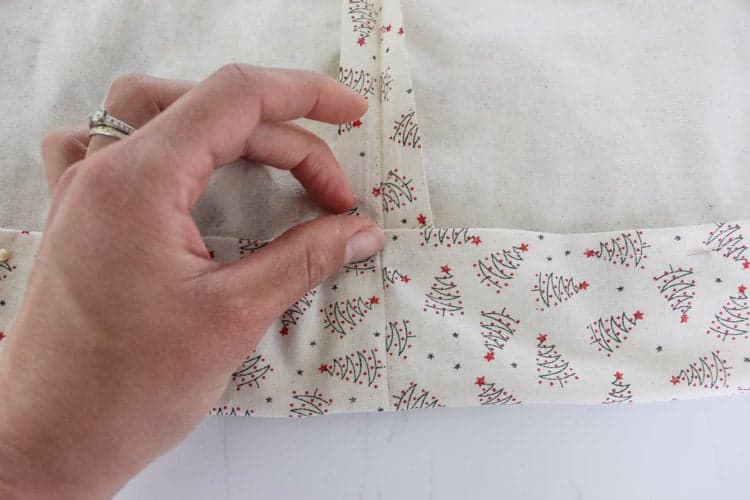
Pin along the top of the bag and stitch along the sewn seam the whole way around the top of the bag.
Now mark 2.5cm above the seam you just stitched (back towards the top of the bag) and stitch the whole way around the bag. This will close off the casing for the ribbon so again, make sure you check that you will not be stitching over the gap.
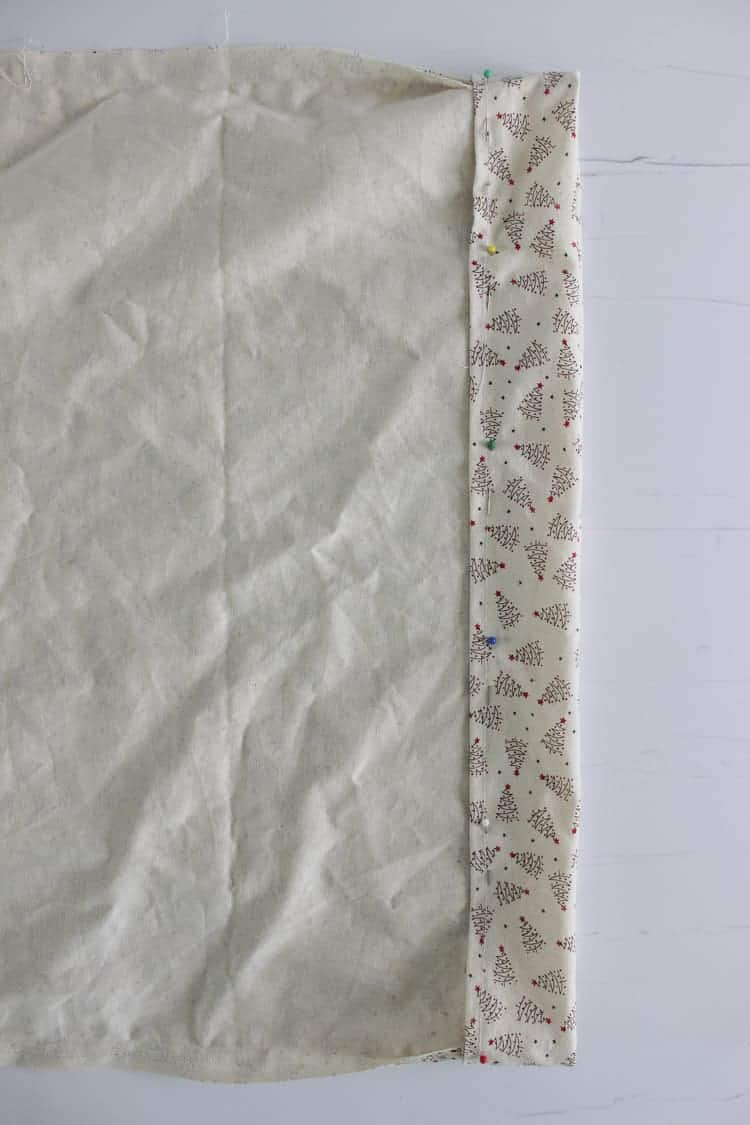
Turn the bag inside out. Almost done!
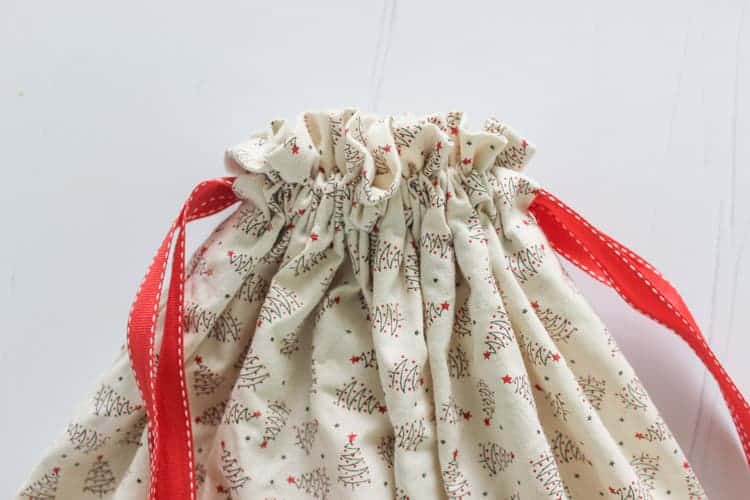
Take one end of one ribbon and attach a safety pin to it. Use the safety pin to help you thread the ribbon all the way through the casing, bringing it out at the same end it went in. Tie the 2 ends of the ribbon together in a knot. Repeat with the second piece of ribbon starting at the other side of the bag. Burn the ends of the ribbon using a lighter or candle to stop them from fraying.

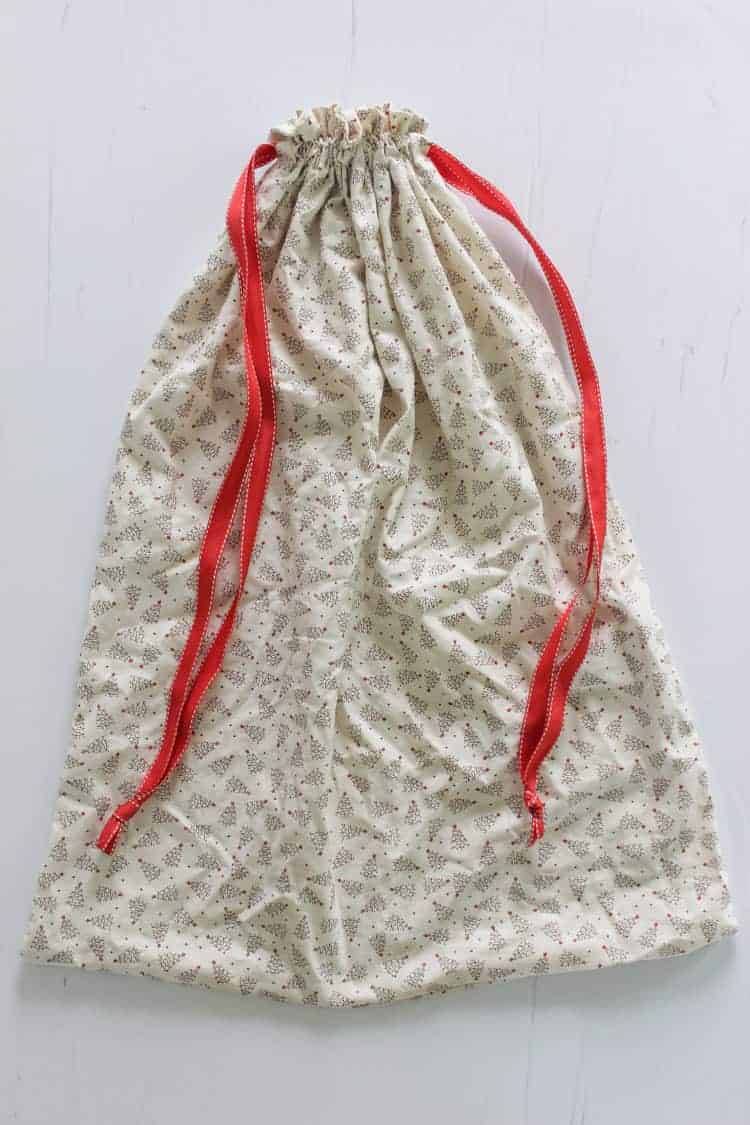
All done!
You now have a gorgeous personal Santa sack for your kids! You could even take it one step further and personalise it by using iron on vinyl or a gift tag attached to the ribbon.
If you make this project, don't forget to tag me on Instagram @thekiwicountrygirl and hashtag it #thekiwicountrygirl

Carolyne says
Thanks for your awesome instructions, I have just finished making 3 Christmas Santa Sacks for my Adult children, instructions were super easy to follow. Merry Christmas
Kaye says
Hi 😀
I just finished two Santa sacks ... yay!
Your iinstructions were so clear and easy to follow with good pics as well ... thank you!
Happy Across the Ditch Christmas 🎄