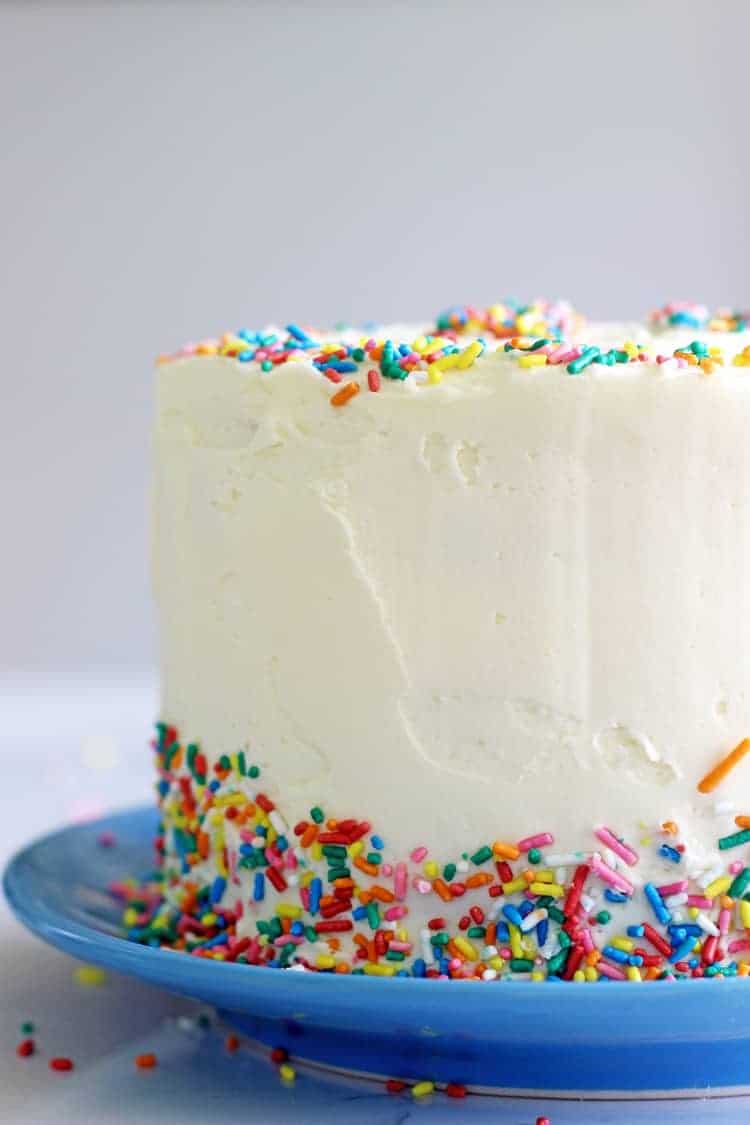
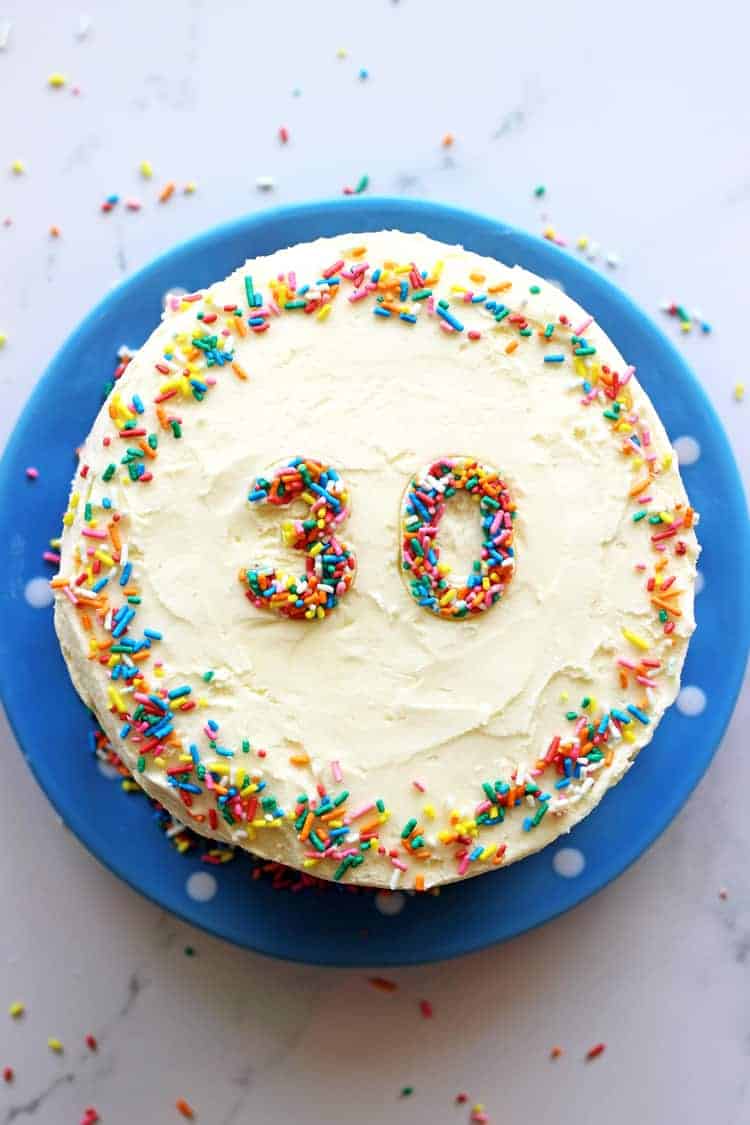
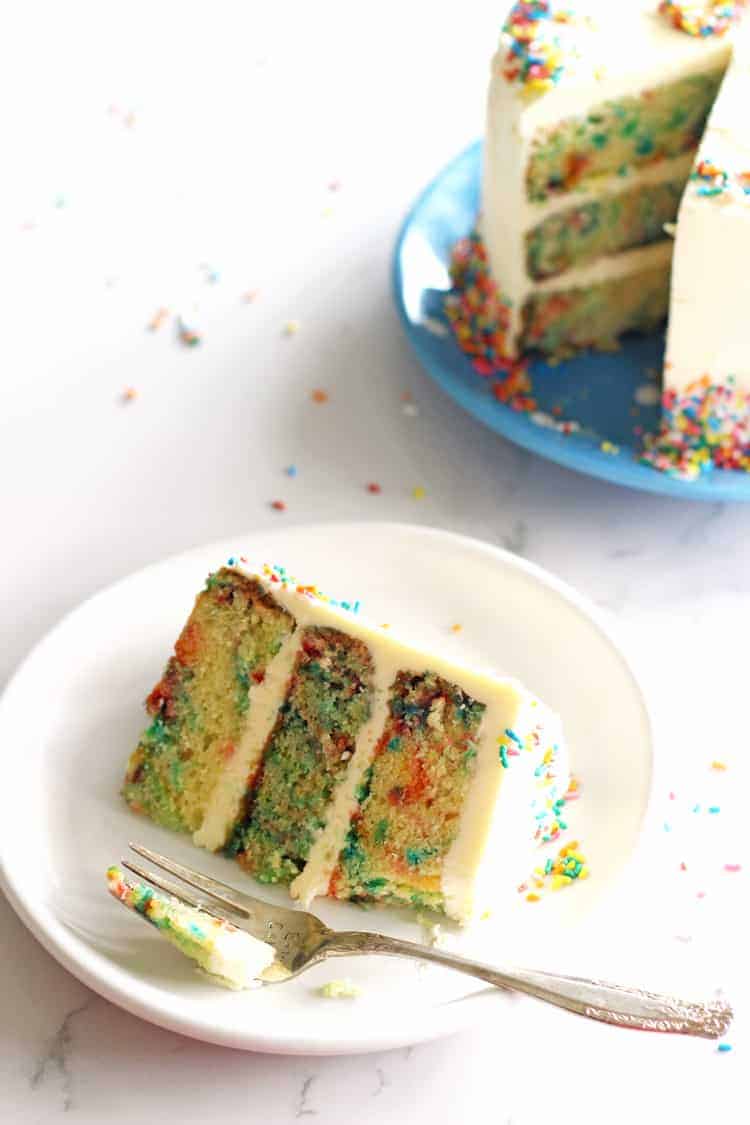
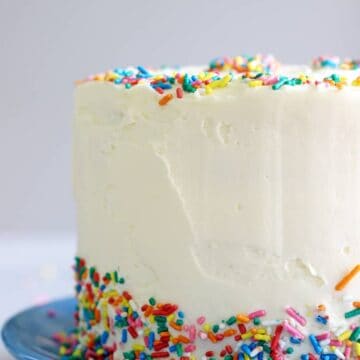
Celebrating my 30th birthday with a super fun and colourful 6 inch sprinkles vanilla birthday cake! Layers of vanilla cake full of funfetti, topped with a simple vanilla buttercream and of course - more sprinkles!
Look, I'm not really sure how this has happened, but according to my birth certificate, I'm 30!! The funny thing is, this is not what I thought 30 would feel like.
5 year old me thought 30 was old. Like, really old. 13 year old me thought 30 was probably pretty boring. 18 year old me thought 30 was a really long time away and by then I would have done all of these amazing things and then settled down and started a family. So other than the fact that 30 feels like it really crept up on me and are you sure it's not my 20th birthday??? out of all the above options, 18 year old me actually had it pretty spot on. And you know what 5 year old and 13 year old me? 30 feels pretty awesome and like I'm not even old at all!
Although I did get a new kitchen appliance (multi cooker/instant pot lovers, are you here?!) for my birthday and was happy celebrating with a few family and friends at a casual Sunday afternoon food truck dinner picnic, so maybe I am showing my age!
Click here to pin this post to your cakes recipes board on Pinterest to save it for later

So obviously, 30 deserved an awesome cake. And most definitely not a classy, mature and sophisticated cake - that's really not me. Classic vanilla cake, filled with colourful sprinkles and topped with vanilla buttercream and even more sprinkles because turning 30 is reason to celebrate!
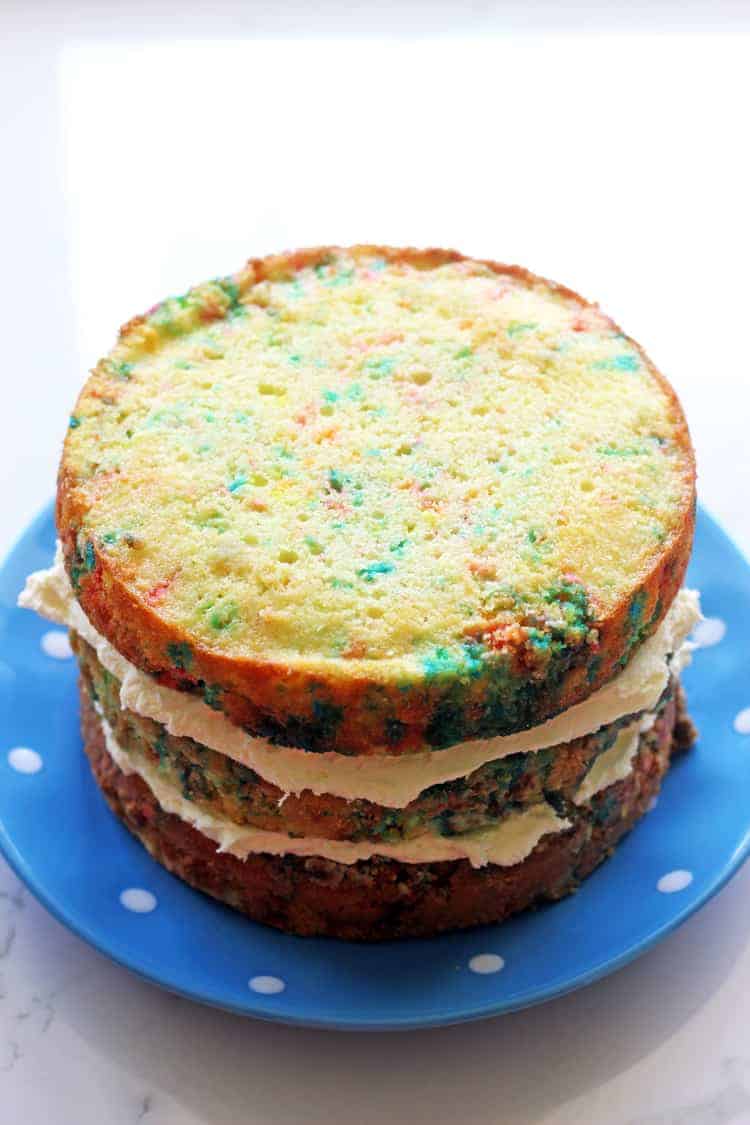
The vanilla cake is very simple and is baked in three 6 inch tins. If you don't have three tins, you can bake the layers one at a time. This is what I did, and the only thing is that the sprinkles did start to bleed into the batter slightly, but it didn't matter too much. You could also bake the whole cake at once and then split it into three layers once it is cool, but the cook time would be much longer.

The buttercream is my all time favourite vanilla buttercream frosting. It is SO easy to make and is perfect for frosting this cake. Simply add all ingredients to the bowl of a stand mixer and beat until really light and fluffy - a good 5 minutes. After a few minutes you might think it looks good, but trust me. 5 minutes on high speed is what makes this frosting light, airy and melt in your mouth. If I've made the frosting in advance and had it in the fridge, when I take it out I let it warm up to room temperature for 10 minutes and then whip is for a few minutes to get it back to fluffy again.
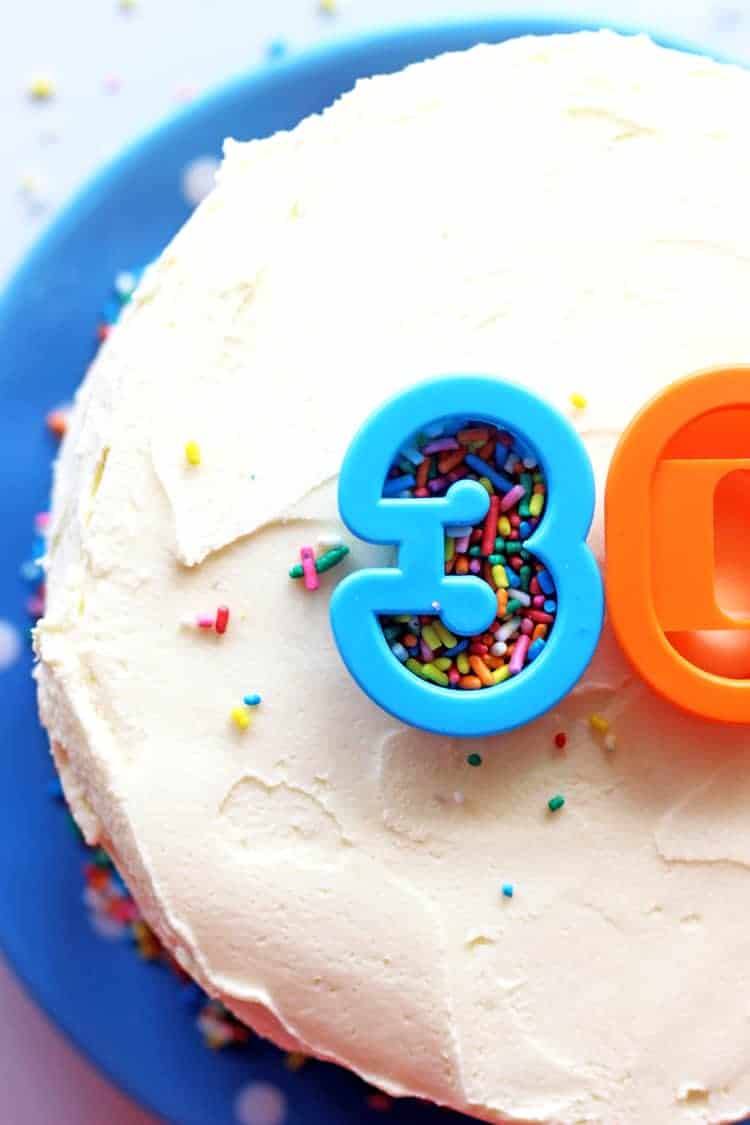
The great thing about this cake is that it really is appropriate for any age! Just change the numbers on the top and it would be as good for a 1st birthday or for a 100th birthday!
Making the numbers on top is really simple. Find the cookie cutter number you need, press it onto the cake and fill it with sprinkles. Make sure you don't overfill as they will spill over when you remove the cutter! Use a toothpick to guide the sprinkles into the corners and press down gently to make sure they stick into the cake.
To make the sprinkles skirt around the bottom of the cake I just put a small amount of sprinkles in my hand and gently pressed them up to the side of the cake. It was easy because the cake is so small!
This recipe is:
- Simple - no fancy ingredients, all pantry staples and is easy to make
- Fun to decorate! Decorate however you like and if you have kids, let them go crazy!
- The perfect size for a small birthday gathering
The other great thing about this recipe is that it's for a small cake! Nothing screams birthday to me like a layer cake but I also hate having three quarters of a cake hanging around for a week, and having to eat cake for breakfast everyday...wait, why did I make a small cake?
Oh no, I am 30.
Made this? Tag me on Instagram @thekiwicountrygirl and hashtag it #thekiwicountrygirl.
6 Inch Sprinkles Birthday Cake
Ingredients
Cake
- 1 ½ cups (210 grams) plain flour (sifted)
- 3 teaspoons baking powder (sifted)
- 150 grams butter (softened)
- 1 cup (210 grams) sugar
- 2 teaspoons vanilla extract
- 2 eggs
- ¾ cup milk
- ½ cup rainbow sprinkles
Vanilla frosting
- 200 grams butter (softened)
- 4 cups icing sugar (sifted)
- 1 ½ teaspoons vanilla extract
- 6 Tablespoons cream or milk
Decorating
- ½ cup rainbow sprinkles
Instructions
Make the cake
- Preheat oven to 180°C/350°F. Prepare three 6 inch round cake tins by cutting out a piece of baking paper the size of the bottom of the tin and pressing into the bottom. Lightly grease the cake tin, including the baking paper. If you only have one 6 inch cake tin see recipe note 1.
- Whisk the sifted flour and baking powder in a small bowl and set aside.
- Using a handheld or stand mixer, beat the butter and sugar together on high speed until smooth and creamy (about 2 minutes). Scrape down the sides and the bottom of the bowl with a rubber spatula as needed. Add the eggs one at a time and beat on high speed until combined, then beat in the vanilla extract. Scrape down the sides and the bottom of the bowl as needed. With the mixer on low speed, add the dry ingredients until just combined. With the mixer still running on low, pour in the milk and mix until just combined. Gently fold in the sprinkles using a rubber spatula.
- Pour batter evenly into the prepared cake tins and bake for 15-20 minutes or until the cakes are baked through. They will be ready when a toothpick inserted into the centre comes out clean. Allow the cakes to cool in the tins for 20 minutes before turning out onto a cooling rack to cool completely. You may need to use a spatula to make sure the cake is away from the edges before tipping it out of the tin.
Frosting
- While the cakes are cooling, prepare the frosting. Add all ingredients into the bowl of a stand mixer and beat on low speed for a couple of minutes until combined, scraping down the sides and bottom as needed and then increase to high speed and beat for a further 5 minutes until light and fluffy.
Decorating
- Once the cakes are completely cooled use a serrated knife or a cake leveler to take the rounded top off each cake. This will give you a nice flat surface for stacking them. Place 1 cake layer on the cake stand or serving plate and evenly cover the top of it with about ⅓ cup of frosting. Repeat with the second cake layer and then place the third cake layer on top and spread the remaining frosting all over the top and sides of the cake.Use your hands to press sprinkles onto the sides of the cake, all the way around and then sprinkle as many as you like on top.To make the sprinkles number place your cookie cutter numbers where you want them (I placed them in the centre of the cake) and fill them with enough sprinkles to make a good layer of sprinkles on the cake (but not too many that they will overflow when you remove the number). Use a toothpick to guide the sprinkles into the corners of the numbers. Use your finger to gently press down the sprinkles to ensure they have stuck to the frosting. Gently remove the cookie cutters.Refrigerate for at least 30 minutes before slicing. This helps the cake hold its shape when cutting.
Notes
[mc4wp_form]
If you tried and loved this recipe, please leave a comment and a rating below!

Elise says
Hi there, is this cake something that can be made the day before (icing and decoration included) and put in the fridge overnight until ready to serve? Thanks!
Laura says
It sure can be! I usually make it the day before and then just leave it out at room temperature with no trouble
Catherine Dungey says
Made this for my daughters birthday- it is brilliant! So delicious and moist, and easy to follow your recipe. Thanks so much everyone loved it!
Kashiya says
Hi Laura, this will be my second time making this cake for my daughter's birthday. Everyone still raves about it from last year as it's just so delicious!! Thanks for sharing such an amazing recipe.
Lucy says
Hey Laura, thanks so much for a funfetti NZ recipe! I've been on the hunt for one.
I am 26 (going on 6) tomorrow so I have just finished making this for my workmates.
Awesome recipe, easy to follow, and actually so good!
I also tested the recipe on the weekend in cupcake form and it was equally as good!
Hope you and your whanau are safe and happy.
Thanks heaps!!
Marie says
The sponge fell apart it’s so crumbly and I followed this recipe by the book, ingredients, method, timings. Disappointed
Gina says
Looks beautiful & delicious! Happy birthday!!! Welcome to 30 😀
Laura says
Thanks Gina!!