Fruity, spicy delicious homemade hot cross buns! Step by step photos and instructions to help you make the perfect Easter buns this year!
This post was originally published in March 2016 – it has been retested, rephotographed and republished (to make it better for you!) in April 2019
It's nearly Easter! And guess how many Easter Eggs I've already eaten? Trick question. Actually none. Probably because we are still working our way through the mountain of Christmas chocolate we were given. Yes, we are thooooose people that can sit in a room with chocolate and not eat it. How? No idea, but the pull of the miniature Reese's Pieces Eggs is getting stronger. I give it til Wednesday. Until then, let's make my favourite Easter treat...hot cross buns!
Before we start I'd like to point out that making bread is a long process. The whole process from start to finish will take you about 3 hours, maybe longer if you dawdle...as I tend to do. But don't fret! This does include about 2 hours rising time so it's not all hands on.
The ingredient list also looks quite long, but it's all simple stuff. It may seem daunting, but I can assure you, it will be totally worth it. The smell of freshly baked hot cross buns is drool worthy, and they taste SO much better than the buns you get from the supermarket. Especially with a 4 day weekend coming up (YAY)...do it!!
 Quick bread making tips:
- Use high grade flour - this is a simple step and a really important one. High grade flour has a higher protein (gluten) content which is what gives the bread its delicate texture. It costs the same as plain flour and makes a world of difference when making bread.
- Use fresh yeast. Don't be pulling an old jar of yeast out of the pantry and expecting it to work wonders. Test it for freshness by dissolving 1 teaspoon sugar in ½ cup warm water (45°C/115°F). Sprinkle 2-¼ teaspoons active dry yeast over it, stir and let stand for 10 minutes, If it's active it will start to bubble and will look sort of foamy. If not, the yeast is dead. If in doubt, throw it out and start again.
- If it's warm where you are, leaving the dough to rise on a sunny windowsill will work perfectly. If it's cold, put it in the hot water cupboard, on top of the fireplace or in the warming draw of your oven.
And to make it even easier for you, I've added step by step photos and a break down of the time involved at the bottom of the post.
So now that the serious stuff is out of the way, let's talk about these buns.
It is a basic sweet bread dough made Easter-y with the addition of cinnamon, mixed spice, nutmeg and is chock-full of currants, raisins & mixed peel. If you are one of those weird people that can't stand dried fruit you can leave it out of these and just have spiced buns. They won't be as good, but that's your call!
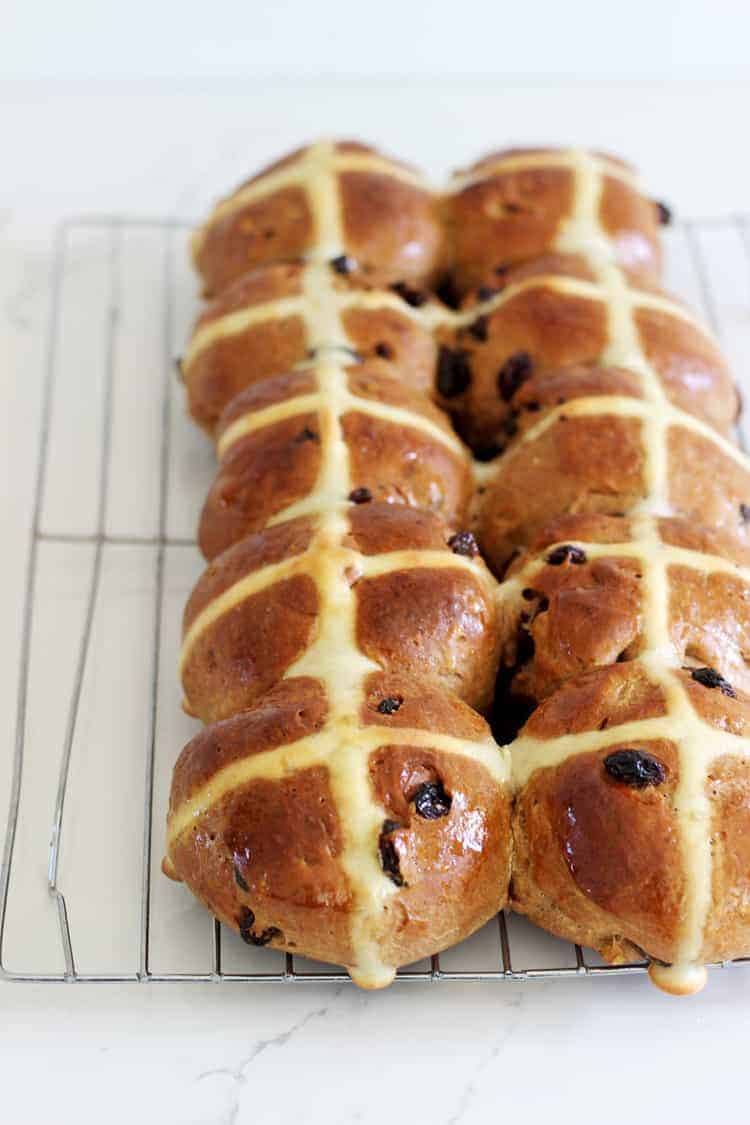
The piped crosses on top are also optional but if you leave them off you have to call them Easter Buns instead....beeeeecause I said so. And there would be no hot cross on it...duh. Plus piping is fun. So I guess this step just became compulsory.
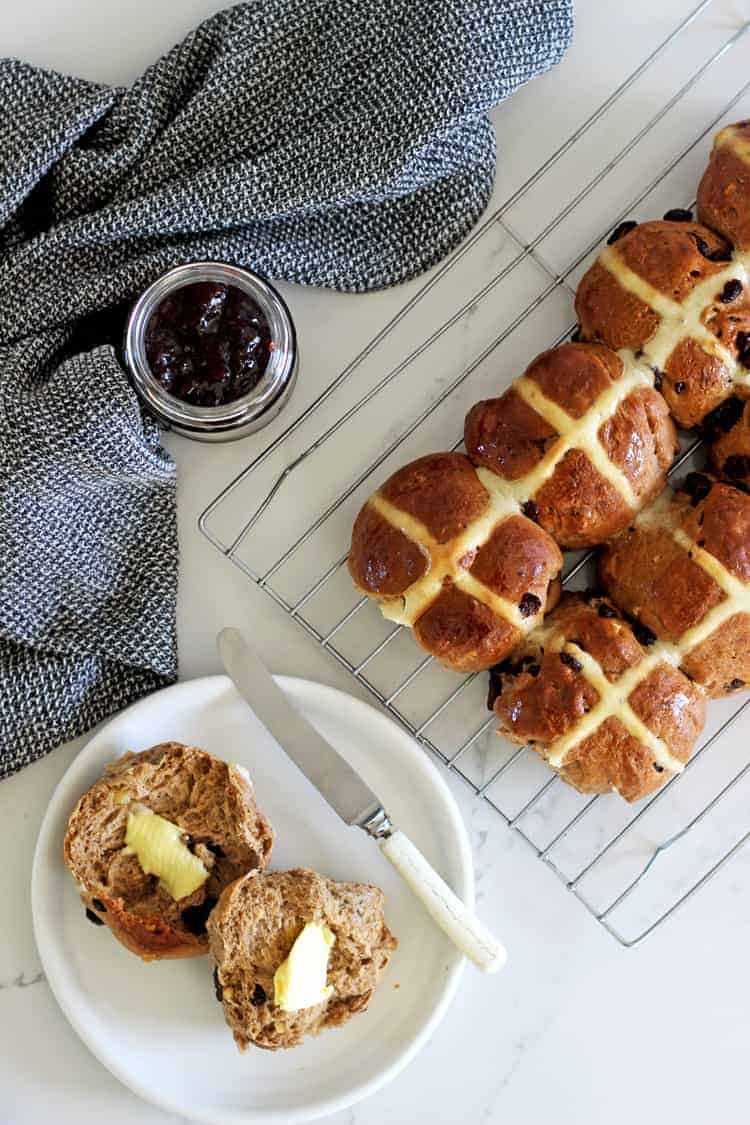
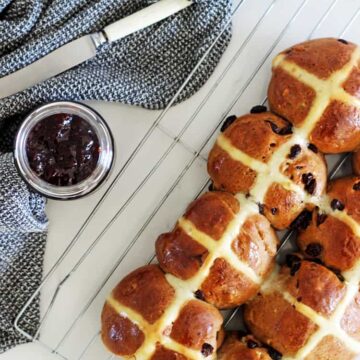
These buns are sweet, spicy, fruity and just plain delicious. Smother them in buttah, serve with a coffee and Happy Easter to you my friend. My other favourite way to eat them? Covered in NUTELLA!! It's almost a sin to cover something so perfect in chocolate buuuut...do it anyway. And don't tell my grandmother.
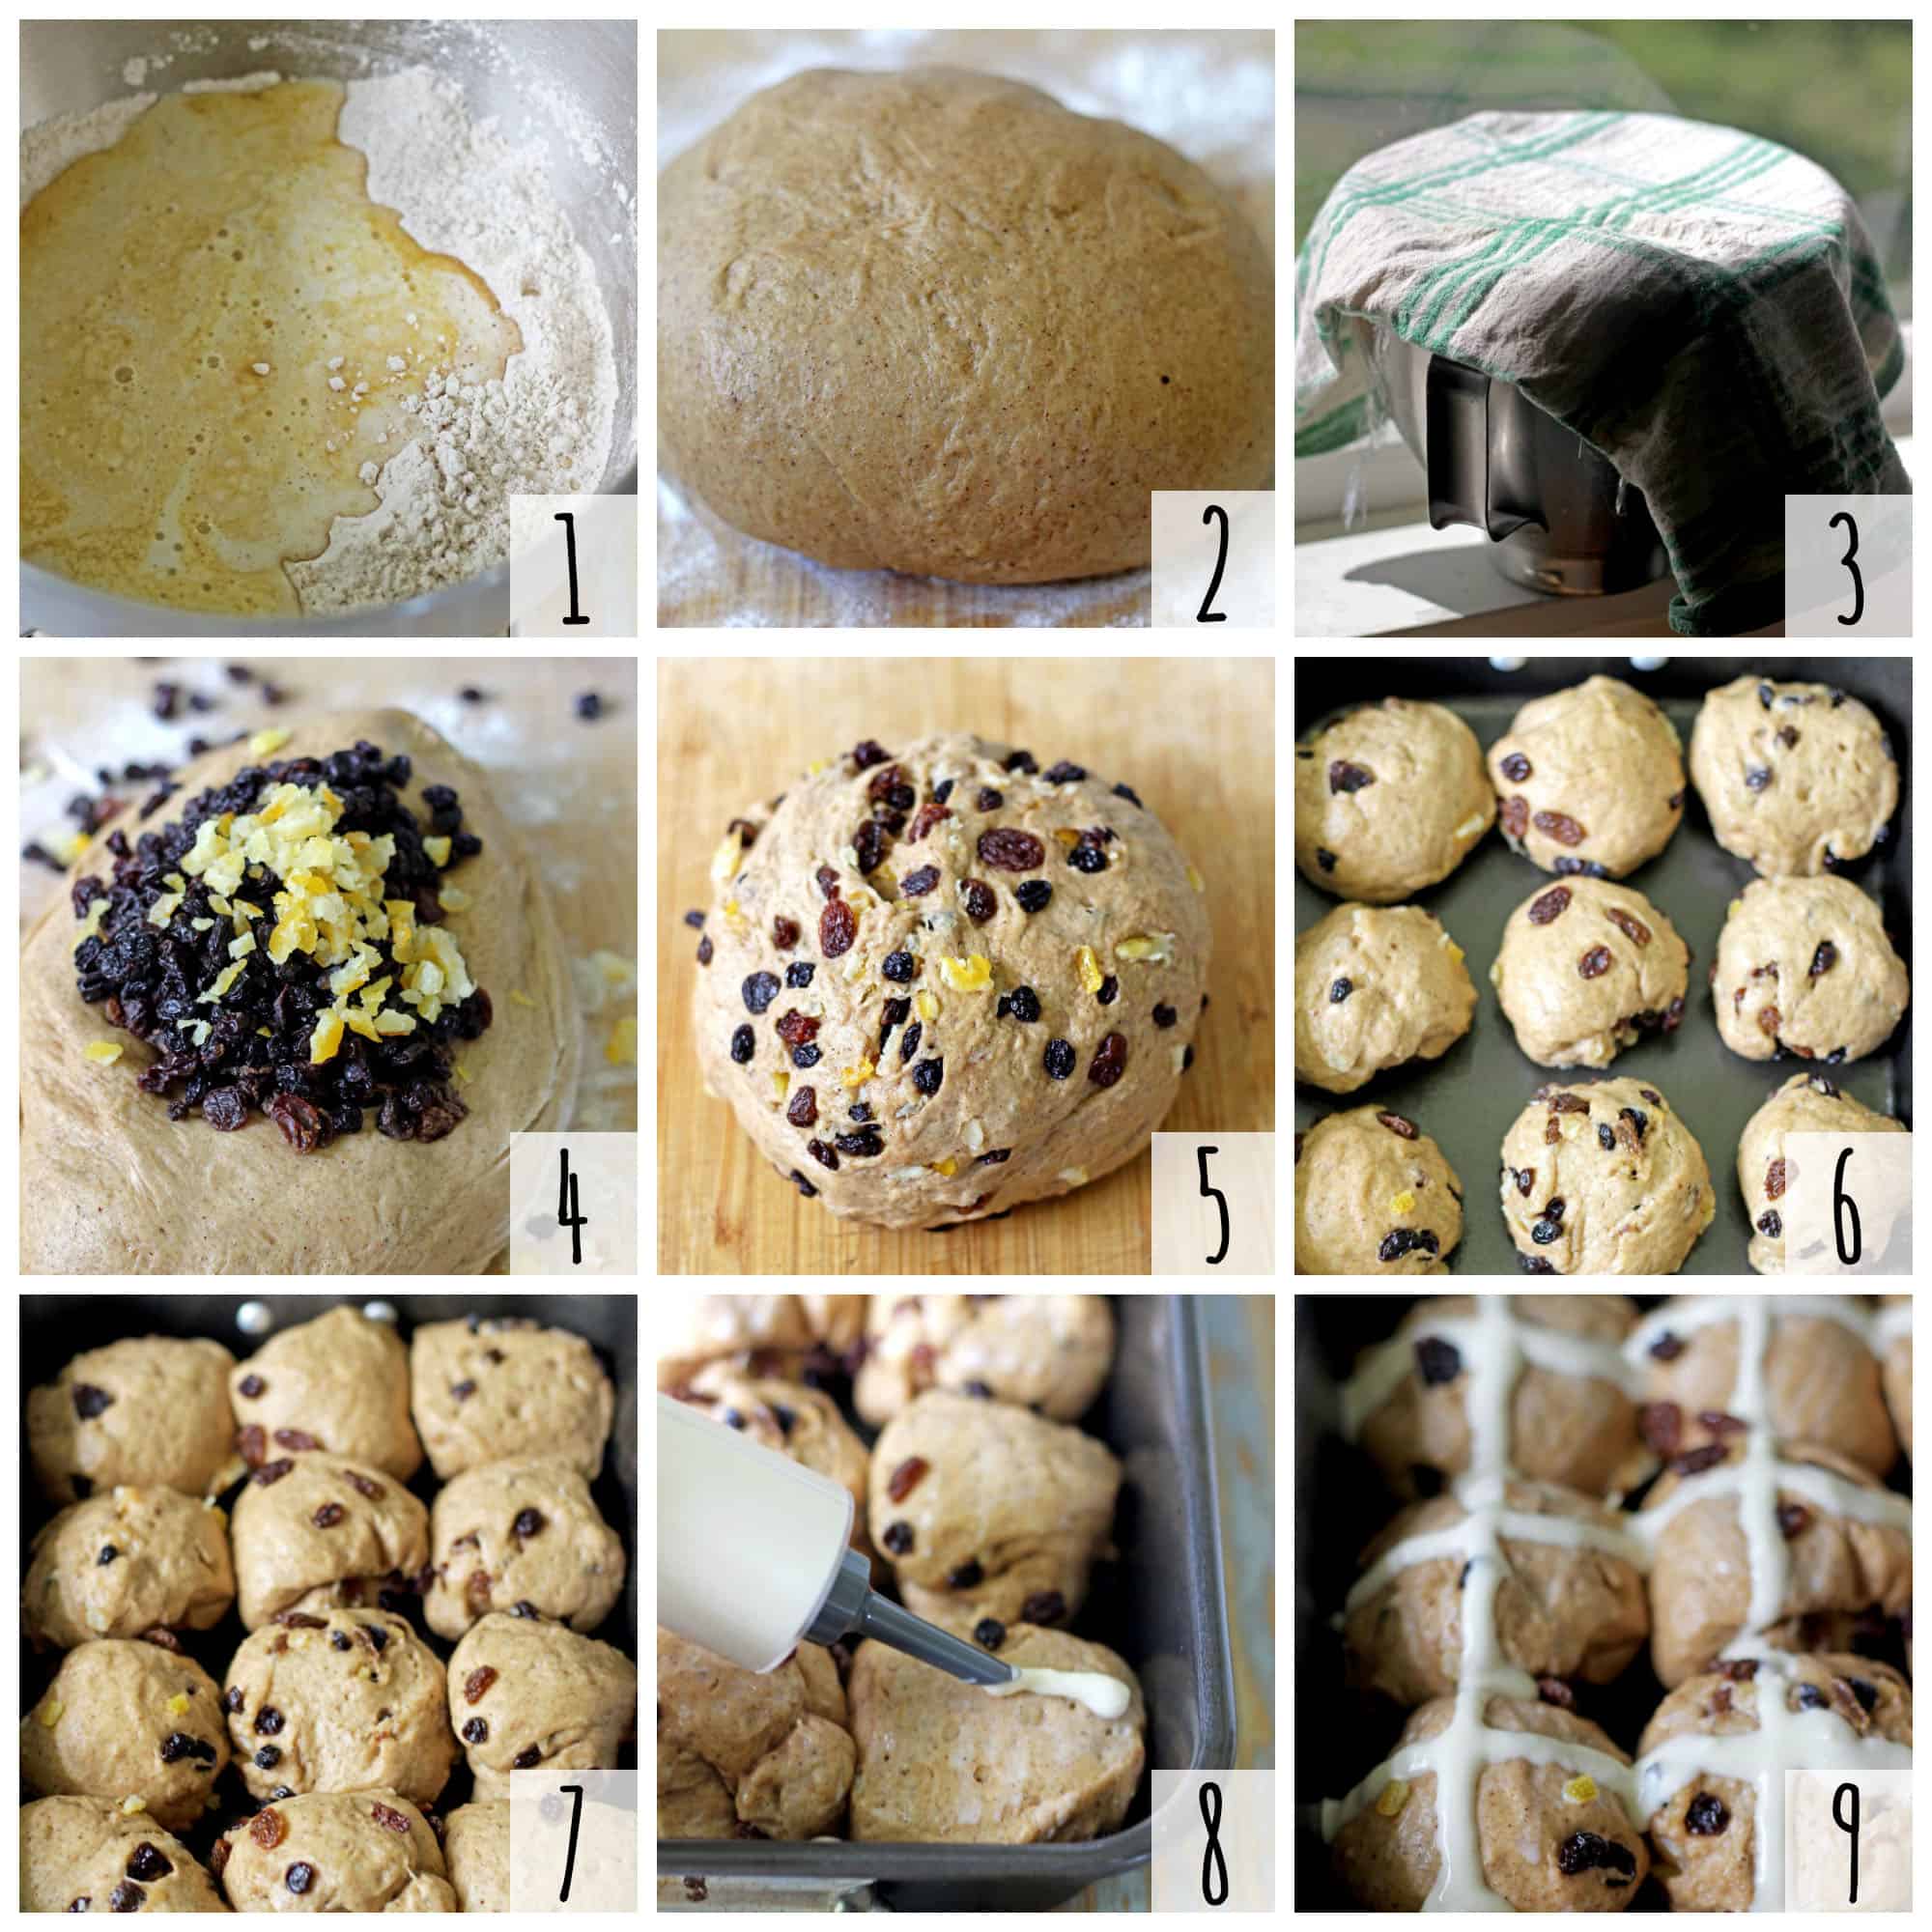
Step by step:
(Note: I used to add the fruit after the first rise as pictured below, I have changed this and now add them at the beginning with all other ingredients, just to keep it simple! The recipe card details how I do it now.)
- Make the dough - 15 minutes
- Knead the dough - 10 minutes
- First rise - 1 ½ hours
- Shape the buns - 5 minutes
- Second rise - 40 minutes
- Pipe the crosses - 5 minutes
- Baking - 20 minutes
Total time: About 3 hours

If you tried and loved this recipe, please leave a comment and a rating below!
Hot Cross Buns
Ingredients
- ½ cup milk
- ¼ cup water
- ¼ cup brown sugar
- 1 Tablespoon active dried yeast
- 2 ½ - 3 cups high grade (or bread) flour
- ½ teaspoon salt
- 1 Tablespoon cinnamon
- 1 Tablespoon mixed spice
- 1 teaspoon nutmeg
- ¾ cup raisins or currants (or a mixture)
- ¼ cup mixed peel
- 75 grams butter melted
- 1 egg
- 1 teaspoon vanilla extract
For the crosses
- ¼ cup flour
- ¼ cup milk
- 1 teaspoon sugar
Glaze
- ¼ cup water
- 3 Tablespoon sugar
Instructions
- Add the milk, water and brown sugar to a microwave proof jug or small pot and heat until warm to the touch (about 45°C/110°F) Whisk well to dissolve the sugar. Pour into a large bowl, or the bowl of a stand mixer, sprinkle the yeast on top, stir in and leave to sit for 5 minutes.
- While you are waiting, combine 2 ½ cups of flour, salt, cinnamon, mixed spice, nutmeg, raisins/currants and mixed peel in a large bowl and whisk together.
- In another small jug melt the butter, add the egg and vanilla and whisk together until all ingredients are incorporated.
- Once the yeast has started to bubble, add the flour mixture and butter mixture to the yeast mixture and using the dough hook attachment on your stand mixer, knead for 7-8 minutes until the dough springs back when you press it. If kneading by hand, combine the dough with a wooden spoon and then turn it out onto a lightly floured surface and knead for 10 minutes. Add a little more flour if the dough is really sticky.
- Cover the dough in gladwrap or a clean tea towel and leave to rise in a warm place for 60-90 minutes or until doubled in size.
- Once the dough has risen, punch it down gently and turn out of the bowl onto a lightly floured surface. Split the dough into 10 evenly sized pieces roll into balls and place on a baking tray lined with a silicone liner or baking paper, so that they are almost touching. Cover with gladwrap that has been lightly sprayed with cooking oil and leave to rise in a warm place for 40 minutes.
- Pre-heat the oven to 180°C/350°F.
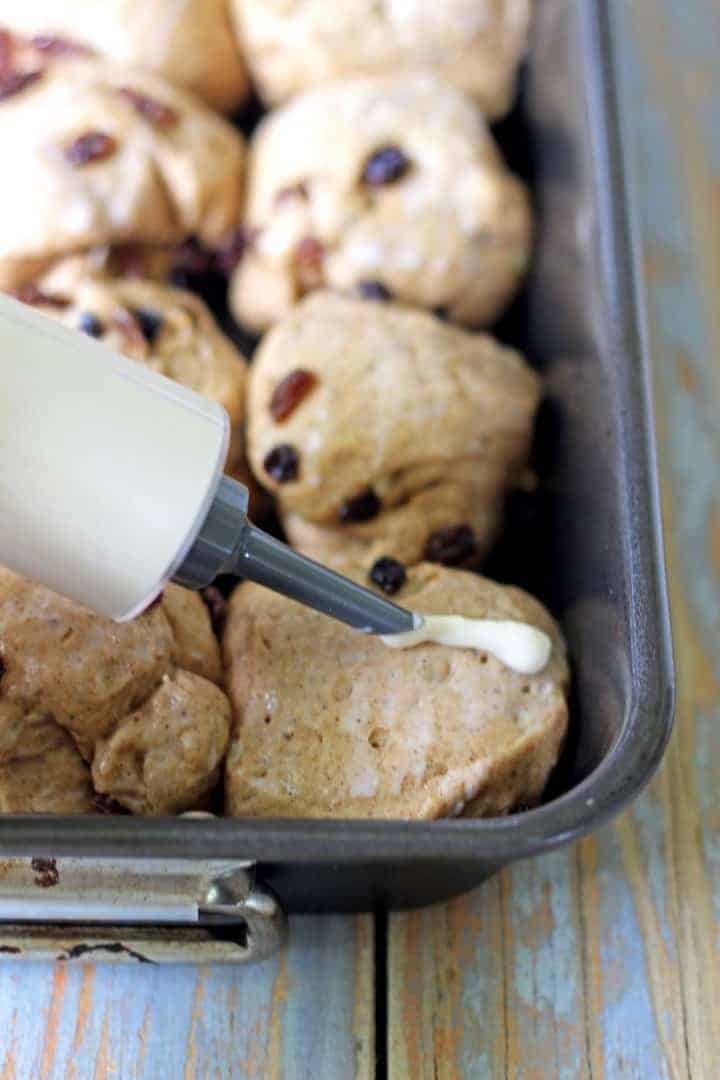
- While the buns are rising, make the mixture for the crosses. In a small bowl whisk together milk, flour and sugar until smooth. Once the buns have risen, pipe the crosses on the buns, by putting the cross mixture into a piping bag or ziplock bag with the corner snipped off. If you don't have a piping bag or ziplock bag, you can carefully drizzle it with a spoon.
- Bake the buns for 20-25 minutes, until the tops are golden brown. While the buns are baking, prepare the glaze by mixing the sugar and water in a small bowl and microwaving until the sugar has dissolved.
- Remove from the oven and brush the buns with the sugar glaze and allow them to cool slightly.
- To serve, slice the buns in half, spread with butter and enjoy!
- Buns will keep in an airtight container for 3 days or can also be frozen. They are definitely best served the day of baking but you can zap them in the microwave or toast them on day 2 or 3 and they're almost as good!

Jan says
Brilliant Recipe
I made these buns by using the breadmaker to do the initial mixing and rising, following the usual order for ingredients given for our breadmaker. The dough was perfect consistency (used about 2 2/3 cups of flour) when it was ready for shaping and the second rise. It made 12 buns. They were absolutely delicious and my husband said they were the best he's ever had. I won't use any other recipe from now on. Thanks for a great recipe Laura.
Sal says
Was super excited by the reviews but mine didn't rise at all.
Made two batches. Tested the yeast both times too. Disappointing ☹
Great flavour, but were heavy rocks.
Now I know why yeast baking is something I have avoided.
Laura says
Hi Sal. That is so disappointing, I'm sorry you haven't had success! How long did you leave the dough to rise? Because of the spices and butter/milk/egg it does take a while to rise, particularly if it's cooler where you are! Mine sometimes takes over 2 hours to double that first rise!
Grace Reader says
This recipe is absolutely fantastic! I have made them about 5 times now in the past 3 weeks and have been able to adjust the recipe for different flavours. I added white chocolate to one lot, and another lot I replaced the spices with cocoa and added chopped up dark chocolate into them! Absolutely delicious and the best recipe out there for hot cross buns
dave walters says
really super recipe. I have never had much luck with buns before as they tend to be dry and not soft . but these were just right ,thank you, Laura.
amanda says
Good recipe, simple and easy to make, economic too.
Amber says
Hi Laura just tried to make these for the first time and my cross mixture was to runny it just ran straight off them must have done something wrong? But apart from that they were yummy
Charles says
Hi Laura
Thanks for the recipe. It is easy to follow but I still managed to get something wrong???
I baked them for 20 mins on 180 but they started browning after only 8 mins and had to drop the temp and put them on a lower rack. Also during the second proving they really expanded so instead of round or squarish they are all different shapes. I have a photo if that helps. I am a novice baker so please help me.
Thanks in advance
Kind regards
Charles
Laura says
Hi Charles. If they start browning too much you can loosely cover the buns with tinfoil while baking. Also make sure you are using conventional bake, not fan bake. And for the shape, try to make sure you roll them up into nice tight balls - that should help them keep their shape!
Jess says
Awesome recipe. Easy to follow and make and they taste delicious!! Thank you 🙂
Mark says
Really Awesome! Good Texture and Flavour. Its our go to recipe for hot cross buns
Gail says
Great, easy recipe. Soaked the fruit first so they weren't so dry and subbed wholemeal flour for about a quarter of total flour and buns still came out light. Rising time was shorter due to nor'wester blowing through, baking time also shorter as I made slightly smaller buns. Delicious, not too sweet, highly recommended.
Emily says
These are the best Hot Cross Buns ever! We have made them for the last 2 years and will never buy them again. They are so delicious, family and friends all love them.
Anne O'Brien says
Fantastic recipe that was so easy to follow. 🤩
Pamela Mac says
Is it possible to make these and let them rise for the last time overnight so they can be baked first thing the morning ?
Laura says
Yes it is! Just make sure you do the second rise in the fridge overnight and allow plenty of time for them to come to room temperature in the morning before baking.
Heather says
At the ripe old age of 81 I’ve just made my first hot cross buns. I’ve never ventured into yeast cookery until now.
Frances says
Have made these twice now, but didn’t bother with crosses or glazing. They were delicious and very light. Now a family staple. Thank you
Laura says
I'm so glad you have been enjoying them! Perfect for all year round, not just Easter! Laura
Nicole Buckland says
Best Recipe I have come across love it !! And it's so easy to follow
Laura says
So happy to hear that Nicole!
Ross MacNicol says
Wonderful recipe thank you its came out beautifully, made 20 medium and small by increasing quantities slightly, a very forgiving recipe, rising beautifully, good idea piping with a zip lock bag. Delicious and spicy with the decent quantities of cinnamon and all spice, fruit soft and delicious and the crosses give it a cultural significance that's cool.
Liz says
These turned out absolutely picture perfect. Was a cold-ish day and the oven was full of roast lamb so the second rise was more like 1.5 hours but they were amazing (maybe even better for it!) Thanks for this amazing recipe!
Laura says
Brilliant! So happy to hear that Liz, Happy Easter! Laura
Mery says
Beautiful recipe.. works perfectly. Thanks
Laura says
Thanks so much for the feedback Mery! 🙂
Jessica @ Sweetest Menu says
Gorgeous! How good are homemade Hot Cross Buns? These look beautiful!!! I'm so jealous that you can also keep chocolate in the house and not eat it - I am definitely NOT one of those people. lol. Happy Easter!
Laura says
Thanks Jessica! Haha it's a special talent! Happy Easter 🙂