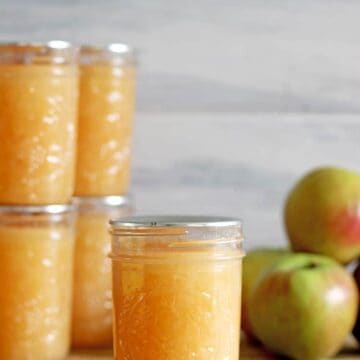
How to Can Applesauce (Bottle Stewed Apples)
A step by step tutorial showing you exactly how to bottle or can homemade applesauce (or stewed apples) The perfect way to preserve the apple harvest and great to have on hand for roast pork or quick desserts!
Print
Pin
Ingredients
- 15 cups apples (about 15-20 medium apples)
- 3 cups water
Instructions
Step 1: Sterilise your jars and wash lids/seals
- 2 hours before you need the jars, run them through the dishwasher on the hottest wash (ours is called hygiene but it may be called sterilise on your machine) Keep the door shut until you are ready for the jars as it will keep them warm until you are ready to use them. If you don’t have a dishwasher, wash the jars thoroughly in hot soapy water and place them in the oven at 150°C for at least 15 minutes or until you need them.Wash the lids and seals thoroughly in hot soapy water and leave to drain until you need them.
Step 2: Wash & prepare the fruit
- Give the apples a quick wash by filling up a large bowl or a clean sink with water, and giving the fruit a light wipe down. Once the apples have been cleaned, peel, core and slice them into roughly 8 pieces and place them in a large pot covered with water to help stop them going brown while you prepare the rest of the apples.
Step 3: Cook the apples
- You have 3 options for cooking the apples here:Instant pot/multi cooker (my prefered method)Add the apples and water to the instant pot, set it to manual pressure cook for 8 minutes and let it manually release pressure for 10 minutes. Stir the apples and they are ready to go into jars.
Slow cookerAdd the apples and water to the slow cooker and cook for 4 hours on high until soft. Once cooked, use a potato masher or stick mixer (immersion blender) to puree the apples to a sauce consistency.
Pot on the stoveAdd the apples and water to a large pot and cook over a low heat (covered, but checking and stirring regularly to ensure they don’t stick to the bottom of the pot) for about 45 minutes. Once cooked, use a potato masher or stick mixer (immersion blender) to puree the apples to a sauce consistency.
Step 4: Prepare the water bath
- While the apples are cooking, add enough hot water to the pot to ensure that the jars will be covered by at least 1 inch of water and bring it to the boil (covered makes it quicker) This can take some time depending on the size of the pot you are using so allow at least 30 minutes for it to come to the boil.Place the rack or a clean tea towel in the bottom of the pot – this is to keep the jars from being in direct contact with the bottom of the pot.
Step 5: Bottle the apples
- Place a clean tea towel on the bench next to the pot of apples and line up the jars out of the dishwasher. Use a ladle and a canning funnel if you have one and fill the jars almost to the top (leaving about 1.5cm) and then run a clean butter knife or small rubber spatula (I usually run this through the dishwasher with the jars) around the inside of the jar to make sure there are no air bubbles in the jar. Use a clean damp cloth to wipe around the rim of the jar.Carefully place a seal on the jar and tighten the ring around it until you just meet resistance. Repeat until you have run out of fruit.
Step 6: Process the jars
- Using jar tongs if you have them lower the jars carefully into the water bath making sure that they are sitting on the rack or the tea towel.Add as many jars as will fit without them touching each other.Place the lid on the pot and bring the water back to the boil, then time 15 minutes for the apples to process. Once the 15 minutes is up, take the pot off the heat and allow to sit for 5 minutes before removing the jars from the water and placing them on the bench on a clean tea towel – this is to prevent breakages as sometimes cool benchtops (i.e. marble or granite) can cause the glass jars to smash.If you have more jars to process, place the pot back on the element and bring back to the boil before processing the remaining jars.
Step 7: Check the seals
- To check the seals, remove the rings from the jars and gently try to prise the lid off using your finger. If they have sealed, the seals will be concave and you won't be able to move the lid. Give the jar a clean with a damp cloth and store in a cool dark place. Properly sealed jars will keep for at least a year and I have kept fruit for 2 years with no problems.If the jars haven’t sealed they cannot be stored at room temperature but they are still safe to eat. Just place the jar in the fridge and eat within a week. Depending on the type of jar you have used (Ball Mason Jars freeze well but I haven’t tried with Agee Jars) you can pop the whole jar in the freezer, or you could transfer the contents of the jar to a freezer proof container and store them in there.
Tried this Recipe? Tag me Today!Tag @thekiwicountrygirl or tag #thekiwicountrygirl!